So you want to join the kombucha cult? Welcome, my friend – you’re about to embark on a journey that’ll transform your kitchen into a mini fermentation laboratory and your taste buds into something way more sophisticated than they probably deserve. 🙂
Look, I get it. You’ve been dropping $4-6 per bottle at the grocery store, watching your bank account slowly weep while you tell yourself it’s “for your gut health.” Well, guess what? You can brew this fizzy elixir of life for literally pennies on the dollar, and honestly, it tastes better than most commercial stuff once you nail the process.
I’ve been brewing kombucha for over five years now, and let me tell you – the first batch I made tasted like vinegar mixed with regret. But here’s the thing: kombucha brewing rewards persistence, and once you get the hang of it, you’ll wonder why you ever bought it from the store.
What Exactly Is This Magical Brew?
Before we jump into the nitty-gritty, let’s talk about what kombucha actually is. At its core, kombucha starts as sweetened tea that gets transformed by a SCOBY (Symbiotic Culture of Bacteria and Yeast). Think of your SCOBY as that weird friend who looks questionable but actually makes everything better.
This rubbery, pancake-looking thing might seem gross at first glance – and honestly, it kind of is – but it’s the MVP of your brewing operation. The SCOBY eats up the sugar in your tea and produces all those beneficial probiotics, organic acids, and that signature tangy flavor we’re after.
Ever wondered why kombucha tastes so different from regular tea? The fermentation process creates acetic acid (that’s the vinegar-y bite), lactic acid, and a whole bunch of other compounds that give kombucha its complex flavor profile. Pretty cool how nature works, right?
Essential Equipment and Ingredients
The Must-Haves
Here’s what you absolutely need to get started (and no, you don’t need to break the bank):
Equipment:
- 1-gallon glass jar (plastic containers are a no-go – they can harbor bacteria and leach chemicals)
- Coffee filter or breathable cloth
- Rubber band
- Non-metal strainer
- Wooden or plastic spoon
- Glass bottles for second fermentation (swing-top bottles work great)
Ingredients:
- SCOBY plus 1-2 cups of starter tea (more on getting this below)
- 8 tea bags or 2 tablespoons loose leaf tea (black tea works best for beginners)
- 3/4 cup white sugar (don’t even think about substituting honey or artificial sweeteners)
- 7 cups filtered water
Getting Your Hands on a SCOBY
This is where most people get stuck. You can’t just waltz into Target and grab a SCOBY off the shelf (unfortunately). Here are your best bets:
- Ask around – Seriously, kombucha brewers are like sourdough starter people; they love sharing
- Buy online – Plenty of reputable sellers ship healthy SCOBYs
- Grow your own from store-bought raw kombucha (takes 2-4 weeks, requires patience you might not have)
FYI, when someone gives you a SCOBY, treat it like the precious gift it is. That person just handed you the keys to unlimited fizzy goodness.
The Basic Kombucha Recipe (First Fermentation)
Alright, let’s get down to business. This is the foundation recipe that’ll serve you well:
Step 1: Brew Your Tea Base
- Boil 7 cups of filtered water
- Add your tea bags and steep for 10-15 minutes (longer than your usual cup of tea)
- Remove tea bags and stir in 3/4 cup white sugar until completely dissolved
- Let the sweet tea cool to room temperature (this is crucial – hot tea will kill your SCOBY)
Step 2: Add Your SCOBY and Starter Tea
- Pour the cooled sweet tea into your gallon jar
- Add your SCOBY and 1-2 cups of starter tea from a previous batch
- The liquid should fill your jar about 3/4 full, leaving room for the SCOBY to do its thing
Step 3: Cover and Wait
- Cover the jar with a coffee filter or breathable cloth
- Secure with a rubber band (tight enough that fruit flies can’t sneak in)
- Place in a warm, dark spot away from direct sunlight
- Wait 7-14 days depending on your taste preference and room temperature
Testing for Doneness
Here’s where your taste buds become your best friend. Start testing after day 7 by carefully inserting a straw under the SCOBY and taking a small sip. You want a balance between sweet and tart – too sweet means it needs more time, too sour means you waited too long.
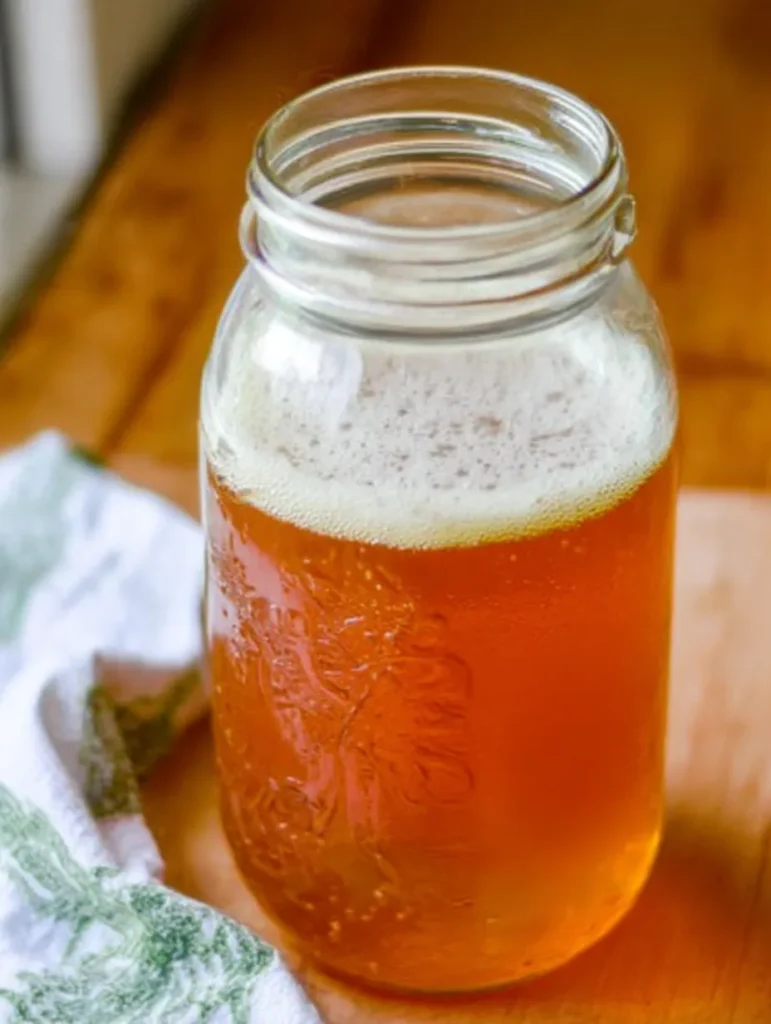
The perfect first fermentation kombucha should taste like a slightly sweet, mildly vinegary tea with just a hint of fizziness.
Second Fermentation: Where the Magic Happens
This is where kombucha goes from “pretty good” to “absolutely incredible.” Second fermentation adds carbonation and opens up a world of flavor possibilities.
The Process
- Reserve your starter tea – Save 2 cups of your finished kombucha plus the SCOBY for your next batch
- Strain and bottle – Pour the remaining kombucha through a non-metal strainer into glass bottles
- Add flavors (optional but highly recommended)
- Seal tightly and let sit at room temperature for 2-4 days
- Refrigerate to stop fermentation
Flavor Combinations That Actually Work
I’ve tried dozens of flavor combinations over the years, and these are the ones that consistently deliver:
Fruit-Forward Options:
- Strawberry + basil (trust me on this one)
- Pineapple + jalapeño (sounds weird, tastes amazing)
- Blueberry + lemon
- Mango + ginger
Herbal and Spice Blends:
- Fresh ginger + turmeric
- Lavender + honey (just a tiny bit)
- Cinnamon + apple
Pro tip: Use about 1-2 tablespoons of fruit or 1 teaspoon of spices per 16-ounce bottle. Start conservative – you can always add more next time, but you can’t take it back.
Troubleshooting Common Issues
Your Kombucha Tastes Like Vinegar
This happens when fermentation goes too long or your brewing environment is too warm. Solution: Shorten your fermentation time or find a cooler spot. Don’t toss it though – vinegar kombucha makes an excellent salad dressing!
No Carbonation in Second Fermentation
Usually means your bottles aren’t airtight or your kombucha wasn’t active enough. Solution: Check your bottle seals and make sure you’re using enough active kombucha from first fermentation.
Mold on Your SCOBY
Real talk – if you see fuzzy, colorful growth on top of your SCOBY, toss the whole batch. Kombucha mold is usually blue, black, or green and looks distinctly different from the normal SCOBY growth. When in doubt, throw it out.
SCOBY Sinking to the Bottom
Totally normal! SCOBYs don’t always float, and a sinking SCOBY doesn’t mean anything’s wrong. As long as fermentation is happening (you’ll taste the difference), you’re good to go.
Advanced Tips for Better Kombucha
Temperature Control
Keep your brewing environment between 75-85°F for optimal fermentation. Too cold and fermentation slows to a crawl; too hot and you risk killing your SCOBY or creating off-flavors.
Tea Selection Makes a Difference
While black tea creates the strongest SCOBY and most reliable fermentation, experimenting with different teas creates unique flavors:
- Green tea produces a lighter, more delicate kombucha
- White tea creates subtle, almost floral notes
- Oolong gives you complexity with a smooth finish
Never use teas with oils (like Earl Grey) as your base – they can damage your SCOBY over time.
The Continuous Brew Method
Once you’re comfortable with basic brewing, consider switching to continuous brew. Keep a large vessel going constantly, harvesting kombucha from the bottom while adding fresh sweet tea to the top. It’s less work and produces more consistent results.
Safety and Storage
Alcohol Content
All kombucha contains trace amounts of alcohol (usually under 0.5%), but home-brewed versions can sometimes climb higher, especially during second fermentation. If you’re avoiding alcohol completely, stick to shorter fermentation times.
Storage Best Practices
- First fermentation: Room temperature, covered with breathable material
- Finished kombucha: Refrigerated in sealed glass containers
- SCOBY storage: In a jar with starter tea in the fridge (they can survive months this way)
Signs of Successful Fermentation
You’ll know your kombucha is working when you see:
- Bubbles forming around the SCOBY
- A new SCOBY layer forming on top
- The characteristic sweet-tart smell developing
- Gradual reduction in sweetness over time
Making Kombucha Part of Your Routine
The beauty of kombucha brewing lies in its rhythm. Once you establish a schedule – whether that’s weekly or bi-weekly batches – it becomes second nature. I brew every Sunday morning with my coffee, and it’s become this weirdly meditative ritual.
IMO, the best part isn’t even the money you save (though that’s pretty great). It’s the satisfaction of creating something genuinely beneficial with your own hands. Plus, you become that person who brings interesting drinks to parties, which honestly never gets old.
Your Kombucha Journey Starts Now
Here’s the thing about kombucha brewing – it’s forgiving, rewarding, and way easier than social media makes it look. Sure, your first few batches might taste a little funky while you dial in your process, but that’s part of the adventure.
Start simple with this basic recipe, get comfortable with the rhythm of fermentation, then let your creativity run wild with flavors. Before you know it, you’ll have mason jars of liquid gold bubbling away in your kitchen, and your friends will be begging for your secrets.
The initial investment might seem like a lot (around $30-50 to get started properly), but you’ll break even after about 10 bottles. After that? Pure profit in both your wallet and your gut health.
So grab that SCOBY, dust off a gallon jar, and join the ranks of home brewers who’ve discovered that the best kombucha doesn’t come from the store – it comes from your own kitchen. Your taste buds (and your bank account) will thank you.
Kombucha Recipe
Equipment
- 1-gallon glass jar
- Coffee filter or breathable cloth
- Rubber band
- Non-metal strainer
- Wooden or plastic spoon
- Glass bottles (swing-top preferred)
Ingredients
- 1 SCOBY
- 1-2 cups starter tea from a previous batch or store-bought raw kombucha
- 8 tea bags or 2 tbsp loose leaf black tea
- 3/4 cup white sugar
- 7 cups filtered water
Instructions
Brew the Tea Base
- Boil 7 cups of filtered water.
- Steep 8 tea bags (or 2 tbsp loose tea) for 10–15 minutes.
- Remove tea bags and stir in sugar until dissolved.
- Let cool to room temperature.
Add SCOBY and Starter Tea
- Pour cooled sweet tea into the 1-gallon glass jar.
- Add 1–2 cups of starter tea and your SCOBY.
- Leave about 1/4 of the jar empty for breathing space.
First Fermentation
- Cover the jar with cloth or coffee filter and secure with a rubber band.
- Let ferment in a warm, dark place for 7–14 days.
- Taste test from day 7 onwards to find your perfect balance.
Second Fermentation (Optional)
- Remove SCOBY and reserve 2 cups of kombucha for next batch.
- Strain the rest into glass bottles.
- Add fruits or spices (optional), seal tightly, and ferment at room temperature for 2–4 days.
- Refrigerate and enjoy.