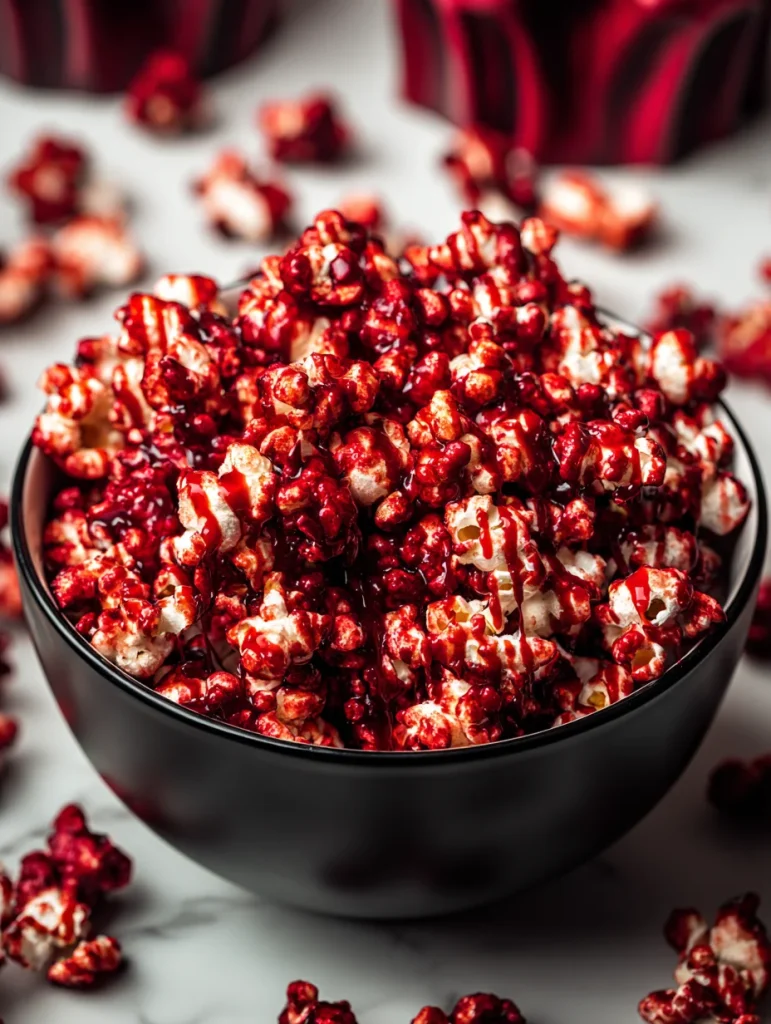
Okay so I need you to trust me on this one because when I first heard about bloody red velvet popcorn I thought someone had lost their mind. Like, red velvet is for cake. Popcorn is for movies. Why would you combine them? Then I actually tried it at a Halloween party and spent the next 20 minutes hovering by the bowl eating handful after handful like some kind of possessed snack goblin.
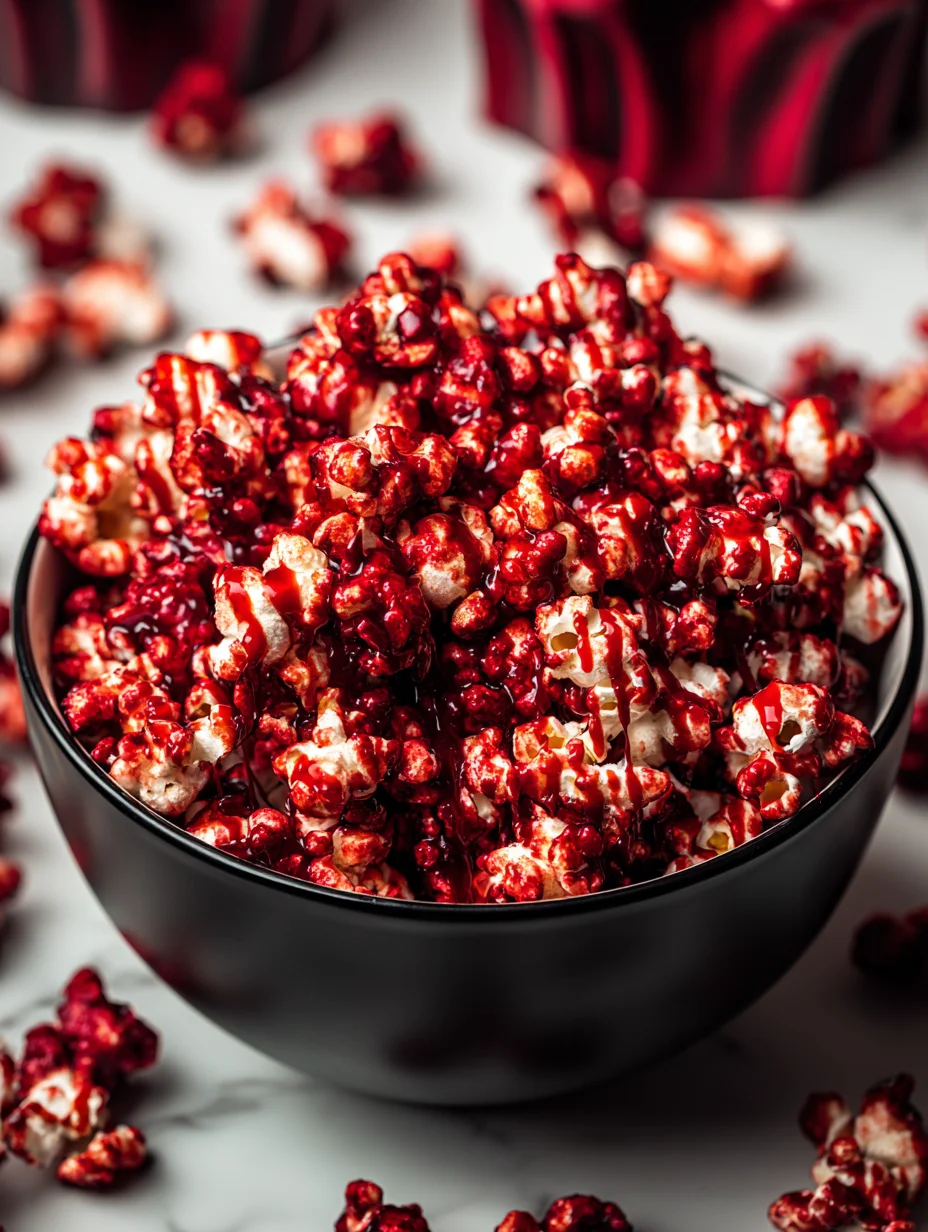
Here’s the thing – it’s sweet, salty, a little chocolatey, coated in white chocolate “blood drips,” and weirdly addictive. I made a batch for movie night last October and my roommate ate so much she felt sick, then made me promise to make it again the next weekend. That’s the power of popcorn coated in cake mix and candy melts, apparently.
Best part? Takes maybe 30 minutes start to finish, uses mostly pantry ingredients, and looks genuinely creepy without requiring any actual cooking skills. You’re basically just melting stuff and tossing it with popcorn. If you can make microwave popcorn, you can make this.
Why This Popcorn Beats Every Other Halloween Snack
Most Halloween snacks are either candy (boring, everyone has candy) or elaborate baked goods that require actual effort. This red velvet popcorn sits perfectly in the middle – interesting enough to be memorable, easy enough to throw together when you forgot you needed to bring something.
I brought this to my friend’s Halloween movie marathon last year. She’d made this whole spread of themed foods – mummy dogs, witch finger cookies, the works. I showed up with a giant bowl of red popcorn drizzled with white chocolate and people literally ignored her carefully prepared appetizers to eat my popcorn. She was annoyed for like ten minutes until she tried it, then she got it. Sometimes simple and weird beats complicated and expected.
Here’s why you need this popcorn:
- Takes 30 minutes max including cleanup
- Everyone’s curious about the red velvet thing – instant conversation starter
- Sweet and salty combo is scientifically proven to be addictive
- Serves a crowd for like $10 worth of ingredients
- You can make it days ahead – actually gets better as it sits
- Looks bloody and creepy without being gross
Plus this works for people who claim they don’t like sweet popcorn. The red velvet cake mix adds this subtle chocolate-vanilla thing that’s not overwhelming. My dad who only eats plain salted popcorn tried this and admitted it was “pretty good” which from him is basically a standing ovation :/
What You Need for Bloody Red Velvet Popcorn
For the Popcorn Base
Don’t use microwave butter popcorn for this – the butter flavor fights with everything else.
Popcorn:
- Plain popped popcorn (16 cups – about ½ cup unpopped kernels)
- Air-popped or plain microwave popcorn works
- Remove all unpopped kernels (biting one ruins the whole experience)
Why plain matters: You need a neutral base so the red velvet coating can shine. Butter flavor makes everything taste weird when combined with white chocolate and cake mix. Just trust me on this.
For the Red Velvet Coating
This is where the magic happens and it’s simpler than you think.
Coating Ingredients:
- Red velvet cake mix (3 tablespoons – not the whole box, just 3 tablespoons)
- White chocolate chips or candy melts (2 cups – about 12 oz)
- Vegetable oil (2 tablespoons – keeps it smooth)
- Red gel food coloring (optional for deeper color)
- Vanilla extract (½ teaspoon)
Mix-ins:
- Mini chocolate chips (½ cup – optional but good)
- White chocolate chips (½ cup – adds texture)
- Freeze-dried strawberries or raspberries (crushed – adds tartness)
Why these ingredients work: The cake mix adds that distinct red velvet flavor without making anything soggy. White chocolate as the base lets the red color pop. And that tiny bit of oil prevents the chocolate from seizing and keeps it glossy.
Substitutions that work:
- No red velvet mix? Use 2 tablespoons cocoa powder, 1 tablespoon sugar, red food coloring
- Dairy-free? Use dairy-free white chocolate chips
- Want it less sweet? Use half white chocolate, half dark chocolate
For the “Bloody” Drizzle
This is the creepy Halloween element that makes it look properly gory.
- White candy melts or white chocolate chips (1 cup)
- Red gel food coloring (to tint it blood-red)
- Corn syrup (1 teaspoon – makes it look glossier and more blood-like)
Critical info: Gel food coloring is essential here. Liquid food coloring will make your white chocolate seize into a grainy mess. Gel gives you that vibrant blood-red without adding moisture that ruins the texture.
Equipment You Actually Need
- Large mixing bowl or roasting pan
- Two baking sheets
- Parchment paper
- Microwave-safe bowls
- Spoon or spatula for stirring
- Piping bag or plastic bag for drizzling
How to Make This Bloody Popcorn
Step 1: Pop and Prep Your Popcorn
Pop your popcorn however you usually do – air popper, stovetop, microwave, whatever. Just make sure it’s plain and unsalted.
Pour it into the largest bowl you have – you need room to toss everything without popcorn flying everywhere. Remove all unpopped kernels and any burnt pieces. This is tedious but necessary because nobody wants to bite down on a kernel.
You should have about 16 cups of popped corn. Seems like a lot but it deflates quickly and people eat more than you think.
Step 2: Make the Red Velvet Coating
Combine white chocolate chips and vegetable oil in a microwave-safe bowl. Microwave in 30-second bursts, stirring between each, until completely melted and smooth. Usually takes 2-3 cycles – don’t rush this or you’ll burn the chocolate.
Once melted, stir in the cake mix, vanilla, and a few drops of red food coloring if you want a deeper red. Mix until completely smooth – the cake mix might make it slightly thicker but it should still be pourable.
Pro tip: Work fast once the chocolate is melted. It starts to thicken as it cools and becomes harder to coat the popcorn evenly.
Step 3: Coat That Popcorn
Pour the red velvet chocolate mixture over your popcorn. Use a large spatula or wooden spoon to toss and fold until every piece is coated. This takes a minute or two – be patient and keep folding.
If you’re adding mini chocolate chips or white chocolate chips, toss them in now while the coating is still wet so they stick.
The popcorn will look glossy and red-tinted. Some pieces will have more coating than others – that’s fine, the variety is actually nice.
Step 4: Let It Set
Line two baking sheets with parchment paper. Spread the coated popcorn in a single layer across both sheets. Try to separate clumps so individual pieces dry – you want crunchy popcorn, not one giant popcorn brick.
Let it sit at room temperature for about 15-20 minutes until the coating hardens. You can speed this up by sticking the sheets in the fridge for 10 minutes but watch condensation doesn’t make everything soggy.
Step 5: Create the Blood Drizzle
Melt 1 cup white candy melts in the microwave – same process as before, 30-second bursts stirring between. Once melted, add red gel food coloring until you get a blood-red color. Start with a little – you can always add more.
Stir in the corn syrup. This makes it look glossier and more liquid-like, less matte and candy-like.
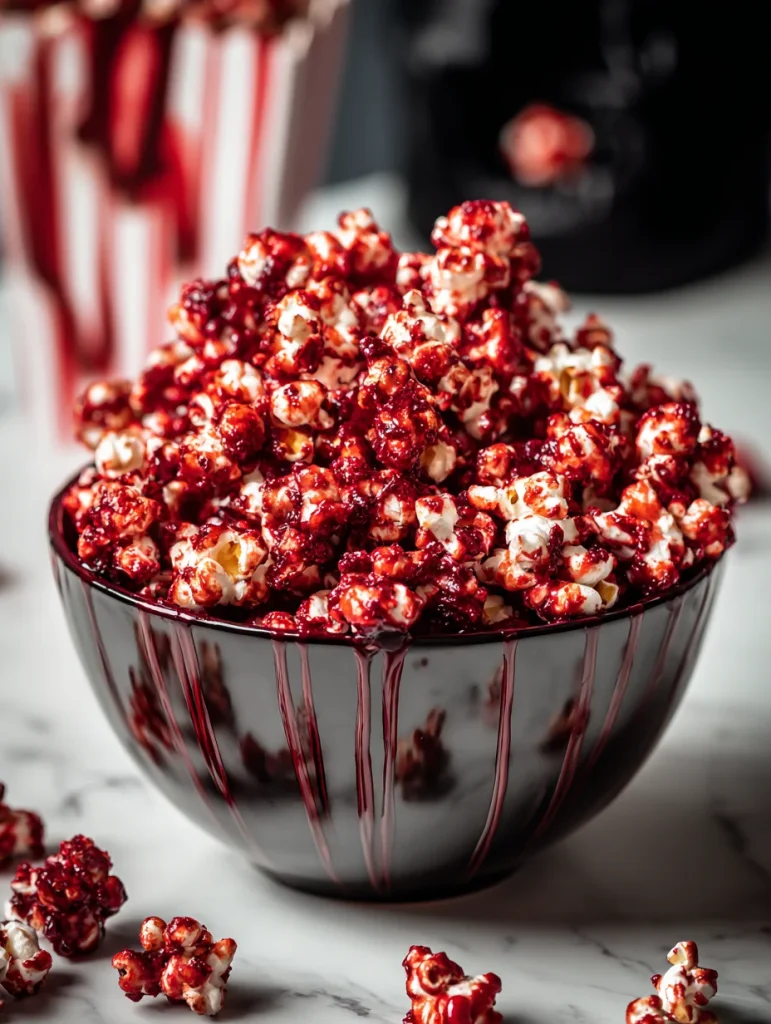
Transfer to a piping bag or plastic bag with the corner cut off. Drizzle over the hardened popcorn in random patterns. Let some drip down the sides of clusters – you want it to look like blood splatters, not neat lines.
Design tips: Less is more here. Too much drizzle makes it look like frosting. Random splatters and drips look more blood-like and creepy. Some pieces with no drizzle at all is fine – variety makes it interesting.
Step 6: Final Set and Serve
Let the blood drizzle harden completely – another 15 minutes at room temperature or 5 minutes in the fridge.
Once everything is set, break up any large clusters into bite-sized pieces. Transfer to a serving bowl or package in treat bags.
This bloody red velvet popcorn keeps for up to a week in an airtight container at room temperature. The coating stays crunchy and the flavors actually get better as it sits, IMO.
Creative Variations Worth Trying
Cookies and Cream Bloody Popcorn
Add crushed Oreos to the coating before it sets. Use the red drizzle or switch to black drizzle for a different aesthetic. The cookies and cream thing works with basically any flavor profile.
Peanut Butter Red Velvet Popcorn
Add ¼ cup peanut butter to the white chocolate coating. Results in a peanut butter cup meets red velvet situation that’s honestly dangerous. Skip the blood drizzle or use chocolate drizzle instead.
Dark Chocolate Blood Popcorn
Use dark chocolate instead of white chocolate as the base. The result is less visually red but tastes richer and more sophisticated. Better for adult Halloween parties where people pretend they’re too cool for super sweet things.
Strawberry Red Velvet Popcorn
Add freeze-dried strawberries crushed into powder to the coating. Enhances the red velvet flavor and adds this fruity tartness. Use pink drizzle instead of red for a less gory, more Valentine’s vibe.
Salted Caramel Blood Popcorn
Drizzle caramel over the red velvet coating before adding the blood drizzle. The sweet-salty-creepy combo is next level. Sprinkle flaky sea salt on top before everything sets.
Monster Mash Popcorn
Add mini M&Ms, sprinkles, and candy eyes to the coating before it sets. More chaotic, less sophisticated, perfect for kids who want maximum sugar and color.
Bloody Red Velvet Popcorn
Equipment
- Large mixing bowl or roasting pan
- 2 baking sheets
- Parchment paper
- Microwave-safe bowls
- Spatula or spoon
- Piping bag or ziplock bag (for drizzle)
Ingredients
- 16 cups plain popped popcorn (about ½ cup unpopped kernels)
- 3 tbsp red velvet cake mix
- 2 cups white chocolate chips or candy melts
- 2 tbsp vegetable oil
- 0.5 tsp vanilla extract
- optional red gel food coloring
- 0.5 cup mini chocolate chips (optional)
- 0.5 cup white chocolate chips (for texture)
- optional freeze-dried strawberries or raspberries, crushed
- 1 cup white candy melts or white chocolate chips (for drizzle)
- 1 tsp corn syrup
- to tint red gel food coloring (for drizzle)
Instructions
- Pop your popcorn using air-popper, stovetop, or microwave — just ensure it’s plain and unsalted. Pour into a large bowl, removing all unpopped kernels.
- In a microwave-safe bowl, melt white chocolate chips with vegetable oil in 30-second bursts. Stir until smooth. Add cake mix, vanilla, and red gel coloring. Mix well.
- Pour coating over popcorn and fold gently until evenly coated. Add mix-ins like mini chips or freeze-dried berries while still wet so they stick.
- Spread coated popcorn on parchment-lined baking sheets. Let sit for 15–20 minutes or refrigerate 10 minutes until set.
- Melt candy melts for drizzle. Add red gel coloring and corn syrup. Transfer to a bag and drizzle randomly over popcorn. Let it look messy and bloody!
- Let drizzle harden for 15 minutes. Break up clusters and serve or store in airtight containers.
Notes
Frequently Asked Questions
My white chocolate seized into a grainy mess – what happened?
Water got into your chocolate or you overheated it. Even one drop of water makes chocolate seize. Make sure your bowl is completely dry before melting. If it happens, try stirring in vegetable oil one teaspoon at a time – sometimes this saves it.
The coating won’t stick to the popcorn – why?
Your chocolate mixture cooled too much before you tossed it with the popcorn. Work quickly once the chocolate is melted. If it starts to thicken, pop it back in the microwave for 10 seconds to loosen it up.
Can I make this bloody red velvet popcorn ahead of time?
Absolutely. Make it up to 5 days ahead and store in an airtight container at room temperature. The coating stays crunchy and the flavors meld together nicely. Just don’t refrigerate it – condensation makes the coating sticky and weird.
My popcorn all clumped into one giant mass – how do I fix this?
You need to spread it out to dry in a single layer immediately after coating. If it’s already clumped, you can break it into smaller clusters – actually kind of nice for snacking. Or next time work faster to separate pieces before the coating sets.
Is there a way to make this less sweet?
Use dark chocolate instead of white chocolate in the coating. Cut the cake mix down to 2 tablespoons instead of 3. Skip the blood drizzle or use very little. Add more salt – a generous sprinkle of flaky sea salt cuts sweetness significantly.
The red color isn’t vibrant enough – how do I make it redder?
Add more red gel food coloring to the white chocolate coating. Gel coloring is more concentrated than liquid and won’t mess up the texture. You can also use red velvet emulsion if you can find it – gives stronger flavor and color.
Can I use already-buttered microwave popcorn?
You can, but the butter flavor clashes with the red velvet coating and makes everything taste off. Plain popcorn really is better for this recipe. If you only have buttered, use less coating mixture to compensate for the butter.