Look, I’m gonna be straight with you—if you’re still grilling chicken thighs outside when it’s 20 degrees or battling mosquitoes the size of small aircraft, you’re doing it wrong. Oven-baked caramelized BBQ chicken thighs are about to become your new obsession, and honestly? They might just be better than anything you’ve ever pulled off a grill.
I stumbled onto this method during one of those “what’s for dinner and I have zero motivation” evenings. You know the ones. Three ingredients later, I had chicken so ridiculously good that my neighbors started asking what smelled amazing. True story.

Why Oven BBQ Chicken Thighs Beat Everything Else
The Thigh Advantage
First things first—chicken thighs are superior to breasts. Fight me on this. They’re juicier, more forgiving, and actually taste like chicken instead of expensive cardboard. Plus, they’re cheaper, which means more money for good BBQ sauce (or wine, no judgment here).
Thighs contain more fat and connective tissue, which breaks down during cooking and creates that fall-off-the-bone texture we all crave. Ever wonder why restaurant chicken always tastes better? They use thighs, not breasts.
Temperature Control Magic
Your oven gives you something a grill never can—consistent, controllable heat. No flare-ups, no hot spots, no panicking when the propane runs out mid-cook. Just steady, reliable heat that caramelizes your BBQ sauce without burning it to a crisp.
I’ve tried both methods extensively (research purposes, obviously), and the oven wins every single time for convenience and consistency.
The Science Behind Perfect Caramelization
Sugar + Heat = Heaven
Caramelization happens when sugars break down under heat, creating those complex, deep flavors that make your mouth water. Most BBQ sauces contain enough sugar to caramelize beautifully at around 375°F—hot enough to work magic, not so hot that you end up with charcoal.
The key is applying sauce in layers. You can’t just slather it on once and call it done (though I’ve definitely tried that shortcut). Multiple applications create those gorgeous, sticky layers that photograph like a dream and taste even better.
The Maillard Reaction Factor
Here’s where things get nerdy for a second. The Maillard reaction—that browning process that makes everything delicious—happens when proteins and sugars react under heat. Chicken skin is perfect for this, especially when you let it get slightly crispy before adding sauce.
This is why you start sauce-free and finish with multiple coats. Trust the process, even when it feels wrong.
Essential Ingredients and Equipment
What You Actually Need
- Bone-in, skin-on chicken thighs (6-8 pieces)
- Your favorite BBQ sauce (about 1 cup)
- Basic seasonings: salt, pepper, garlic powder, paprika
- Optional flavor boosters: brown sugar, soy sauce, apple cider vinegar
Equipment-wise, you need:
- A rimmed baking sheet
- Wire cooling rack (optional but recommended)
- Meat thermometer
- Basting brush
Sauce Selection Strategy
Not all BBQ sauces caramelize equally. Thicker, sweeter sauces work best for this method. Kansas City-style sauces are perfect—they’re molasses-heavy and stick beautifully. Carolina vinegar sauces? Save those for pulled pork.
IMO, Sweet Baby Ray’s gets unfair hate from food snobs. It caramelizes like a champ and costs half what the “artisanal” stuff does. Sometimes simple wins 🙂
The Step-by-Step Method
Prep Work (Don’t Skip This)
Pat those thighs completely dry with paper towels. Moisture is the enemy of crispy skin and good caramelization. Season generously with salt, pepper, and whatever else makes you happy. I like a mix of garlic powder, paprika, and a touch of brown sugar.
Let them sit at room temperature for 20-30 minutes while your oven preheats to 375°F. This ensures even cooking and better skin texture.
The Initial Bake
Place thighs skin-side up on your baking sheet. If you have a wire rack, use it—the airflow creates better browning all around. Bake for 25-30 minutes without any sauce.
Yes, this feels wrong. Yes, you want to add sauce immediately. Don’t. The skin needs time to render fat and start crisping. This is where patience pays off in a big way.
The Caramelization Process
Here’s where the magic happens. After that initial bake, brush on your first layer of BBQ sauce. Don’t flood them—a thin, even coat is perfect. Return to the oven for 10 minutes.
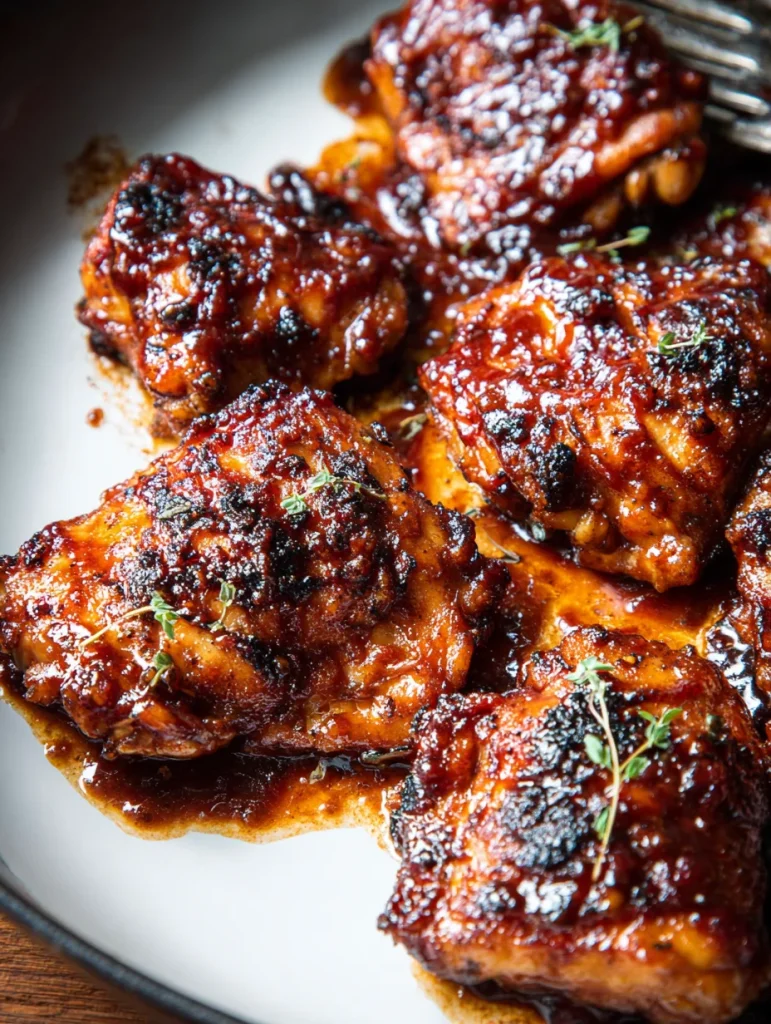
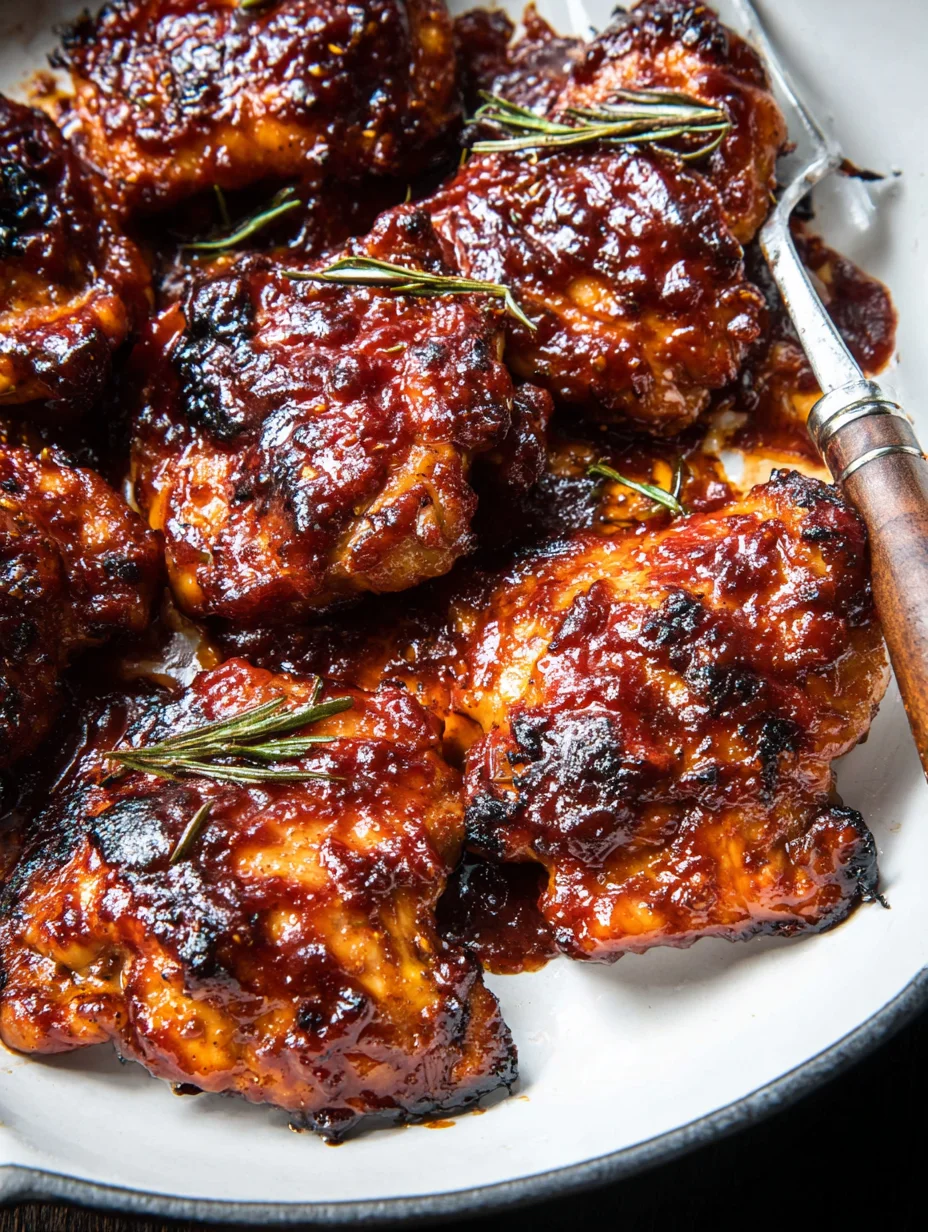
Repeat this process 2-3 more times, baking 8-10 minutes between each application. Each layer builds flavor and creates that glossy, caramelized exterior that makes people think you’re some kind of kitchen wizard.
Temperature Check
Internal temperature should hit 165°F in the thickest part of the thigh. But honestly? I usually take mine to 170-175°F. Thighs can handle it, and the extra time helps render more fat for juicier meat.
Pro Tips for Next-Level Results
Rack Positioning Matters
Middle rack is your sweet spot for even browning. Too high and the tops burn before the bottoms cook. Too low and you get soggy skin. Middle rack gives you the goldilocks zone of heat distribution.
The Broiler Finish (Advanced Move)
Want restaurant-level caramelization? After your final sauce application, hit them with 2-3 minutes under the broiler. Watch them like a hawk—broilers go from perfect to carbonized faster than you can say “fire alarm.”
This creates those gorgeous dark spots and extra-sticky texture that photographs beautifully for your inevitable Instagram post.
Sauce Customization Ideas
- Add soy sauce and ginger for an Asian twist
- Mix in chipotle peppers for smoky heat
- Stir in bourbon because why not? 🙂
- Apple cider vinegar brightens heavy, sweet sauces perfectly
Common Mistakes and How to Avoid Them
The Sauce-Too-Early Trap
Adding sauce before the skin starts browning is mistake number one. You’ll steam the chicken instead of caramelizing it, and nobody wants sad, soggy chicken skin. Be patient with that first 25-30 minutes.
Temperature Inconsistencies
Not using a meat thermometer is just asking for trouble. Chicken thighs are forgiving, but food safety isn’t negotiable. Get a decent instant-read thermometer—your family’s stomachs will thank you.
Overcrowding Issues
Cramming too many thighs on one pan creates steam instead of browning. Give them space to breathe. Better to use two pans than crowd everything together and get mediocre results.
Serving Suggestions and Sides
Perfect Pairings
These caramelized beauties pair amazingly with:
- Creamy coleslaw (cuts through the richness)
- Roasted vegetables (Brussels sprouts work surprisingly well)
- Mac and cheese (because life’s too short for boring sides)
- Cornbread (obviously)
Leftover Magic
Cold caramelized BBQ chicken makes incredible sandwiches the next day. Shred it up for tacos, toss it in salads, or just eat it straight from the fridge while standing in your kitchen at midnight. We’ve all been there.
Storage and Reheating Tips
Keeping It Fresh
Store leftovers in the refrigerator for up to 4 days in airtight containers. The caramelized coating actually helps preserve moisture, so they reheat better than plain baked chicken.
Reheating Without Ruining Everything
Low and slow is the way to go for reheating. 300°F oven for 10-15 minutes brings them back to life without drying them out. Microwaving works in a pinch, but you’ll lose that crispy skin texture.
FYI, frozen leftovers keep for about 3 months, though honestly, they never last that long in my house.
Final Thoughts
Oven caramelized BBQ chicken thighs prove that sometimes the easiest methods produce the best results. No special equipment, no complicated techniques, just good ingredients and a little patience.
The next time someone tries to tell you “real” BBQ only happens on a grill, invite them over for dinner. One bite of these glossy, caramelized beauties will change their tune faster than you can say “outdoor cooking is overrated.”
Trust me on this one—your oven has been waiting to show off, and these chicken thighs are the perfect opportunity to let it shine.
Oven-Baked Caramelized BBQ Chicken Thighs
Equipment
- rimmed baking sheet
- wire cooling rack (optional)
- Meat thermometer
- Basting brush
Ingredients
- 6-8 bone-in, skin-on chicken thighs
- 1 cup BBQ sauce (Kansas City-style preferred)
- 1 tsp salt
- 1/2 tsp black pepper
- 1 tsp garlic powder
- 1 tsp paprika
- 1 tbsp brown sugar (optional, for extra caramelization)
- 1 tbsp soy sauce (optional flavor booster)
- 1 tbsp apple cider vinegar (optional, to balance sweetness)
Instructions
- Pat chicken thighs completely dry with paper towels. Season generously with salt, pepper, garlic powder, paprika, and optional brown sugar. Let rest at room temperature 20–30 minutes while oven preheats to 375°F.
- Arrange thighs skin-side up on a rimmed baking sheet. Use a wire rack if available for better airflow. Bake for 25–30 minutes without sauce.
- Brush on a thin layer of BBQ sauce. Return to oven for 10 minutes. Repeat this process 2–3 times, baking 8–10 minutes between each sauce layer.
- Check internal temperature with a meat thermometer. Chicken should reach 165°F minimum; 170–175°F gives juicier results with more fat rendered.
- Optional: After final sauce coat, broil 2–3 minutes for charred caramelized spots. Watch closely to prevent burning.
- Serve hot with creamy coleslaw, roasted vegetables, mac and cheese, or cornbread.