Spring is finally here and the days are getting longer. You want something fresh and exciting for dinner tonight. This Peruvian Roasted Chicken is the perfect answer for your family. It brings bright, bold flavors right to your kitchen table.
This recipe delivers a succulent bird with incredibly crispy skin. It is smoky, savory, and smells amazing while roasting. You get restaurant-quality results with very little active effort. It is a great way to liven up your routine.
Why This Recipe Is a Winner
This recipe is a total winner for busy families. It uses simple pantry staples and one special paste. The flavor is deep, smoky, and slightly sweet. It is perfect for a busy weeknight when you prep ahead. You do the work early in the day.
The oven does all the heavy lifting for you. Your kids will love the tender, juicy meat. It feels like a special treat without the high price. This dish is truly budget-friendly and impressive for any guest.
Simple Cooking Steps
Making this chicken is very simple and straightforward. You mix a quick marinade paste in one bowl. Then you rub it all over the bird. Let it sit and soak up all that flavor. Even if you are a beginner, you can do this. Success is guaranteed with these easy steps.
Ingredients You’ll Need
Most of these items are already in your kitchen. The secret is the aji panca paste found online.
- 1 whole chicken (3.5 to 4 pounds)
- 2 tablespoons soy sauce
- 2 tablespoons fresh lime juice
- 2 tablespoons vegetable oil
- 4 cloves garlic, minced
- 2 tablespoons aji panca paste
- 1 tablespoon kosher salt
- 2 teaspoons ground cumin
- 2 teaspoons paprika
- 1 teaspoon dried oregano
- 1 teaspoon freshly ground black pepper
Step-by-Step Directions
- In a medium bowl, combine the soy sauce and lime juice. Add oil, garlic, aji panca, and all the dry spices. Mix well to create a thick marinade paste.
- Pat the chicken very dry with paper towels first. Remove any excess fat or giblets from the cavity.
- Carefully loosen the skin over the breast and thighs. Rub a generous portion of marinade under the skin. Apply the rest over the exterior and inside.
- Place the chicken in a sealed bag or container. Refrigerate for at least 4 hours or up to 24. This ensures maximum flavor penetration for the meat.
- Preheat your oven to 400°F (200°C) before roasting.
- Place the chicken on a roasting rack breast side up. This helps the air circulate for crispy skin.
- Roast for 70 to 80 minutes until fully cooked. The internal temperature should reach 165°F (74°C) in the thigh.
- Remove from the oven and tent loosely with foil. Let it rest for 15 minutes before you carve.
Best Ways to Enjoy It
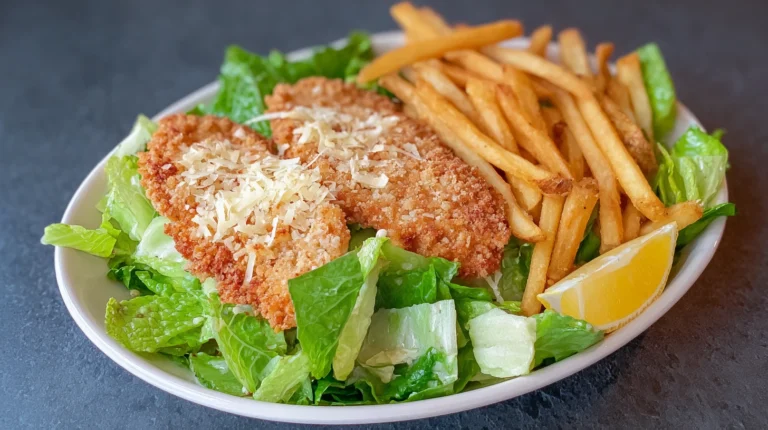
Serve this chicken warm with a side of fries. It is traditional to serve it with green sauce. A simple green salad adds a fresh crunch. This is a complete family meal that everyone enjoys. Set the table and enjoy a lovely spring evening.
Storage & Reheating
Store any leftovers in an airtight container for three days. This chicken makes excellent sandwiches the next day. You can also freeze the cooked meat for later. Reheat in a 350°F oven to keep skin crisp. Avoid the microwave to keep the texture perfect.
Tips for Best Results
- Don’t skip the aji panca paste for authenticity.
- Pat the skin very dry for maximum crispiness.
- Marinate overnight for the most intense flavor.
- Always use a meat thermometer for perfect results.
- Rub marinade under the skin to keep meat juicy.
- Let the chicken rest so the juices stay inside.
- Double the marinade if you have a larger bird.
Ways to Switch It Up
- Use chicken thighs for a faster weeknight version.
- Swap lime juice for lemon if you prefer.
- Add a pinch of cayenne for extra heat.
- Try roasting it on a bed of potatoes.
Common Questions
Can I make this ahead?
Yes, you should definitely marinate it early. It actually tastes much better the next day. Just roast it right before you want to eat.
Is aji panca paste spicy?
It is very mild but very smoky. It adds a deep red color to the skin. Most kids find it delicious and not hot.
What if I don’t have a roasting rack?
You can use a bed of thick onion slices. This lifts the bird off the pan bottom. It adds great flavor to the pan drippings too.
I hope this cozy recipe brightens your spring evenings. Give it a try and let every bite warm you up. Happy cooking!
— Lidia
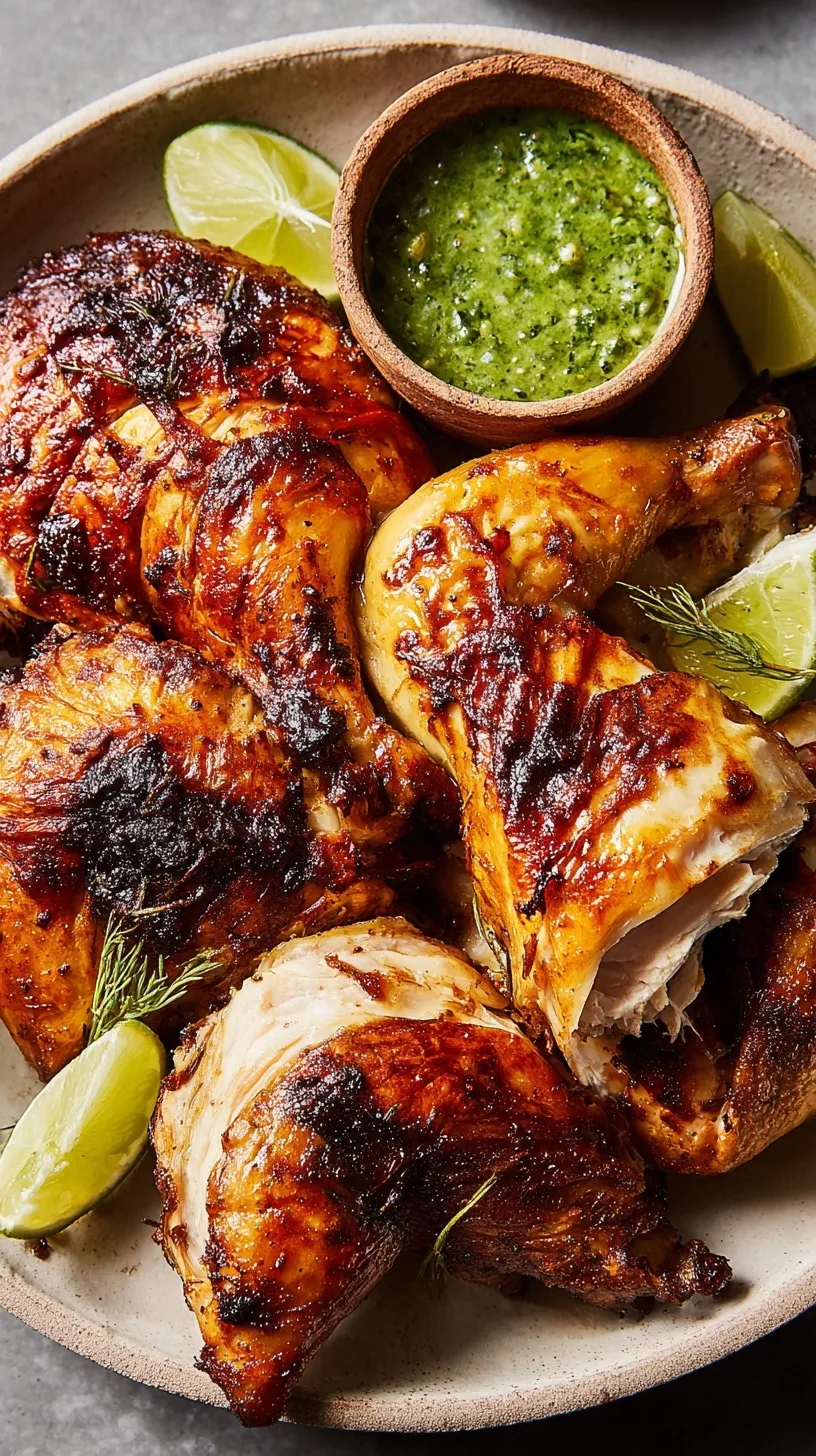
Peruvian Roasted Chicken (Pollo a la Brasa)
Ingredients
- 1 whole chicken (3.5 to 4 pounds)
- 2 tablespoons soy sauce
- 2 tablespoons fresh lime juice
- 2 tablespoons vegetable oil
- 4 cloves garlic , minced
- 2 tablespoons aji panca paste
- 1 tablespoon kosher salt
- 2 teaspoons ground cumin
- 2 teaspoons paprik a
- 1 teaspoon dried oregano
- 1 teaspoon freshly ground black pepper
Instructions
- In a medium bowl, combine the soy sauce, lime juice, vegetable oil, garlic, aji panca paste, salt, cumin, paprika, oregano, and black pepper to create the marinade paste.
- Pat the chicken dry with paper towels and remove any excess fat or giblets.
- Carefully loosen the skin over the breast and thighs using your fingers. Rub a generous portion of the marinade under the skin, then apply the remaining marinade over the entire exterior of the bird and inside the cavity.
- Place the chicken in a sealed container or resealable bag and refrigerate for at least 4 hours, though 12 to 24 hours is recommended for maximum flavor penetration.
- Preheat the oven to 400°F (200°C).
- Place the chicken on a roasting rack set inside a roasting pan, breast side up.
- Roast for 70 to 80 minutes, or until the internal temperature of the thickest part of the thigh reaches 165°F (74°C) and the skin is deeply browned.
- Remove the chicken from the oven and tent loosely with foil. Allow the bird to rest for 15 minutes before carving to ensure juices redistribute.