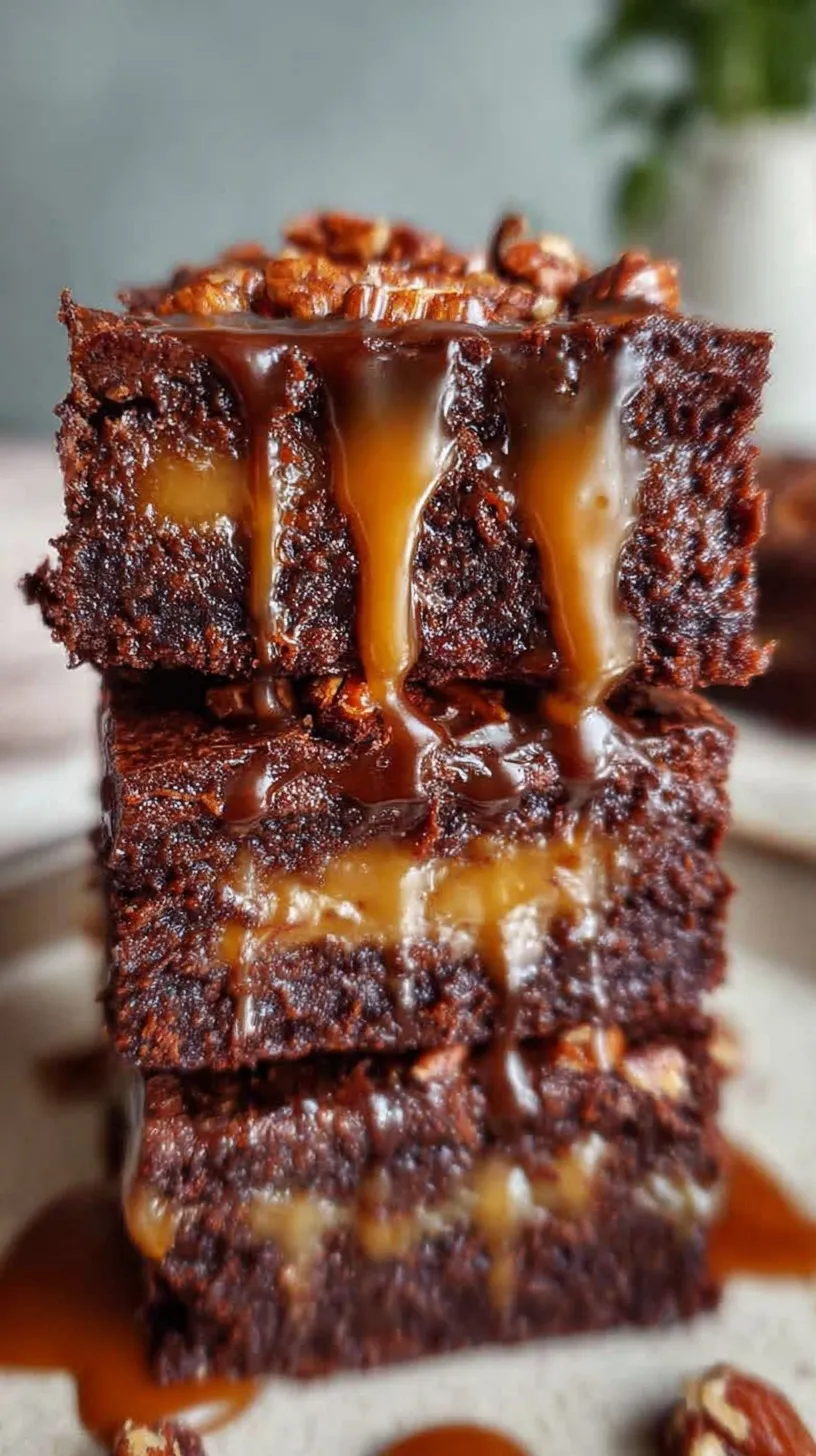
Looking for a dish that wows your guests without stressing you out? These Gluten Free Caramel Slice Brownies are the ultimate winter treat for your family.
There is nothing quite like the smell of chocolate and caramel on a snowy afternoon. This recipe delivers a rich, multi-layered experience that everyone can enjoy together. You will love how simple it is to create something so impressive and delicious.
Why This Recipe Is a Winner
This dessert is a total showstopper for any holiday gathering or special occasion. It combines a fudgy brownie with a silky caramel center and dark chocolate. Your friends will never even guess that these treats are completely gluten-free.
It is the perfect balance of salty and sweet in every single bite. These brownies are sturdy enough for potlucks but feel fancy enough for a party. You can easily make them ahead of time to save your sanity.
Simple Cooking Steps
Making these layers is much easier than it looks on the plate. You start by whisking a simple brownie batter and giving it a head start. While that bakes, you gently simmer the golden caramel on the stove. Even if you are a beginner, you can master these beautiful layers easily.
Ingredients You’ll Need
Most of these items are likely already waiting in your kitchen pantry. Fresh eggs and quality dark chocolate make a big difference in the final flavor.
- 200g unsalted butter, melted
- 200g granulated sugar
- 3 large eggs
- 1 teaspoon vanilla extract
- 60g unsweetened cocoa powder
- 100g gluten-free all-purpose flour blend
- 0.5 teaspoon sea salt
- 397g sweetened condensed milk
- 50g unsalted butter (for caramel)
- 2 tablespoons golden syrup
- 200g dark chocolate, chopped
- 30g unsalted butter (for topping)
Step-by-Step Directions
- Preheat oven to 170°C and line a 20cm square baking pan with parchment paper.
- In a large mixing bowl, whisk together 200g melted butter and sugar.
- Add eggs and vanilla extract, whisking until the mixture is glossy and well emulsified.
- Sift the cocoa powder, gluten-free flour, and salt into the wet ingredients.
- Fold the mixture gently with a spatula until just combined.
- Pour the brownie batter into the prepared pan and bake for 20 minutes.
- Prepare the caramel by combining the condensed milk, 50g butter, and golden syrup in a heavy-based saucepan over medium-low heat.
- Whisk the caramel continuously for 8 to 10 minutes until thickened and pale golden.
- Pour the hot caramel over the partially baked brownie base and return the pan to the oven for an additional 12 to 15 minutes.
- Remove from the oven and allow the pan to cool completely at room temperature, then refrigerate for at least 2 hours to set the caramel.
- Melt the chopped dark chocolate and 30g butter together using a double boiler or microwave.
- Spread the chocolate topping over the chilled caramel layer and refrigerate for 30 minutes before slicing into squares.
Best Ways to Enjoy It
Serve these rich squares on a pretty platter for your next holiday party. They look stunning when dusted with a little extra sea salt on top. Pair them with a hot cup of coffee or a cold glass of milk. You can also serve them with a scoop of vanilla bean ice cream.
Storage & Reheating
Keep these brownies in an airtight container in the refrigerator for five days. They actually taste even better after sitting for a day. You can also freeze the sliced squares for up to three months. Just thaw them in the fridge overnight before you plan to serve them.
Tips for Best Results
- Whisk the caramel constantly so it does not burn on the bottom.
- Do not skip the two-hour chilling time for the caramel layer.
- Use a hot knife to get perfectly clean and sharp brownie edges.
- Sift your cocoa powder to ensure there are no bitter lumps.
- For a festive touch, add a sprinkle of edible gold leaf.
- Make sure your gluten-free flour blend includes xanthan gum for structure.
Ways to Switch It Up
- Swap dark chocolate for milk chocolate if you prefer a sweeter finish.
- Add chopped pecans to the brownie base for a crunchy texture.
- Use maple syrup instead of golden syrup for a different flavor profile.
- Stir a pinch of espresso powder into the batter to boost the chocolate.
Common Questions
Can I make these brownies ahead of time?
Yes, these are perfect for making a day before your big event. The layers set firmly and the flavors deepen as they sit. This makes your holiday hosting much easier and stress-free.
Why did my caramel layer not set properly?
This usually happens if the caramel was not boiled long enough. Make sure it looks thick and pale golden before pouring it. Proper chilling in the fridge is also essential for a firm set.
How do I know when the brownie base is done?
The edges should be set, but the middle should still look slightly soft. It will finish cooking when you put it back in with the caramel. This ensures your brownies stay fudgy and moist.
I hope these decadent brownies bring a little extra sweetness to your winter celebrations. They are truly a treat that the whole family will love. Happy baking!
— Lidia
Gluten Free Caramel Slice Brownies
Ingredients
- 200 g unsalted butter, melted
- 200 g granulated sugar
- 3 large egg s
- 1 teaspoon vanilla extract
- 60 g unsweetened cocoa powder
- 100 g gluten -free all-purpose flour blend
- 0.5 teaspoon sea salt
- 397 g sweetened condensed milk
- 50 g unsalted butter (for caramel)
- 2 tablespoons golden syrup
- 200 g dark chocolate, chopped
- 30 g unsalted butter (for topping)
Instructions
- Preheat oven to 170°C and line a 20cm square baking pan with parchment paper.
- In a large mixing bowl, whisk together 200g melted butter and sugar. Add eggs and vanilla extract, whisking until the mixture is glossy and well emulsified.
- Sift the cocoa powder, gluten-free flour, and salt into the wet ingredients. Fold the mixture gently with a spatula until just combined.
- Pour the brownie batter into the prepared pan and bake for 20 minutes.
- Prepare the caramel by combining the condensed milk, 50g butter, and golden syrup in a heavy-based saucepan over medium-low heat.
- Whisk the caramel continuously for 8 to 10 minutes until thickened and pale golden.
- Pour the hot caramel over the partially baked brownie base and return the pan to the oven for an additional 12 to 15 minutes.
- Remove from the oven and allow the pan to cool completely at room temperature, then refrigerate for at least 2 hours to set the caramel.
- Melt the chopped dark chocolate and 30g butter together using a double boiler or microwave.
- Spread the chocolate topping over the chilled caramel layer and refrigerate for 30 minutes before slicing into squares.