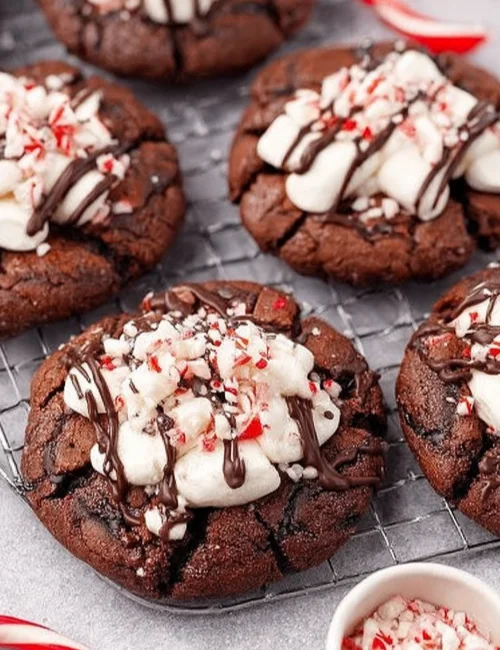
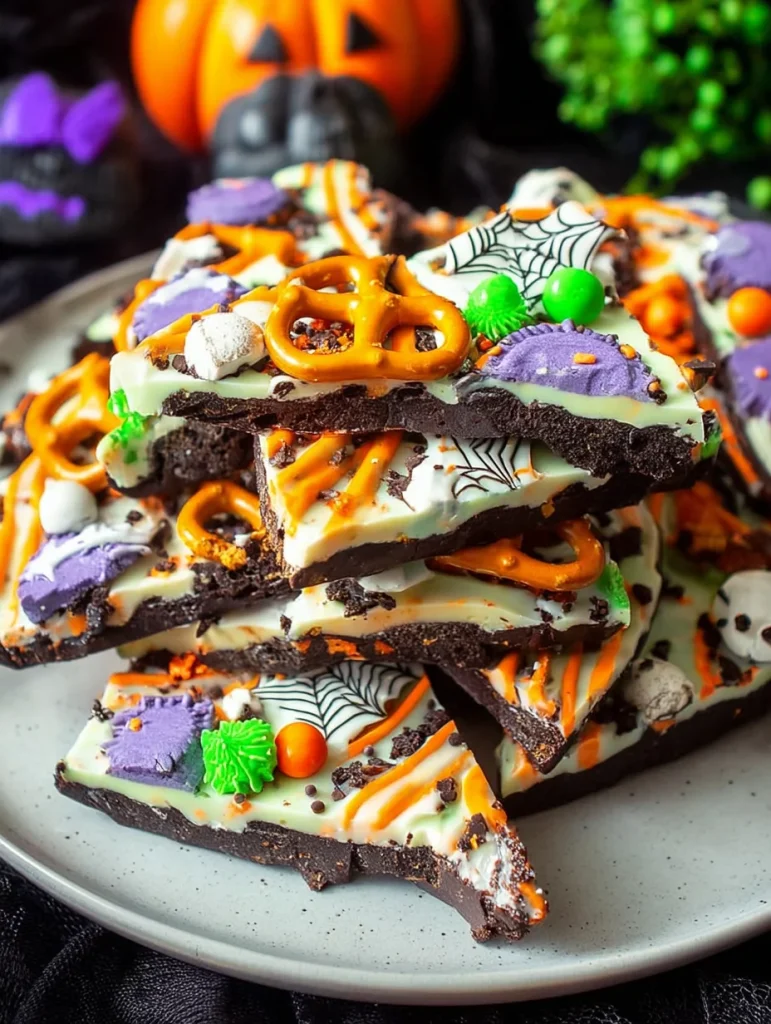
Let me tell you about Halloween bark – it’s the dessert you make when you want to look like you tried but actually did almost nothing. White chocolate, pretzels, candy, and food coloring dumped on a baking sheet. That’s it. No baking, no complicated steps, no specialty equipment. I made this last Halloween while half-watching a movie and it turned out looking like I’d spent hours on it.
I brought a platter of this to a party and someone asked how long it took. When I said “maybe 20 minutes including cleanup” they literally didn’t believe me. Thought I was being modest. Nope, this is genuinely that easy. You melt chocolate, pour it on a sheet, throw toppings on while it’s wet, let it harden. Done. If you can successfully open a bag of chocolate chips, you’re qualified to make this.
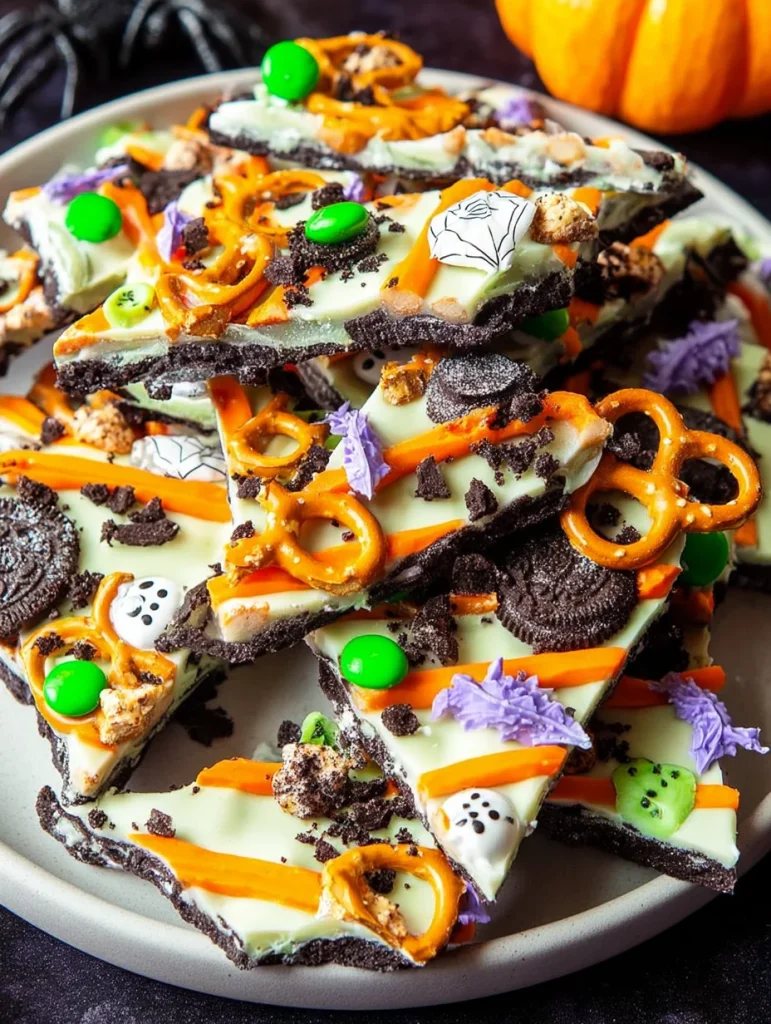
Best part? The sweet-salty combo of white chocolate and pretzels is genuinely addictive. The crunch, the creaminess, the little pops of candy color – it all works together way better than it has any right to. Plus it looks festive without trying too hard.
Why This Bark Beats Other Halloween Candy
Most homemade Halloween treats require actual cooking or decorating skills. This white chocolate pretzel bark requires neither. You’re not tempering chocolate or piping designs or carefully arranging anything. You’re dumping ingredients in a vaguely attractive way and calling it done. That’s my kind of recipe.
I made this for my nephew’s Halloween party alongside someone who’d made elaborate cake pops that took her three hours. My bark was gone in 15 minutes. Her cake pops sat there looking pretty but mostly untouched because kids wanted the thing that looked like candy, not cake on a stick. Sometimes simple wins, especially when kids are involved.
Here’s why you need this bark:
- Takes 20 minutes max from start to finish
- No oven required – just a microwave and fridge
- The sweet-salty combo is scientifically proven to be addictive
- Looks impressive despite requiring zero skill
- Perfect for gifting in clear bags with ribbons
- You can customize colors and toppings endlessly
Plus this works for people who claim they can’t cook. This isn’t cooking. This is melting and arranging. If you can pour milk in a bowl without spilling, you’re overqualified for this recipe :/
What You Need for Halloween Bark
For the Base
Keep it simple – quality ingredients make a difference here.
Chocolate Layer:
- White chocolate chips or melting wafers (16 oz – about 2½ cups)
- Coconut oil or vegetable oil (1 tablespoon – keeps it smooth)
- Orange and purple gel food coloring (for swirled effect)
- Or leave it plain white if you prefer classic
Why white chocolate works: It’s sweet, creamy, and provides a neutral canvas for Halloween colors. Plus it contrasts nicely with darker toppings. You could use milk or dark chocolate but then you lose the color-swirl effect.
For the Pretzel Crunch
This is what makes it special instead of just chocolate bark.
- Mini pretzel twists (2 cups – broken into pieces)
- Pretzel sticks (1 cup – for variety)
- Or just use one type – doesn’t matter that much
Critical info: Break the pretzels into bite-sized pieces before adding them. Whole pretzels make the bark hard to break and eat. Plus smaller pieces distribute better across the chocolate.
For the Toppings
This is where you get creative and use whatever Halloween candy you have.
Classic Options:
- M&Ms in fall colors (orange, yellow, brown)
- Candy corn (if you’re into that)
- Reese’s Pieces
- Mini chocolate chips
- Sprinkles in Halloween colors
- Crushed Oreos
- Candy eyeballs (for creepy factor)
Fancier Options:
- Crushed freeze-dried strawberries (adds tartness)
- Sea salt flakes (cuts the sweetness)
- Chopped nuts (pecans or almonds work well)
- Mini marshmallows
- Toffee bits
You don’t need all of these – pick 3-4 toppings max or it gets too chaotic.
Equipment You Actually Need
- Large baking sheet with sides
- Parchment paper or silicone mat
- Microwave-safe bowl
- Spatula for spreading
- Toothpick for swirling colors
How to Make Halloween Bark
Step 1: Prep Your Pan
Line a large baking sheet with parchment paper or a silicone baking mat. Make sure it’s flat and smooth – wrinkles will show up in your final bark.
The paper should cover the entire surface with a little overhang for easy removal later. This step takes 30 seconds but makes cleanup infinitely easier.
Step 2: Melt the White Chocolate
Combine white chocolate chips and coconut oil in a microwave-safe bowl. Microwave in 30-second bursts, stirring between each, until completely melted and smooth. Usually takes 2-3 cycles total.
Don’t rush this. Overheated white chocolate seizes and becomes grainy. Better to go slow with 30-second intervals than blast it and ruin everything.
Once melted, let it cool for about 2 minutes. If it’s too hot when you pour it, the heat will melt your candy toppings before the chocolate sets.
Step 3: Create the Swirled Effect (Optional)
If you want colored swirls, divide the melted chocolate into 2-3 small bowls. Leave one white, tint one orange with gel food coloring, tint one purple.
Pour dollops of each color onto your prepared baking sheet in a random pattern. Don’t overthink the placement – random looks better than organized here.
Use a toothpick or knife to swirl the colors together in figure-eight motions. Do like 10-15 swirls and stop – over-swirling turns everything muddy brown instead of distinct colors.
If skipping the color swirls, just pour all the white chocolate onto the sheet and spread it into an even layer about ¼ inch thick.
Step 4: Add the Pretzels
While the chocolate is still wet, press broken pretzel pieces into the surface. Distribute them somewhat evenly – you want pretzel in every bite.
Press them down gently so they stick but don’t sink completely under the chocolate. You want them partially exposed for texture contrast.
Step 5: Add Remaining Toppings
Working quickly before the chocolate sets, sprinkle on your chosen toppings. M&Ms, candy corn, sprinkles, whatever you picked. Scatter them randomly – perfect placement looks staged and weird.
Press toppings down very gently with your hand so they stick to the chocolate. Don’t press hard or they’ll all sink.
If using sea salt, sprinkle it on last – just a light dusting across the whole surface.
Step 6: Let It Set
Refrigerate the baking sheet for about 30 minutes until the chocolate is completely hardened. You can leave it at room temperature but that takes 1-2 hours and who has that kind of patience.
Once hardened, the bark should feel firm to the touch and not leave chocolate on your finger when you poke it.
Step 7: Break and Serve
Remove from fridge and lift the entire sheet of bark off the pan using the parchment paper. Place on a cutting board.
Break into irregular pieces with your hands – rustic, uneven pieces look more artisan and handmade. Or use a knife to cut clean squares if you prefer neat edges.
Store in an airtight container at room temperature for up to 2 weeks. Don’t refrigerate long-term or condensation will make it sticky and weird.
This Halloween bark makes excellent gifts in clear cellophane bags tied with orange ribbon. Looks way fancier than the 20 minutes of effort it required.
Creative Variations Worth Trying
Dark Chocolate Pretzel Bark
Use dark chocolate instead of white chocolate. Skip the color swirls. Top with sea salt and crushed pretzels for sophisticated adult version. Less Halloween-y, more everyday elegant.
Peanut Butter Pretzel Bark
Mix ½ cup peanut butter into the melted white chocolate before pouring. Top with Reese’s Pieces and pretzel pieces. The peanut butter-chocolate-pretzel combo is undefeated.
Cookies and Cream Halloween Bark
Fold crushed Oreos into the white chocolate before spreading. Top with more Oreo pieces and Halloween sprinkles. Everything tastes better with Oreos, this is just facts.
Candy Corn Explosion Bark
Go all-in on candy corn. Mix it throughout the chocolate and cover the top with it. For candy corn lovers only – everyone else will judge you but who cares.
S’mores Halloween Bark
Add graham cracker pieces and mini marshmallows to the pretzel mix. Drizzle with milk chocolate after the white chocolate sets. S’mores in bark form.
Spooky Monster Bark
Cover the entire surface with candy eyeballs in various sizes. Makes it look genuinely creepy. Kids absolutely lose their minds over this version.

Halloween Pretzel Bark
Equipment
- large baking sheet
- Parchment paper or silicone mat
- Microwave-safe bowl
- Spatula
- toothpick or knife for swirling
Ingredients
- 16 oz white chocolate chips or melting wafers (about 2½ cups)
- 1 tbsp coconut oil or vegetable oil
- orange and purple gel food coloring (optional for swirling)
- 2 cups mini pretzel twists (broken into pieces)
- 1 cup pretzel sticks (optional)
- M&Ms in fall colors
- Reese’s Pieces or candy corn
- Halloween sprinkles or candy eyeballs
- mini chocolate chips or crushed Oreos (optional)
- flaky sea salt (optional)
Instructions
- Line a large baking sheet with parchment paper or a silicone baking mat. Ensure it’s smooth and wrinkle-free for clean bark.
- Melt white chocolate and coconut oil in a microwave-safe bowl using 30-second bursts, stirring each time, until smooth. Let cool 2 minutes.
- For color swirls, divide melted chocolate into bowls. Tint with orange and purple gel coloring. Pour onto pan in dollops and swirl with a toothpick.
- While chocolate is wet, sprinkle broken pretzels over the surface. Gently press them in so they stick.
- Add chosen toppings like M&Ms, Reese’s Pieces, candy corn, sprinkles, or candy eyes. Lightly press them in so they set into the chocolate.
- Refrigerate the tray for 30 minutes until chocolate is firm. Or leave at room temp for 1–2 hours until fully set.
- Lift bark from pan and place on a cutting board. Break into irregular pieces or cut into squares. Store in airtight container.
Notes
Frequently Asked Questions
My white chocolate seized and got grainy – what happened?
You overheated it or water got into it. Even one drop of water ruins chocolate. Use 30-second microwave bursts and make sure your bowl is completely dry. If it seizes, start over with fresh chocolate.
The toppings fell off when I broke the bark – why?
You didn’t press them into the chocolate while it was still wet, or the chocolate was too cool when you added toppings. Work quickly and press toppings gently into the wet chocolate so they adhere.
Can I make this Halloween bark ahead of time?
Yes. Make it up to 2 weeks ahead and store in an airtight container at room temperature. The pretzels might lose a tiny bit of crispness after a week but it’s still good. Don’t refrigerate long-term.
My color swirls turned into muddy brown – what did I do wrong?
You over-swirled. Do just 10-15 swirls maximum and stop. More than that blends the colors together into mud. Less is more with color swirling.
The bark won’t come off the pan – help?
You didn’t use parchment paper or your pan wasn’t lined properly. Next time make sure the entire surface is covered. For now, try putting the pan in the freezer for 10 minutes then peeling it off.
Can I use chocolate chips instead of melting wafers?
Yes, but add that tablespoon of coconut oil to help it melt smoothly. Melting wafers are formulated to melt easier, but chips work fine with a little oil added.