Look, I’m gonna be real with you – I used to be one of those people who thought galettes were just “lazy pies.” Boy, was I wrong :/ After my first bite of a huckleberry galette, I became a complete convert. This rustic, free-form tart captures everything magical about huckleberries without the fussy perfection that traditional pies demand.
You know what I love most about huckleberry galettes? They celebrate imperfection in the most delicious way possible. That slightly wonky, hand-folded crust? Pure charm. The way the huckleberry juices bubble and caramelize at the edges? Chef’s kiss perfection.
What Makes Huckleberry Galettes So Special?
Ever wondered why food bloggers can’t stop raving about galettes? It’s because they’re the ultimate lazy baker’s dream – and I mean that in the best possible way.
Unlike their high-maintenance pie cousins, huckleberry galettes don’t require perfect lattice work or pristine crimped edges. You literally roll out your dough, pile on the berries, fold up the edges, and bake. The rustic, imperfect look isn’t a bug – it’s a feature.
But here’s where huckleberries really shine. These little purple gems pack way more flavor punch than regular blueberries. Think of them as blueberries’ cooler, more complex cousin who traveled the world and came back with stories.
The Huckleberry Advantage
I’ve tried this recipe with different berries, and honestly? Nothing comes close to huckleberries:
• Intense flavor: Huckleberries have this incredible tart-sweet balance that doesn’t get mushy when baked • Natural pectin: They hold their shape beautifully in galettes • Color payoff: That deep purple hue makes your galette look absolutely stunning • Unique taste: You can’t find this flavor profile in any store-bought dessert

Choosing Your Huckleberries: Fresh vs. Frozen Showdown
Here’s where I get a bit opinionated. Fresh huckleberries? Absolutely amazing if you can get them. But let’s be honest – unless you live in the Pacific Northwest or have access to specialty markets, you’re probably going with frozen.
Fresh huckleberries give you that perfect texture and burst-in-your-mouth experience. They’re firmer, less likely to break down during mixing, and honestly just taste more vibrant.
Frozen huckleberries, on the other hand, are way more accessible and surprisingly good. Pro tip I learned the hard way: don’t thaw them first! Toss them frozen right into your galette filling. This prevents them from bleeding too much color and keeps them from turning into purple mush.
The Perfect Huckleberry Galette Crust
Can we talk about crust for a hot second? I’ve tried every shortcut under the sun – store-bought, pre-made, you name it. None of them come close to a simple homemade pastry dough.
My Go-To Galette Crust Recipe
The beauty of galette dough lies in its simplicity. You want something that’s:
• Buttery and flaky: Cold butter creates those perfect layers • Sturdy enough: It needs to hold up to juicy huckleberries • Forgiving: Because we’re going for rustic, not perfect
I use a basic ratio: 1¼ cups flour, ½ cup cold butter, a pinch of salt, and just enough ice water to bring it together. The key? Keep everything cold and don’t overwork the dough.
Building Your Huckleberry Galette: Step by Step
Ready to get your hands dirty? This is where the magic happens.
The Filling Formula
For a perfect huckleberry galette, I stick to this winning combination:
• 3 cups fresh or frozen huckleberries • ⅓ cup sugar (adjust based on your berries’ sweetness) • 2 tablespoons cornstarch or flour • 1 tablespoon lemon juice • Pinch of salt • Optional: ½ teaspoon vanilla or almond extract
Mix these gently – you want the berries coated but not bruised. The cornstarch prevents your galette from turning into a soggy mess, trust me on this one.
Assembly Time
Roll your dough into a rough 12-inch circle on parchment paper. Don’t stress about perfection – wonky edges add character!
Pile your huckleberry mixture in the center, leaving about 3 inches of border. Here’s where you channel your inner artist: fold those edges up and over the filling, pleating as you go. Some overlap? Good. Uneven folds? Even better.
Baking Secrets for Galette Success
Temperature control makes or breaks a huckleberry galette. I learned this after several soggy-bottom disasters (we don’t talk about those dark times).
Start hot – 425°F for the first 20 minutes. This sets the crust and prevents sogginess. Then drop to 375°F for another 25-30 minutes until the crust turns golden brown and the filling bubbles enthusiastically.
Pro Tips I Wish Someone Had Told Me
• Brush the crust with beaten egg and sprinkle with coarse sugar for that bakery look • Use parchment paper – it makes cleanup a breeze and prevents sticking • Let it cool for at least 30 minutes before slicing (I know, the torture is real)
Flavor Variations That’ll Blow Your Mind
Don’t get me wrong – classic huckleberry galette is perfection. But once you master the basic recipe, why not get creative?
My Favorite Combo Experiments
Huckleberry-Lemon: Add lemon zest to your filling and a drizzle of lemon glaze after baking. The citrus brightens those deep berry flavors like crazy.
Huckleberry-Almond: A touch of almond extract in the filling plus sliced almonds sprinkled on top. This combo feels fancy without trying too hard.
Spiced Huckleberry: A pinch of cinnamon and cardamom transforms this into a fall-worthy dessert that’ll make your kitchen smell incredible.
Serving and Storage: Making It Last
A warm huckleberry galette with vanilla ice cream? That’s peak dessert right there. But here’s the thing – this galette actually improves after sitting for a day. Those flavors meld together beautifully.
Store it covered at room temperature for up to 3 days, or wrap and freeze for up to 3 months. FYI, frozen galette slices reheat beautifully in a 350°F oven for about 10 minutes.
When Huckleberries Play Hard to Get
Let’s address the elephant in the room – huckleberries aren’t exactly available at every grocery store. What do you do when you’re craving that huckleberry galette magic but can’t find the star ingredient?
Blueberries work as a substitute, though you’ll miss that distinctive tartness. Blackberries actually come closer to the flavor profile, especially if you mix in a handful of cranberries for extra tang.
Online specialty retailers often stock frozen huckleberries, and honestly? They’re worth ordering for special occasions.
Why Galettes Win Over Traditional Pies
I used to be a die-hard pie person until galettes showed me the light. Here’s why I’ve switched teams:
• Less time-consuming: No blind baking, no perfectly crimped edges • More forgiving: Imperfections look intentional • Better fruit-to-crust ratio: You taste more of those gorgeous huckleberries • Easier serving: Cut into wedges like pizza – no special pie server needed
The Final Verdict
Huckleberry galette represents everything I love about rustic baking. It’s unpretentious, delicious, and celebrates the natural beauty of simple ingredients. You don’t need perfect technique or fancy equipment – just good ingredients and a willingness to embrace the wonderfully imperfect.
Next time you’re torn between attempting a perfect pie or trying something new, give huckleberry galette a shot. Your taste buds (and your stress levels) will thank you. Plus, you’ll have a gorgeous, Instagram-worthy dessert that looks like you spent hours perfecting it – when really, you just rolled with the rustic flow
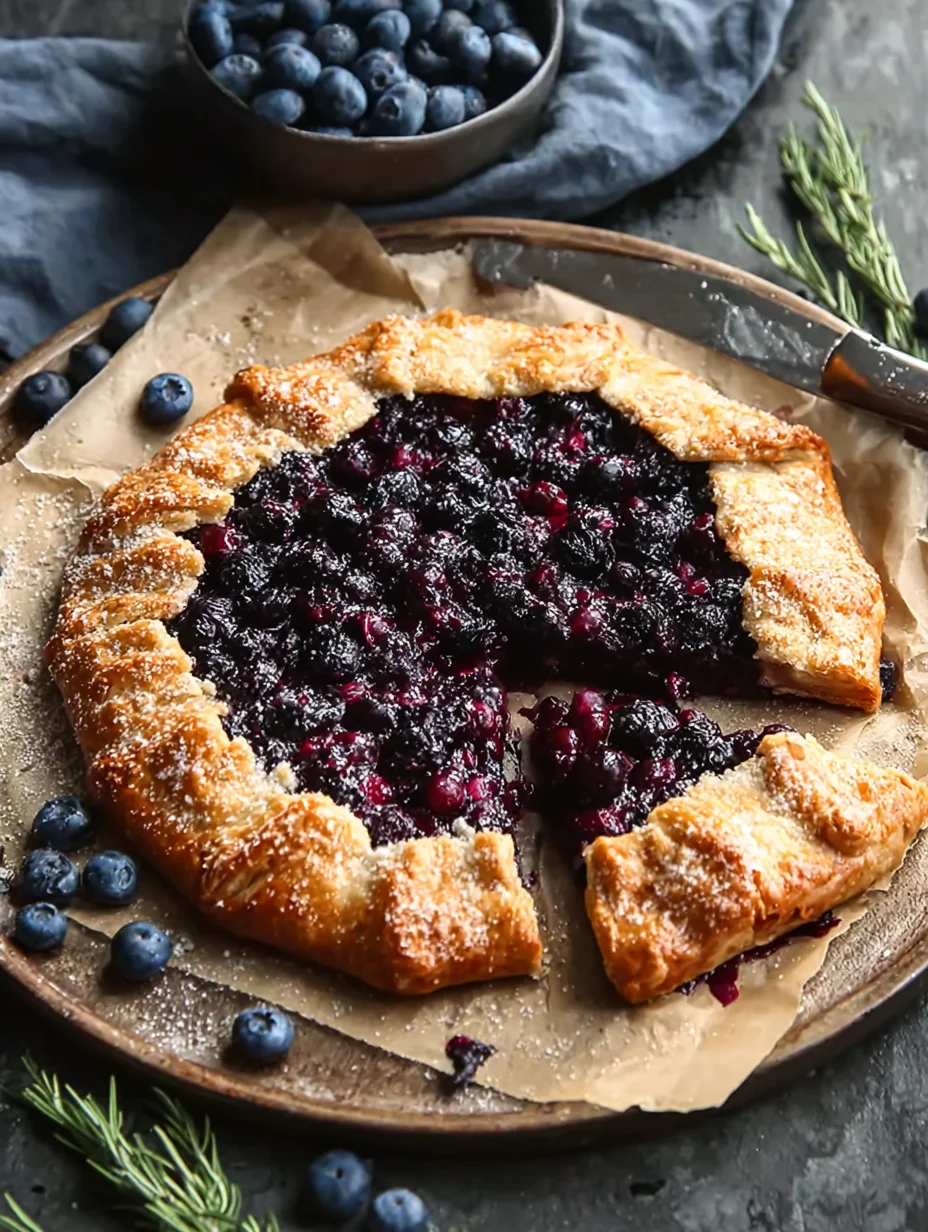
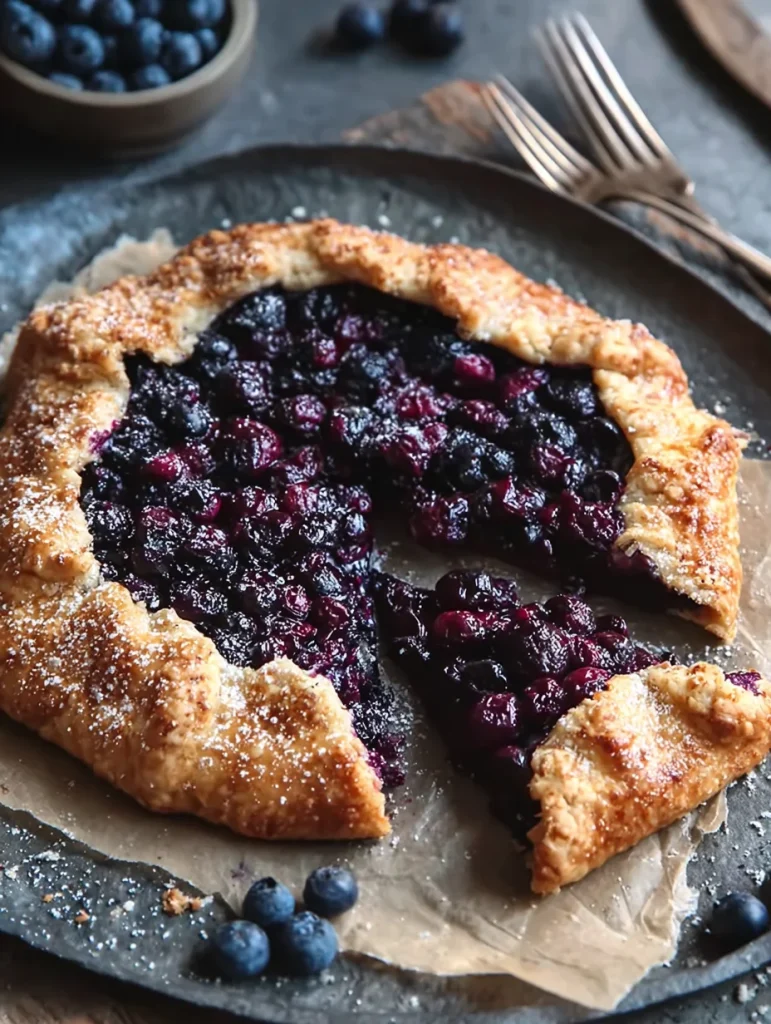
Rustic Huckleberry Galette
Equipment
- Mixing bowls
- Rolling Pin
- Parchment paper
- Baking sheet
- Pastry brush
Ingredients
- 1¼ cups all-purpose flour
- ½ cup cold unsalted butter, cubed
- ¼ tsp salt
- 3–4 tbsp ice water
- 3 cups fresh or frozen huckleberries
- ⅓ cup granulated sugar (adjust to taste)
- 2 tbsp cornstarch or flour
- 1 tbsp lemon juice
- 1 pinch salt
- ½ tsp vanilla or almond extract (optional)
- 1 beaten egg (for crust wash)
- 1 tbsp coarse sugar (for sprinkling)
Instructions
- In a bowl, combine flour and salt. Cut in cold butter until mixture resembles coarse crumbs. Add ice water, 1 tbsp at a time, just until dough holds together. Shape into a disk, wrap, and chill 30 minutes.
- In a large bowl, gently toss huckleberries with sugar, cornstarch, lemon juice, salt, and optional extract. Keep berries whole, avoid overmixing.
- Roll chilled dough into a 12-inch circle on parchment. Pile berry filling in the center, leaving a 3-inch border. Fold edges up and over, pleating as needed.
- Brush folded edges with beaten egg and sprinkle with coarse sugar for a golden, bakery-style finish.
- Bake at 425°F (220°C) for 20 minutes, then reduce to 375°F (190°C) and bake 25–30 minutes more, until crust is golden and filling is bubbling.
- Let cool at least 30 minutes before slicing. Serve warm or at room temperature, ideally with vanilla ice cream.