You know what bugs me about most Halloween baking? Everything either requires a culinary degree to execute or tastes like sweetened cardboard wrapped in orange frosting. I’ve been there – spent three hours on elaborate pumpkin-shaped cookies only to watch kids take one bite and abandon them on paper plates.
That’s why these Jack-O-Lantern Hand Pies hit different. They’re portable, they actually taste good, and honestly? They’re way easier than they look. I discovered this recipe two years ago when I needed something for my nephew’s school party that wouldn’t melt, crumble, or require forks. These little guys survived a 20-minute car ride, an hour sitting on a classroom table, and still had kids coming back for seconds.
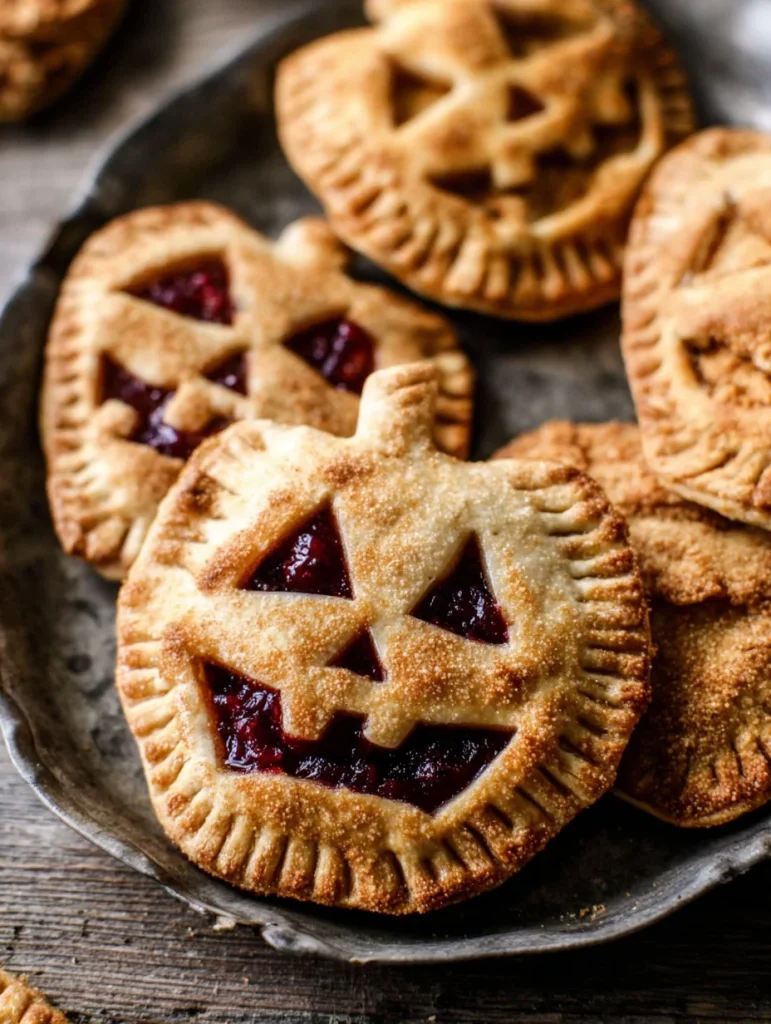
The flaky pastry crust paired with spiced pumpkin filling gives you all those fall flavors without the “trying too hard” vibe. Plus, you can make the scary jack-o-lantern faces as simple or elaborate as your artistic skills allow – no judgment here.
Why These Hand Pies Will Save Your Halloween
Ever volunteered to bring treats somewhere and immediately regretted it? Yeah, me too. That’s the beauty of jack-o-lantern hand pies – they solve about five different Halloween dessert problems at once.
I’ll never forget making these for my sister’s Halloween party. She’s got that friend group where everyone tries to out-do each other with fancy Pinterest creations. I showed up with a tray of these hand pies, and people genuinely thought I’d bought them from some fancy bakery. The secret? They’re ridiculously simple but look impressive.
Here’s why you’ll actually want to make these:
- Portable and mess-free (no plates or forks needed)
- The pumpkin filling tastes like actual pumpkin pie, not artificial flavoring
- You can prep and freeze them ahead of time
- Kids can help decorate the faces
- They’re substantial enough to be dessert but not so heavy you feel gross after eating one
- Store-bought puff pastry makes them legitimately easy
And let’s be honest – anything you can make ahead and freeze is basically a gift to your future stressed-out self. FYI, I’ve served these warm, room temperature, and even slightly chilled, and they’re good every single way.
What You Need for These Halloween Hand Pies
For the Pastry
You’ve got options here, and I’m not gonna pretend homemade is always better.
Store-Bought Route (No Shame):
- 2 boxes of puff pastry sheets, thawed
- Or pie crust sheets if you prefer a more traditional texture
Homemade Route (If You’re Feeling It):
- All-purpose flour (2½ cups)
- Cold butter, cubed (1 cup – and I mean cold, like straight from the fridge)
- Ice water (about ½ cup)
- Salt (1 teaspoon)
- Sugar (1 tablespoon for a hint of sweetness)
Here’s the thing – store-bought puff pastry is completely acceptable for this recipe. I use it 90% of the time because life’s too short to make puff pastry from scratch unless you’re really into that. Homemade pie crust gives you more control over thickness and flavor, but honestly? Most people can’t tell the difference once these are baked and decorated.

For the Pumpkin Filling
This is where you don’t cut corners. The filling makes or breaks these hand pies.
- Pure pumpkin puree – not pumpkin pie filling, just plain pumpkin (15 oz can)
- Brown sugar (½ cup, packed)
- Heavy cream or evaporated milk (¼ cup)
- Egg yolk (1, saves the white for egg wash)
- Cinnamon (1½ teaspoons)
- Ginger (½ teaspoon – fresh grated is amazing if you have it)
- Nutmeg (¼ teaspoon)
- Cloves (just a pinch, don’t overdo it)
- Salt (¼ teaspoon)
- Cornstarch (1 tablespoon – this thickens it so you don’t get soggy bottoms)
Why these ingredients matter: The cornstarch is crucial here. Without it, your filling stays too wet and makes the pastry soggy. The egg yolk adds richness and helps bind everything. And those spices? That’s literally what makes it taste like fall instead of just sweet pumpkin mush.
Substitutions that work:
- Dairy-free? Use coconut cream instead of heavy cream
- No brown sugar? Mix white sugar with a bit of molasses
- Can’t find pumpkin puree? Sweet potato puree works surprisingly well
For Assembly and Decoration
- Egg white (beaten with 1 tablespoon water for egg wash)
- Orange food coloring (gel works better than liquid)
- Black decorating gel or melted chocolate
- Extra flour for rolling
- Parchment paper (saves your sanity during cleanup)
Pro tip: Get the black decorating gel in a tube with a fine tip. Trying to pipe melted chocolate for tiny jack-o-lantern faces will test your patience :/
How to Make Jack-O-Lantern Hand Pies
Step 1: Make That Filling
Combine your pumpkin puree, brown sugar, cream, egg yolk, all the spices, salt, and cornstarch in a medium bowl. Mix it until completely smooth – no lumps allowed. Taste it (yes, there’s raw egg, but one tiny taste won’t hurt you).
It should taste slightly sweeter and spicier than you think it needs to be because baking mellows flavors. If it tastes bland now, add more cinnamon or a bit more brown sugar. Set this aside while you deal with the pastry.
The filling should be thick enough that when you scoop it with a spoon, it holds its shape. Too runny? Add another teaspoon of cornstarch and mix well.
Step 2: Prep Your Pastry
If using store-bought, let your puff pastry thaw according to package directions – usually about 40 minutes at room temperature. Don’t microwave it to speed things up, you’ll end up with melted butter spots and a weird texture.
Roll out your pastry on a lightly floured surface until it’s about ⅛ inch thick. You want it thin enough to bake through but thick enough to hold the filling without tearing.
Cut out circles using a 4-inch round cutter (or a bowl if you don’t have one – we’re not fancy here). You should get about 8-10 circles per pastry sheet depending on how efficiently you arrange them. Re-roll scraps once for more circles.
Step 3: Fill and Seal These Bad Boys
Place circles on a parchment-lined baking sheet. Spoon about 1½ tablespoons of filling onto the center of half your circles, leaving a ½-inch border around the edges. Don’t overfill – I learned this the hard way when filling exploded out the sides during baking.
Brush the edges with egg wash (this acts like glue). Place a second circle on top of each filled circle. Press the edges together firmly, then use a fork to crimp all around the edge. This seals them and looks pretty, so it’s a win-win.
Critical step: Cut 2-3 small slits in the top of each pie to let steam escape. Skip this and they’ll puff up like balloons and potentially burst. Not cute.
Step 4: Add the Jack-O-Lantern Effect
Brush the tops with egg wash. Mix a few drops of orange gel food coloring into the remaining egg wash and brush that over the pies for that pumpkin orange color. You might need two coats to get it vibrant enough.
Bake at 400°F for 18-22 minutes until golden brown and puffed. The edges should be crispy and the tops should have some color – pale hand pies look sad.
Let them cool for at least 15 minutes before decorating. Hot pastry plus chocolate decoration equals a melted mess.
Step 5: Draw Those Spooky Faces
Here’s the fun part. Use black decorating gel or melted chocolate in a piping bag to draw jack-o-lantern faces on each pie. Triangle eyes, triangle nose, jagged smile – classic pumpkin face.
Get creative here. Make some happy, some scary, some goofy. I like making at least one with a surprised expression because it makes kids laugh. You can also let kids do this part if you’re brave and don’t mind some abstract interpretations of jack-o-lantern faces 🙂
Creative Variations Worth Trying
Apple Cinnamon Jack-O-Lanterns
Swap pumpkin filling for diced apples tossed with cinnamon, sugar, and a bit of cornstarch. More traditional fall flavor, still works with the orange decoration and spooky faces.
Chocolate-Hazelnut Surprise Pies
Use Nutella or chocolate-hazelnut spread as filling instead of pumpkin. Make the faces extra silly to match the playful chocolate flavor. Kids go absolutely crazy for these.
Cream Cheese Pumpkin Hand Pies
Beat 4 oz cream cheese into your pumpkin filling for a cheesecake-style version. Richer, tangier, honestly pretty amazing. This was an accident I made last year that turned into my preferred version.
Savory Pumpkin Hand Pies
Skip the sugar and spices. Mix pumpkin with sautéed onions, sage, and parmesan for a savory appetizer version. Still decorate with faces because why not? These are surprisingly good.
Mini Jack-O-Lantern Bites
Cut smaller 2-inch circles for bite-sized versions. Perfect for parties where people want to try multiple desserts. Adjust baking time down to 12-15 minutes.
Maple Pecan Pumpkin Pies
Add 2 tablespoons maple syrup to the filling and sprinkle chopped pecans on top before baking. The maple complements pumpkin so well – honestly might be better than the original, IMO.
Frequently Asked Questions
How long do jack-o-lantern hand pies stay fresh?
Store them in an airtight container at room temperature for up to 2 days. They’re best eaten the first day when the pastry is still crisp, but they don’t get terrible on day two. Refrigerate them if keeping longer than 2 days – they’ll last 4-5 days chilled. Reheat in the oven at 350°F for 5 minutes to crisp them back up.
Can I freeze these hand pies?
Absolutely. Freeze them before or after baking – both work. Unbaked is better because the pastry stays flakier. Assemble completely, place on a baking sheet to freeze solid, then transfer to freezer bags. Bake from frozen, adding 5-7 minutes to the baking time. Already baked ones can be frozen too – just reheat from frozen at 350°F for 10-12 minutes.
My filling leaked out during baking – what did I do wrong?
You probably overfilled them or didn’t seal the edges well enough. Use less filling (about 1 tablespoon instead of 1½) and make sure you crimp those edges firmly with a fork. Also double-check you’re cutting steam vents in the top – pressure buildup can blow out the seams.
Can I make these with canned pumpkin pie filling instead of plain pumpkin?
You can, but they’ll be sweeter and the spice balance might be off. If you use pie filling, skip the sugar and spices in the recipe – the filling already has them. You’ll still need to add the cornstarch and egg yolk for proper consistency.
What’s the best way to reheat leftover hand pies?
Oven or toaster oven at 350°F for 5-7 minutes. Microwave makes the pastry soggy and sad. If you’re at work or somewhere without an oven, room temperature is honestly fine – they’re still good cold.
Do I have to use orange food coloring?
Nope. The pies will be golden brown without it and still taste identical. The orange coloring just makes them more obviously jack-o-lantern themed. If you skip it, maybe dust them with orange sanding sugar before baking for a subtle pumpkin hint.
Can kids help make these jack-o-lantern hand pies?
Definitely. Kids can help fill the pies (with supervision), crimp the edges with a fork, and definitely draw the faces. The face-drawing part is actually perfect for kids because wonky faces look more charming and handmade anyway. Just keep them away from the hot oven and sharp cutting tools.

Jack-O-Lantern Hand Pies
Equipment
- Mixing bowl
- Rolling Pin
- 4-inch round cutter or bowl
- Baking sheet
- fork (for sealing edges)
- piping bag or squeeze bottle (optional)
- Parchment paper
Ingredients
- 2 boxes puff pastry sheets, thawed
- 15 oz pure pumpkin puree (not pumpkin pie filling)
- ½ cup brown sugar, packed
- ¼ cup heavy cream or evaporated milk
- 1 egg yolk (reserve white for egg wash)
- 1½ tsp cinnamon
- ½ tsp ginger
- ¼ tsp nutmeg
- pinch cloves
- ¼ tsp salt
- 1 tbsp cornstarch
- 1 egg white (for egg wash)
- 1 tbsp water
- orange food coloring gel (optional)
- black decorating gel or melted chocolate (for faces)
- flour (for rolling surface)
- parchment paper (for baking sheet)
Instructions
- In a bowl, combine pumpkin puree, brown sugar, cream, egg yolk, cinnamon, ginger, nutmeg, cloves, salt, and cornstarch. Mix until smooth and thick. Taste and adjust seasoning. Set aside.
- Let pastry thaw per box instructions. Roll out to ⅛-inch thick on floured surface. Cut 4-inch circles. You should get 8–10 circles per sheet.
- Place half the circles on parchment-lined sheet. Add 1½ tbsp filling in center. Brush edges with egg wash. Top with another circle. Seal edges with fork and cut 2–3 slits on top to vent.
- Brush pies with egg wash. For orange effect, mix orange gel into egg wash and brush on. Bake at 400°F for 18–22 minutes until golden brown. Cool 15 minutes before decorating.
- Use black decorating gel or melted chocolate to draw jack-o-lantern faces. Make classic triangles or get creative. Let kids help!
Notes
Final Thoughts on These Hand Pies
I’ve brought these jack-o-lantern hand pies to probably a dozen Halloween events over the past few years, and they’ve never once been the dessert that gets left behind. You know what I mean – there’s always that one treat that’s still sitting there at the end of the night, looking sad and rejected. These aren’t that treat.
What makes them work is that they balance convenience with actual quality. They’re not trying to be some elaborate showstopper that requires fondant skills and three days of prep. They’re just really solid hand pies with a fun seasonal twist.
My favorite thing? Watching people bite into them expecting some dry, mediocre pastry situation and then getting hit with that creamy spiced pumpkin filling. The surprise factor never gets old.
Make them your own way. Add more spices if you’re into that. Make the faces super creepy or keep them friendly. Use homemade pastry if you’re feeling ambitious or lean into that store-bought convenience. Either way, you’re ending up with hand-held pumpkin pie that you can eat while walking around a Halloween party, which is honestly the dream.
Now go make some jack-o-lantern hand pies and watch them disappear faster than candy corn at a kid’s birthday party. Your Halloween dessert game just got significantly better.