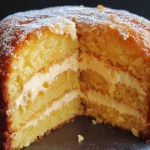
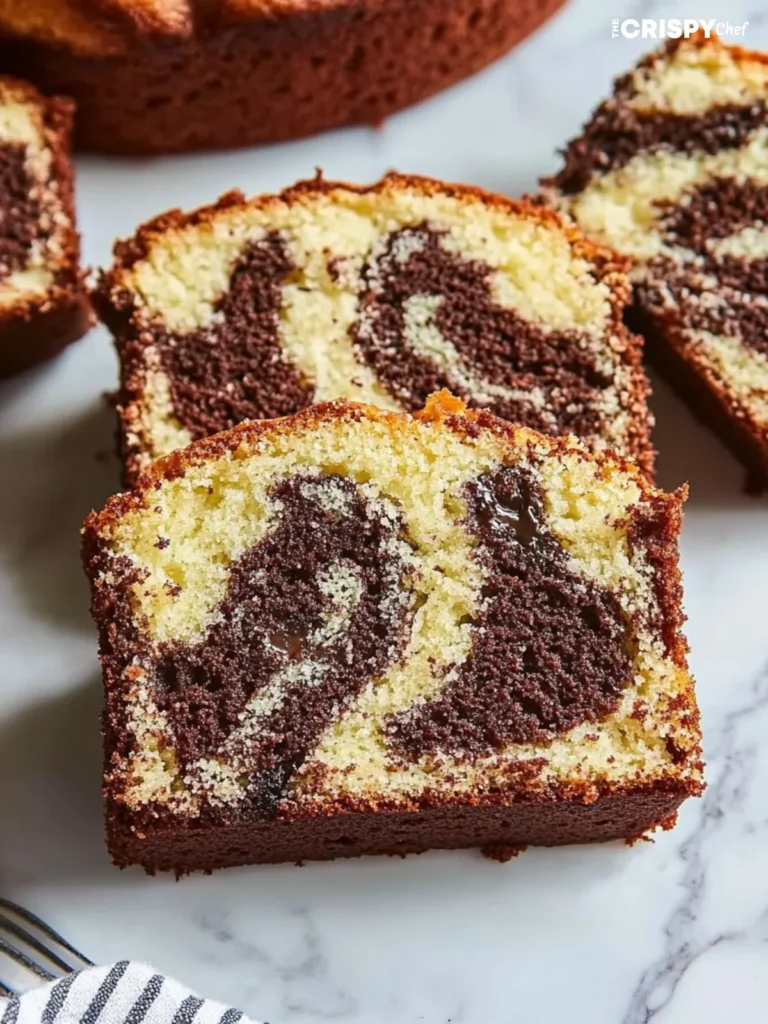
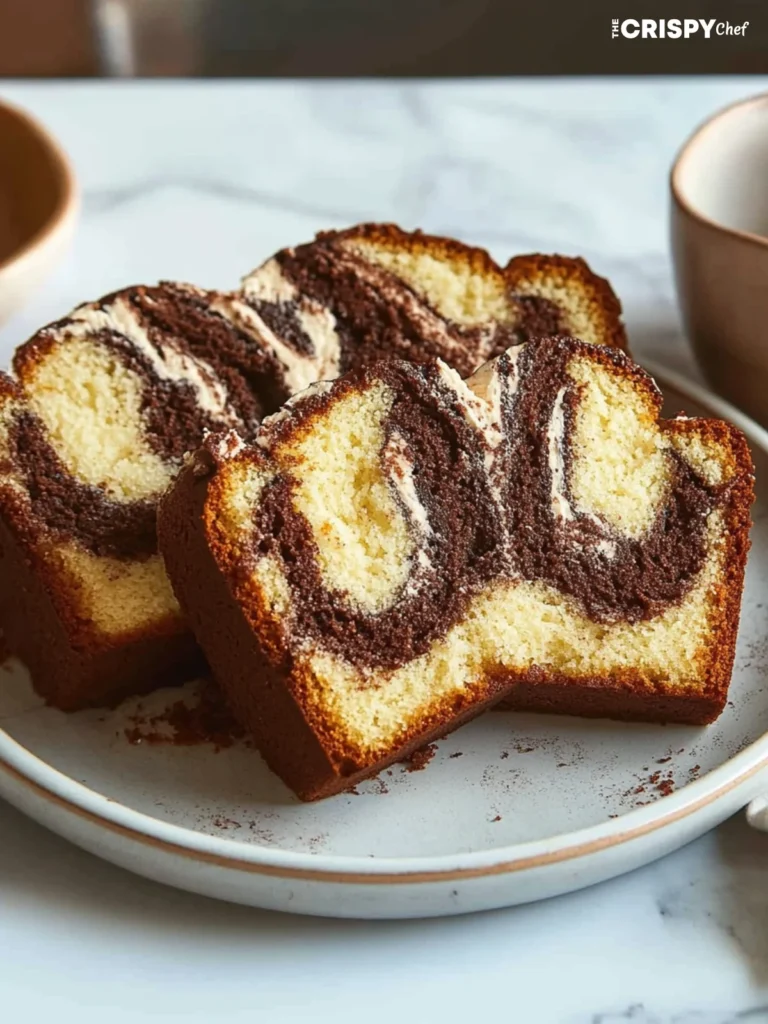
Want a dessert that looks amazing and tastes even better? Making a marble cake at home can boost your baking skills. It’s a classic treat with a mix of vanilla and chocolate that’s perfect for any event.
A marble cake is more than just a dessert. It’s a masterpiece that combines two cake batters into one. Whether you’re new to baking or have years of experience, learning to make a marble cake is rewarding. It adds beauty and joy to your kitchen.
Key Takeaways
- Master the art of creating beautiful cake swirls
- Learn professional baking techniques
- Understand ingredient interactions
- Create a visually stunning dessert
- Develop confidence in home baking skills
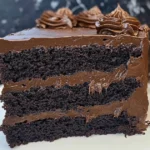
More Cake ideas
Understanding the Magic Behind Marble Cake
Marble cake is a mix of chocolate and vanilla that has won American hearts for years. It turns simple baking into a creative art form. This dessert combines two classic tastes into one stunning treat.
The story of marble cake starts with home bakers looking to improve traditional recipes. They mixed different batters to boost flavor and create beautiful desserts.
The History of Marble Cake in American Baking
Marble cake first appeared in American kitchens in the late 1800s. It was inspired by European baking. German immigrants brought new techniques that turned simple cakes into stunning swirled desserts.
- Originated in German-American communities
- Became popular during community gatherings
- Symbolized culinary creativity and skill
Why Marbling Creates Unique Patterns
The magic of marble cake is in its swirling technique. Mixing chocolate and vanilla batters creates amazing patterns. Your skill in mixing makes each cake a unique piece of art.
Knowing the science of marbling helps make marble cakes that look as good as they taste. Each swirl is a story of creativity and passion.
Essential Ingredients for a Classic Marble Cake
Creating a great marble cake starts with the right ingredients. You need to pick the best ones for rich flavors and a beautiful marbled look.
Here are the key ingredients for a tasty marble cake:
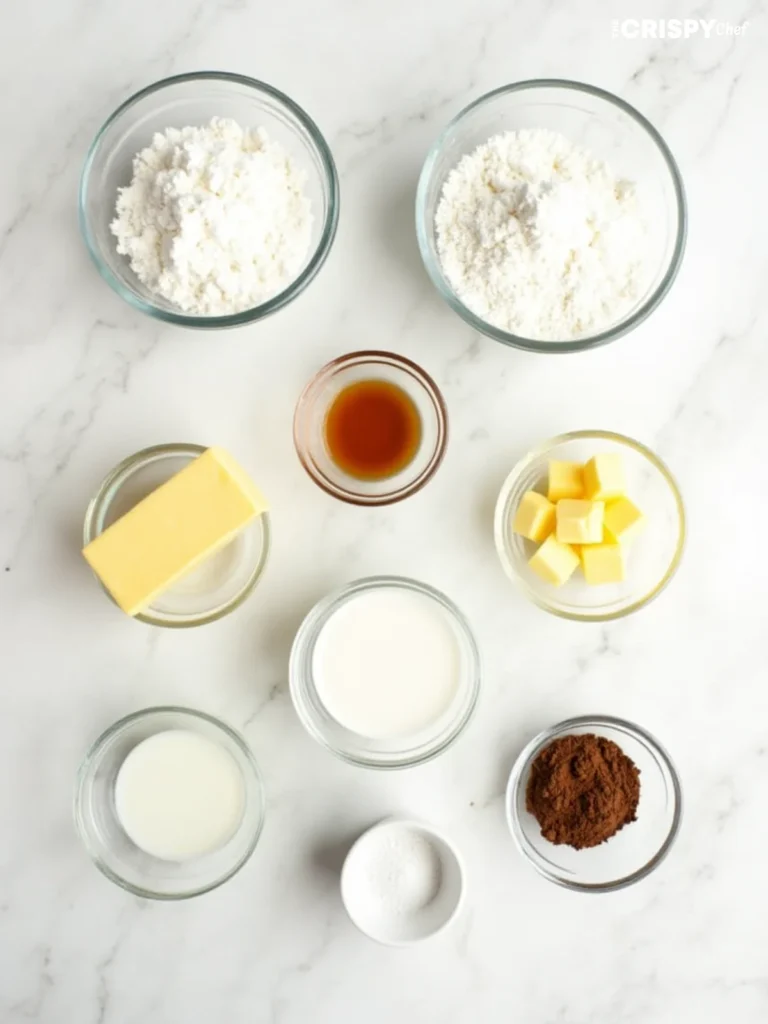
- All-purpose flour – The base of your cake’s structure
- Granulated sugar – Adds sweetness and helps with caramelization
- Unsalted butter – Gives a smooth, rich texture
- Large eggs – Binds ingredients and adds moisture
- Vanilla extract – Boosts the overall flavor
- Baking powder – Helps the cake rise and become light
- Salt – Balances sweetness and enhances flavors
The secret to a great marble cake is in the chocolate. You’ll need:
- High-quality cocoa powder
- Dark chocolate (optional for deeper flavor)
- Milk or buttermilk for moisture
Pro tip: Use room temperature ingredients for smooth mixing and texture. Fresh, top-quality ingredients make a big difference in taste and look.
Remember, baking is both an art and a science – quality matters!
Choose fresh, name-brand ingredients for the best marble cake. Organic options can make the flavor even better.
Required Kitchen Tools and Equipment
Before you start making a marble bundt cake or a classic marble cake, you need the right tools. Having the right equipment is key to a successful baking experience. It ensures your cake turns out perfectly.
To make a marble cake, you’ll need a variety of tools. The right tools make the baking process easier. They help you get that beautiful marbled look and a stunning cake.
Essential Mixing Tools and Bowls
- Stand mixer or hand mixer
- Large mixing bowls (ceramic or stainless steel)
- Rubber spatulas for folding batters
- Measuring cups and spoons
- Whisk for combining dry ingredients
Baking Pans and Temperature Tools
- 9-inch round cake pan or marble bundt cake pan
- Parchment paper for easy cake removal
- Oven thermometer for precise temperature
- Cooling rack
- Offset spatula for smooth batter spreading
Additional Helpful Equipment
Some tools are optional but can make baking better:
- Kitchen scale for precise ingredient measurements
- Piping bags for decorative touches
- Bench scraper for clean mixing
- Digital timer for accurate baking
Quality tools are worth the investment. They help you make a marble cake that looks like it was made by a pro. Your family and friends will be impressed.
Choosing the Right Type of Chocolate
Choosing the right chocolate is key to making a delicious marble cake. The type of chocolate you pick greatly affects the taste and texture of your dessert. Not all chocolates are the same, and knowing the differences can make your marble cake truly special.
When making a marble cake, you have several chocolate options:
- Dark Chocolate: Offers rich, intense flavor with less sweetness
- Milk Chocolate: Provides creamy, sweeter notes ideal for softer palates
- Semi-Sweet Chocolate: Strikes a perfect balance between bitter and sweet
Professional bakers say using high-quality chocolate is essential for the best marble cake. The chocolate you choose will make beautiful swirls in the vanilla cake, turning a simple dessert into a stunning treat.
You can mix and match chocolate and vanilla to find your favorite flavor. Some like to use cocoa powder for its strong taste. Others prefer melted chocolate for a smoother texture.
Pro tip: Always choose chocolate with at least 60% cocoa content for the most robust flavor in your marble cake.
Remember, the quality of chocolate affects your marble cake’s taste and look. Spend on good chocolate, and your baking will stand out!

Preparing Your Workspace and Ingredients
Creating a marble cake is more than just mixing ingredients. It needs precision and careful setup. Your workspace and how you prepare your ingredients are key to a delicious, swirly dessert.
- Clear your countertop space completely
- Gather all ingredients and tools in advance
- Read the entire recipe before beginning
- Ensure your kitchen is clean and organized
Room Temperature Guidelines
Temperature is important when making marble cake. Eggs, butter, and milk work best at room temperature. Let them sit for 30-45 minutes before mixing.
| Ingredient | Ideal Temperature | Preparation Time |
|---|---|---|
| Butter | 65-70°F | 30-45 minutes |
| Eggs | 60-70°F | 20-30 minutes |
| Milk | 70°F | 15-20 minutes |
Proper Ingredient Measurements
Getting the measurements right is key to a perfect marble cake. Use standard measuring cups and spoons for dry and liquid ingredients. For dry ingredients, gently spoon into the measuring cup and level with a straight edge. Liquid ingredients should be measured at eye level in clear measuring cups.
- Use digital kitchen scale for precise weights
- Sift dry ingredients to remove lumps
- Measure ingredients before mixing
- Don’t pack ingredients unless specifically instructed
Mastering the Basic Marble Cake Batter
Making the perfect marble cake batter needs precision and knowledge of baking science. Start with top-notch ingredients and the right mixing methods. Aim for a batter that’s smooth and well-blended for a light, moist cake.
The creaming method is key for the right cake texture. Begin by beating butter and sugar until it’s light and fluffy. This step adds air, making your cake tender.
- Use room temperature butter for optimal mixing
- Beat butter and sugar for 3-5 minutes until pale and creamy
- Add eggs one at a time, fully incorporating each
- Gradually mix in dry ingredients
Knowing how ingredients work together is crucial. Flour gives structure, and eggs bind everything. The way you mix can greatly affect your cake’s texture.
| Ingredient | Purpose | Mixing Tip |
|---|---|---|
| Butter | Creates richness | Room temperature, creamed thoroughly |
| Sugar | Adds sweetness | Mix until light and fluffy |
| Eggs | Provides structure | Add one at a time |
| Flour | Gives cake body | Fold gently to prevent overmixing |
Pro tip: Don’t overmix your batter. Too much mixing can make the cake tough. Mix just until everything is combined for the best texture.
Look for signs while mixing. A great marble cake batter should be smooth, creamy, and lump-free. It should be thick but still pour slowly when you lift it with a spatula.
Creating the Perfect Chocolate Swirl Mixture
Making the perfect chocolate swirl is key to a tasty marble cake. The right mix can turn a simple vanilla cake into a beautiful marble delight. It pleases both the eyes and taste buds.
When mixing your chocolate and vanilla cake, you have a choice. Should you use cocoa powder or melted chocolate?
Cocoa Powder vs Melted Chocolate
Both options have their benefits for your marble cake:
- Cocoa Powder:
- It gives a strong chocolate taste
- It’s easy to mix into the batter
- It keeps the texture consistent
- Melted Chocolate:
- It offers a richer, more luxurious flavor
- It feels smoother in your mouth
- It adds deeper chocolate flavors
Achieving the Right Consistency
To get a perfect marble cake, balance your chocolate swirl. Strive for a mix that’s not too thick or too thin. The chocolate should blend well with the vanilla batter. It should not sink or make heavy streaks.
“The art of marbling is all about creating beautiful, delicate swirls that dance through your cake.” – Professional Baker
Pro tip: If using cocoa powder, sift it well to avoid lumps. When using melted chocolate, cool it a bit first. This prevents cooking the eggs in your batter.
Step-by-Step Marbling Techniques
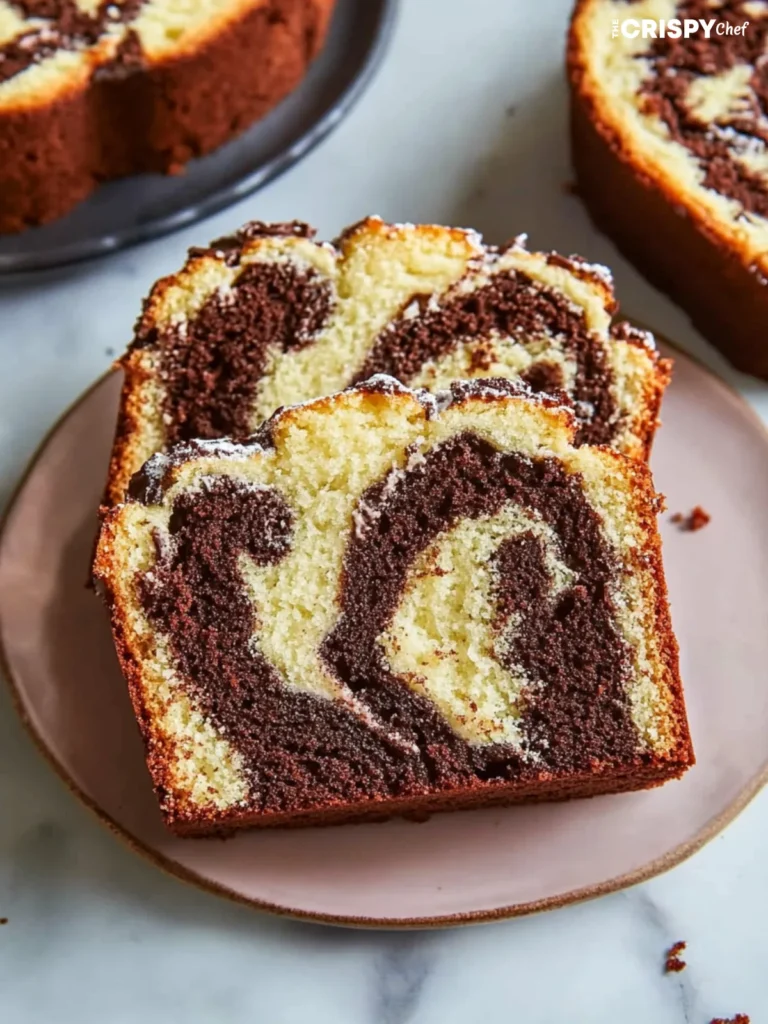
Creating a stunning marble cake is all about mastering the art of swirling. When you learn how to make marble cake, the marbling technique can turn an ordinary dessert into a visual masterpiece. The secret is to blend your batters without overmixing.
Here are several expert techniques for achieving beautiful marble cake patterns:
- Layering Method: Alternately pour vanilla and chocolate batters into the pan
- Zigzag Swirl: Use a knife or skewer to create intricate zigzag patterns
- Figure-Eight Technique: Gently draw figure-eight shapes through the batter
Professional bakers recommend these specific approaches for marble cake perfection:
| Technique | Difficulty Level | Visual Result |
|---|---|---|
| Vertical Swirling | Easy | Soft, gentle waves |
| Deep Knife Marbling | Intermediate | Bold, dramatic patterns |
| Concentric Circle Method | Advanced | Sophisticated, refined design |
Remember, practice makes perfect when creating your marble cake. Don’t be afraid to try different swirling techniques to find your unique style. Each marble cake will be slightly different, making your dessert truly one-of-a-kind.
Optimal Baking Temperature and Timing
Baking the perfect marble cake recipe needs precision and knowing how your oven works. The right temperature and timing are key. They can turn a good cake into a great one.
To bake the cake just right, pay attention to a few important things. Your oven’s temperature and where you place the rack are crucial. They help make your marble cake even and tasty.
Rack Position for Even Heat Distribution
Choosing the right rack spot is important. It helps your cake cook evenly. Here’s what to do:
- Put the rack in the oven’s center
- Don’t place the cake too near the top or bottom heating elements
- Make sure there’s at least 2 inches of space around the cake pan
Determining Perfect Baking Temperature
| Cake Type | Temperature | Baking Time |
|---|---|---|
| Standard Marble Cake | 350°F (175°C) | 35-45 minutes |
| Smaller Cake Variations | 325°F (165°C) | 25-35 minutes |
Testing Your Cake for Doneness
Here are ways to check if your marble cake is done:
- Stick a toothpick into the cake’s center
- Look for clean release with few crumbs
- Gently press the cake’s surface – it should spring back
- Check for golden-brown edges that are slightly away from the pan sides
Keep in mind, every oven is different. Your marble cake might need a little temperature tweak, depending on your oven.
Troubleshooting Common Marble Cake Problems
Baking the perfect marble-cake can be tricky. Even experienced bakers face challenges. Knowing the common problems helps you make a delicious marble-cake every time.
When learning how to make marble cake, you might face several common problems. Let’s explore the most frequent challenges and their solutions:
- Dry Texture
- Cause: Overmixing batter or overbaking
- Solution: Check cake early, use room temperature ingredients
- Uneven Marbling
- Cause: Improper swirling technique
- Solution: Use a sharp knife or toothpick for gentle swirling
- Cake Sinking
- Cause: Incorrect oven temperature
- Solution: Use an oven thermometer, preheat completely
For a successful marble-cake, practice is key. Start with high-quality ingredients and follow the recipe carefully. Pay attention to mixing techniques and baking times to achieve that perfect swirled pattern.
Remember that every marble-cake is unique. Small imperfections often make your homemade dessert more charming and delicious.
Decorating Your Marble Cake
Creating a stunning marble-cake is an art that goes beyond baking. The final touches can make your marble-cake go from delicious to spectacular. Whether it’s a classic marble bundt cake or a layered marble-cake, the right decoration can make it a true showstopper.
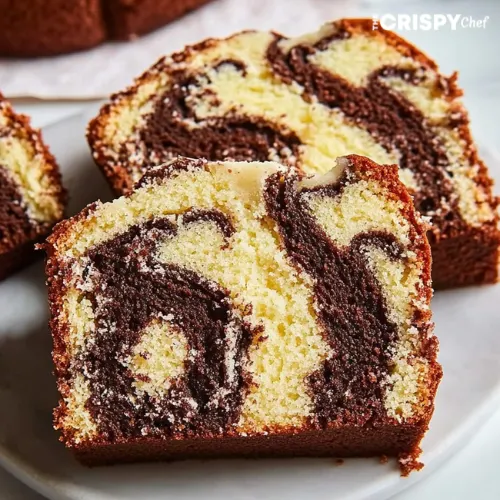
Your marble-cake’s beauty is in its intricate swirled patterns. Your decoration should highlight this unique characteristic. Choose glazes and presentation techniques that complement the cake’s natural beauty.
Glazing Options to Enhance Your Marble Cake
Choosing the right glaze can make your marble cake unforgettable. Here are some delicious options:
- Chocolate Ganache: A rich, glossy coating that highlights the chocolate swirls
- Vanilla Glaze: A light, sweet drizzle that adds subtle sweetness
- Powdered Sugar Dusting: A classic, elegant finish that showcases the marbling
Presentation Tips for Maximum Impact
Presenting your marble cake is about creating a visual feast. Here are some professional tips:
- Use a cake stand that complements the cake’s color palette
- Create strategic drizzles that follow the cake’s natural marbling
- Garnish with fresh berries or chocolate shavings
- Ensure clean, precise edges when applying glaze
The goal is to showcase the marble-cake’s stunning interior. At the same time, create an irresistible exterior that makes everyone want to take a slice.
Storing and Serving Tips
Your delicious marble cake recipe needs the right care to keep its amazing taste and texture. Storing your cake correctly can greatly help keep it fresh and enjoyable.
For short-term storage, keep your marble-cake in an airtight container at room temperature. This is ideal for cakes you’ll eat in 2-3 days. Use plastic wrap or a cake carrier to avoid moisture loss.
- Room temperature storage: Up to 3 days
- Refrigerator storage: Up to 1 week
- Freezer storage: Up to 3 months
When you refrigerate your marble cake, wrap it tightly in plastic wrap or use a sealed container. This keeps the cake from getting other food smells and keeps it moist.
“The secret to a perfect marble-cake is not just in baking, but in storing it right!” – Baking Experts
Freezing is great for long-term storage. Wrap slices or the whole cake in plastic wrap, then in a freezer-safe container. Thaw at room temperature for the best taste.
Serving suggestions include pairing your marble-cake with:
- Vanilla ice cream
- Fresh berries
- Whipped cream
- Hot coffee or tea
Pro tip: Always bring refrigerated or frozen marble cake to room temperature before serving. This restores its original soft texture and rich flavor.
Variations of Classic Marble Cake
Try new twists on the traditional marble-cake to boost your baking skills. A mix of chocolate and vanilla cake opens up endless possibilities. Add unique ingredients like espresso, citrus zest, or almond extract for a special touch.
Seasonal twists can make your marble-cake even more exciting. Add fresh berries or a lemon glaze for summer. For winter, try warm spices like cinnamon or nutmeg. This way, your cake can reflect the seasons while keeping its stunning swirled look.
Playing with textures can elevate your marble-cake. Add chopped nuts or dried fruit for extra depth. Some like to include cream cheese swirls or chocolate chips for surprise flavors. The secret is to keep the chocolate and vanilla balance just right.
For the bold, try mixing flavors like coffee-caramel or raspberry-chocolate. Each new mix lets you show off your creativity while sticking to the marble-cake basics. Feel free to experiment and create your own unique marble cake recipe that wows everyone.
FAQ
What makes a marble cake different from other cakes?
A marble-cake is special because it mixes two batters, vanilla and chocolate, to make a marbled pattern. This method makes the cake look stunning and tastes great in every bite.
Can I make a marble cake without a bundt pan?
Yes, you can make marble cake in many shapes. Use a 9-inch round cake pan, square dish, or even cupcakes. Just make sure to keep the marbling effect.
How do I prevent my marble cake from becoming dry?
To keep your cake moist, don’t overmix the batter. Use room temperature ingredients and avoid overbaking. Adding sour cream or buttermilk helps too. Always check with a toothpick to know when to take it out of the oven.
Can I make a marble cake gluten-free?
Yes, you can make a gluten-free marble-cake. Just replace regular flour with a gluten-free blend. Make sure it includes xanthan gum for the right texture.
What’s the best way to create a perfect marble effect?
To get a great marbling, alternate adding vanilla and chocolate batter. Then, use a knife or skewer to swirl them gently. Don’t mix too much to keep the swirls clear.
How long will a marble cake stay fresh?
A marble-cake stays fresh for 3-4 days in an airtight container. For longer storage, refrigerate it for a week or freeze for three months. Wrap it well in plastic wrap and put it in a container before freezing.
Can I add other flavors to my marble cake?
Yes, you can add flavors like espresso, orange zest, or almond extract. Just be careful not to add too much liquid to keep the cake’s texture right.
What’s the difference between using cocoa powder and melted chocolate in a marble cake?
Cocoa powder gives a strong chocolate taste and keeps the cake light. Melted chocolate makes the chocolate part richer. Cocoa powder is easier to use and gives better results for home bakers.
Marble Cake
Equipment
- Stand mixer or hand mixer
- Large mixing bowls
- Rubber spatulas
- Measuring cups and spoons
- Whisk
- 9-inch round cake pan or bundt pan
- Parchment paper
- Oven thermometer
- Cooling rack
- Offset spatula
Ingredients
- 2 cups all-purpose flour
- 1 cup granulated sugar
- 1 cup unsalted butter softened
- 3 large eggs
- 1 tsp vanilla extract
- 1 1/2 tsp baking powder
- 1/4 tsp salt
- 1/2 cup milk or buttermilk
- 1/4 cup high-quality cocoa powder
- 2 oz dark chocolate optional, for deeper flavor
Instructions
- Preheat your oven to 350°F (175°C). Grease and line a 9-inch cake pan with parchment paper.
- In a mixing bowl, cream butter and sugar until light and fluffy.
- Add eggs one at a time, beating well after each addition. Stir in vanilla extract.
- In a separate bowl, whisk together flour, baking powder, and salt.
- Gradually add dry ingredients to the wet mixture, alternating with milk. Mix until just combined.
- Divide the batter into two bowls. In one bowl, mix cocoa powder and melted dark chocolate.
- Spoon the vanilla and chocolate batters alternately into the prepared pan.
- Use a skewer or knife to swirl the batters gently, creating a marbled effect.
- Bake for 45 minutes or until a toothpick inserted comes out clean.
- Let the cake cool in the pan for 10 minutes, then transfer to a wire rack to cool completely.
Notes