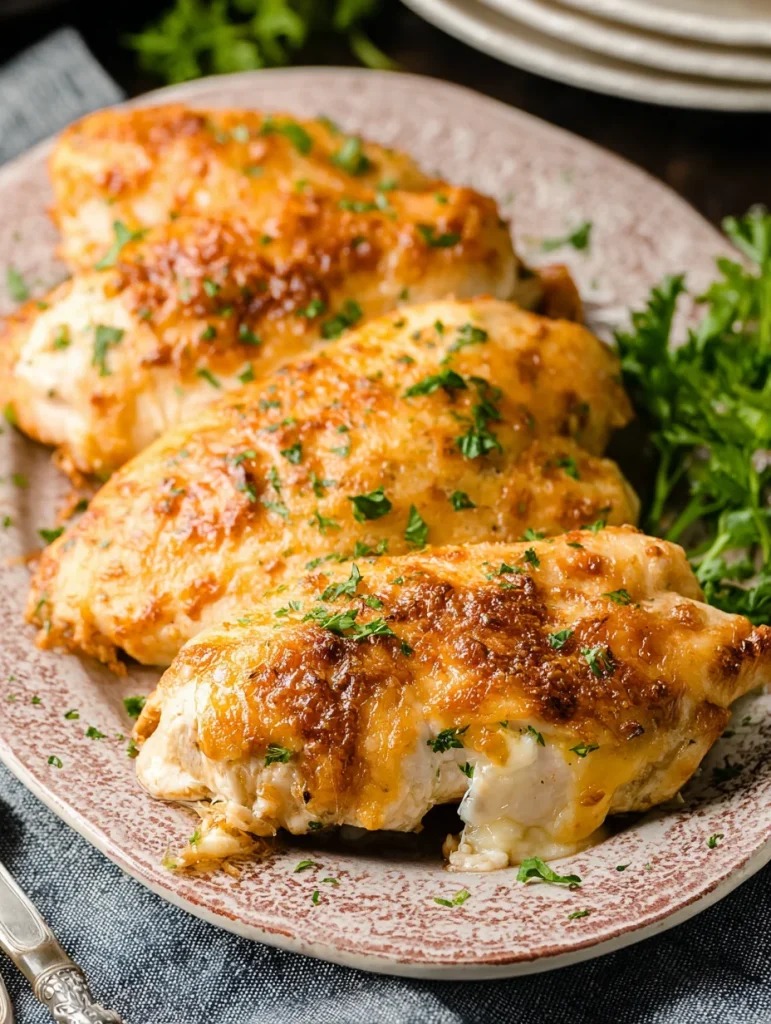
Melt in your mouth chicken breast is basically the holy grail of chicken cooking—juicy, tender, and so perfectly seasoned that you’ll actually look forward to eating chicken instead of just tolerating it. I’m talking about chicken so moist and flavorful that it literally melts in your mouth, with a golden exterior that looks like it came from a restaurant kitchen. This isn’t some complicated technique that requires fancy equipment; it’s a simple method that transforms boring chicken breasts into the kind of protein you’ll actually crave.
I discovered this melt in your mouth chicken breast technique after years of battling dry, flavorless chicken that needed drowning in sauce just to be edible. Turns out, the secret isn’t some exotic marinade or expensive ingredients—it’s all about proper preparation, smart seasoning, and cooking at the right temperature. Now this is my go-to method for chicken that’s so good, people actually ask for the recipe even though it’s embarrassingly simple.
Why This Melt In Your Mouth Chicken Will Change Your Cooking Game
• Foolproof results every time – No more guessing if chicken is done or overcooked • Incredibly juicy and tender – The kind of texture that makes you question everything you thought you knew about chicken • Restaurant-quality flavor – Tastes like you hired a professional chef but costs pennies per serving • Versatile base – Perfect on its own or as a base for countless other dishes • Quick and easy – Ready in under 30 minutes with minimal hands-on time
What You’ll Need (Ingredients)
For the Chicken Preparation:
- 4 boneless, skinless chicken breasts (about 2 lbs/900g) – uniform size preferred
- 2 tsp kosher salt
- 1 tsp black pepper
- 1 tsp garlic powder
- 1 tsp onion powder
- 1 tsp paprika
- ½ tsp dried thyme
- ½ tsp dried oregano
- ¼ tsp cayenne pepper (optional)
For the Cooking Process:
- 3 tbsp olive oil (45ml)
- 3 tbsp butter (45g)
- 3 cloves garlic, minced
- ¼ cup chicken broth (60ml) – or white wine
- 1 tbsp fresh lemon juice (15ml)
- 2 tbsp fresh herbs (parsley, thyme, or rosemary)
Optional Flavor Enhancers:
- 1 tbsp honey for subtle sweetness
- 1 tsp Dijon mustard for depth
- ½ tsp smoked paprika for extra flavor
- Red pepper flakes for heat

Essential Equipment
- Large oven-safe skillet (cast iron or stainless steel)
- Meat mallet or rolling pin
- Plastic wrap or parchment paper
- Instant-read thermometer (game-changer!)
- Tongs
- Small bowl for seasoning mix
Step-by-Step Instructions for Perfect Melt In Your Mouth Chicken
Prep Your Chicken for Success
- Pound to even thickness – Place chicken breasts between plastic wrap and gently pound to ¾-inch thickness throughout. This is crucial for even cooking—thick spots will be undercooked while thin spots overcook.
- Brine quickly – If you have 30 minutes, dissolve 2 tablespoons salt in 4 cups water and soak chicken. This step adds moisture and flavor from the inside out, but it’s optional if you’re in a hurry.
- Pat completely dry – Remove from brine (if using) and pat chicken completely dry with paper towels. Moisture is the enemy of good searing and crispy skin.
Create the Perfect Seasoning Blend
- Mix seasonings – In a small bowl, combine kosher salt, black pepper, garlic powder, onion powder, paprika, thyme, oregano, and cayenne (if using). This blend creates layers of flavor that penetrate the meat.
- Season generously – Coat chicken breasts on both sides with the seasoning mixture, pressing gently to help it adhere. Don’t be shy—the seasoning is what makes this chicken special.
- Let it rest – Allow seasoned chicken to sit at room temperature for 15-20 minutes. This helps the seasoning penetrate and ensures even cooking.
Master the Searing Technique
- Preheat your pan – Heat olive oil in a large oven-safe skillet over medium-high heat until shimmering but not smoking. The right temperature is crucial for proper searing.
- Sear perfectly – Add chicken breasts to the hot pan and cook for 5-6 minutes without moving them. You want a beautiful golden-brown crust that locks in all those juices.
- Flip once – Turn chicken and sear the other side for 3-4 minutes. Don’t flip multiple times—patience creates better browning and texture.
Finish with Oven Magic
- Preheat oven – While chicken sears, preheat oven to 375°F (190°C). This moderate temperature ensures gentle, even cooking.
- Add butter and aromatics – Add butter and minced garlic to the pan around (not on top of) the chicken. The butter bastes the chicken while the garlic infuses flavor.
- Transfer to oven – Move the entire skillet to the preheated oven and cook for 15-20 minutes until internal temperature reaches 165°F (74°C) at the thickest part.
Create the Finishing Touch
- Rest the chicken – Remove from oven and transfer chicken to a plate. Tent with foil and let rest for 5 minutes—this redistributes juices for maximum tenderness.
- Make pan sauce – Place the skillet back on the stove over medium heat. Add chicken broth and lemon juice, scraping up any browned bits. These bits are pure flavor gold!
- Finish with herbs – Stir in fresh herbs and any optional flavor enhancers. Spoon this pan sauce over the rested chicken for extra richness and flavor.
Smart Variations and Flavor Profiles
Mediterranean style: Add dried basil, oregano, and a splash of balsamic vinegar to the seasoning blend.
Cajun-inspired: Increase cayenne and add some smoked paprika for a spicy kick.
Herb-crusted: Mix fresh chopped herbs into the seasoning for more intense flavor.
Asian-inspired: Replace some seasonings with five-spice powder and finish with soy sauce and sesame oil.
Italian-style: Add Italian seasoning and finish with a splash of white wine and fresh basil.
Pro Tips for Melt In Your Mouth Chicken Success
• Use a meat thermometer – This eliminates all guesswork and prevents overcooking. 165°F (74°C) is your target temperature.
• Don’t skip the pounding – Even thickness is crucial for even cooking. Thick spots will be undercooked while thin spots dry out.
• Let it rest – Resting allows juices to redistribute throughout the meat, creating that melt-in-your-mouth texture.
• Control your heat – Medium-high for searing, then moderate oven heat for gentle finishing. High heat throughout creates tough, dry chicken.
• Save those pan drippings – The browned bits and rendered fat make an incredible pan sauce that takes this dish from good to restaurant-quality.
Common Mistakes That’ll Ruin Your Chicken
Moving the chicken too much – Let it sear undisturbed to develop that beautiful golden crust that locks in moisture.
Cooking straight from the fridge – Cold chicken cooks unevenly. Let it come to room temperature for 15-20 minutes first.
Skipping the thermometer – Guessing doneness leads to either undercooked (dangerous) or overcooked (dry) chicken.
Not letting it rest – Cutting immediately causes all the juices to run out onto your cutting board instead of staying in the meat.
Using too high heat – High heat creates a burnt exterior with raw interior. Medium-high for searing, then moderate oven heat.
Storage and Meal Prep Magic
Storage: Cooked melt in your mouth chicken keeps for 3-4 days in the fridge and maintains its texture beautifully.
Reheating: Slice and reheat gently in a covered pan with a splash of broth to prevent drying out. Don’t microwave if you can avoid it.
Meal prep: Cook several breasts at once and use throughout the week for salads, sandwiches, pasta, and grain bowls.
Freezing: Cooked chicken freezes well for up to 3 months. Thaw overnight in the fridge before reheating.
Perfect Serving Suggestions
This melt in your mouth chicken pairs beautifully with:
- Roasted vegetables – asparagus, Brussels sprouts, or sweet potatoes
- Creamy mashed potatoes or garlic rice pilaf for comfort food vibes
- Fresh salads – the protein makes any salad a complete meal
- Pasta dishes – slice and add to alfredo, primavera, or carbonara
- Grain bowls with quinoa, brown rice, or farro
Nutritional Info (Per 6oz Serving)
Real talk about this lean protein powerhouse
- Calories: 285
- Protein: 54g
- Carbohydrates: 2g
- Fat: 6g
- Fiber: 0g
- Iron: 6% daily value
- Satisfaction factor: Maximum

Melt In Your Mouth Chicken Breast
Equipment
- Large oven-safe skillet
- Meat mallet or rolling pin
- Plastic wrap or parchment paper
- Instant-read thermometer
- Tongs
- Small mixing bowl
Ingredients
- 4 boneless, skinless chicken breasts (about 2 lbs/900g)
- 2 tsp kosher salt
- 1 tsp black pepper
- 1 tsp garlic powder
- 1 tsp onion powder
- 1 tsp paprika
- 0.5 tsp dried thyme
- 0.5 tsp dried oregano
- 0.25 tsp cayenne pepper (optional)
- 3 tbsp olive oil (45ml)
- 3 tbsp butter (45g)
- 3 cloves garlic, minced
- 0.25 cup chicken broth or white wine (60ml)
- 1 tbsp fresh lemon juice (15ml)
- 2 tbsp fresh herbs (parsley, thyme, or rosemary)
- 1 tbsp honey (optional)
- 1 tsp Dijon mustard (optional)
- 0.5 tsp smoked paprika (optional)
- red pepper flakes (optional)
Instructions
- Place chicken breasts between plastic wrap and pound to ¾-inch thickness for even cooking.
- Brine in 2 tbsp salt + 4 cups water for 30 minutes. Rinse and pat dry. Optional but recommended for juicier chicken.
- Combine all dry seasonings and rub evenly over both sides of chicken. Let sit at room temp 15–20 mins.
- Heat olive oil in oven-safe skillet over medium-high. Sear chicken undisturbed for 5–6 minutes.
- Flip and sear another 3–4 minutes until golden. Don’t flip again to preserve crust.
- While searing, preheat oven to 375°F (190°C).
- Add butter and garlic around the chicken (not on top). Let melt and infuse for 1 minute.
- Transfer skillet to oven and cook 15–20 minutes until internal temp reaches 165°F (74°C).
- Remove chicken to plate and tent with foil. Rest for 5 minutes to lock in juices.
- Return skillet to stovetop. Add broth + lemon juice, scrape browned bits. Stir in herbs and optional flavor boosters.
- Spoon pan sauce over sliced chicken and serve with your favorite sides.
Notes
Your Most Important Questions About Perfect Chicken
Q: How do I know when my melt in your mouth chicken is done without a thermometer? A: While a thermometer is best, you can check by cutting into the thickest part—juices should run clear and meat should be white throughout with no pink. But seriously, get a thermometer!
Q: Can I use this method with chicken thighs? A: Absolutely! Thighs are even more forgiving and flavorful. Cook to 175°F (79°C) for thighs since they benefit from slightly higher temperature.
Q: What if my chicken breasts are really thick? A: Butterfly them or pound them thinner. Anything over 1 inch thick will cook unevenly, leading to dry edges and potentially undercooked centers.
Q: Can I make this melt in your mouth chicken without an oven-safe pan? A: You can finish on the stovetop with a lid, but it’s harder to control temperature. If using this method, lower heat and cook covered for 8-12 minutes.
Q: Why is my chicken dry even when I follow the recipe? A: Usually this means overcooking (temperature went above 165°F) or the chicken wasn’t at room temperature when cooking started. FYI, every oven is different, so use temperature as your guide, not just time.
There you have it—melt in your mouth chicken breast that’ll make you wonder why you ever thought chicken was boring. This method transforms the most basic protein into something you’ll actually crave, and once you master it, you’ll never go back to dry, flavorless chicken again. Whether you’re meal prepping, cooking for family dinner, or trying to impress someone special, this technique delivers restaurant-quality results every single time! :/