Pumpkin pie is the undisputed queen of holiday desserts, but baking a whole pie can be time-consuming, and serving slices can be messy. Enter the mini pumpkin pie! These adorable, individual dessert bites solve all those problems. They are perfectly portioned, incredibly easy to make using a muffin tin, and eliminate the need for any messy slicing.
These mini pies are a fantastic solution for any gathering, from a casual fall party to a formal holiday dinner. They set faster, look stunning on a dessert tray, and allow every guest to have their very own perfect little pie. Best of all, they taste exactly like the classic pie you love, with a buttery crust and a creamy, spiced filling, ready to be topped with a dollop of whipped cream.
Why You’ll Love This Recipe
- Perfectly Portioned: Each mini pie is a satisfying, single-serving dessert, ideal for parties and effortless cleanup.
- Faster to Bake: The smaller size drastically cuts down on baking and cooling time compared to a full-sized pie.
- Adorable Presentation: They look beautiful on any platter and are much easier to transport than a fragile, full pie.
- Easy Shortcut: Using pre-made, refrigerated pie crust dough makes the assembly process incredibly quick and simple.
- Ultimate Holiday Flavor: They deliver that classic, creamy, spiced pumpkin flavor that everyone craves during the fall and winter seasons.
Ingredients
For the Crust
- 1 (14.1 oz or 400 g) package refrigerated pie crust dough (2 crusts)
- All-purpose flour, for rolling
For the Filling
- 1 cup (240 g) canned pumpkin purée (NOT pie filling)
- 1/2 cup (120 ml) evaporated milk or heavy cream
- 1 large egg, plus 1 large egg yolk
- 1/2 cup (110 g) light brown sugar, packed
- 2 tbsp (25 g) granulated sugar
- 1 tsp pumpkin pie spice
- 1/2 tsp vanilla extract
- 1/4 tsp salt
Equipment
- Standard 12-cup muffin tin
- 3 1/2-inch (9 cm) round cookie cutter or a drinking glass
- Large mixing bowl
- Whisk
- Measuring cups and spoons
- Rolling pin
Step-by-Step Instructions
- Prep the Crusts: Lightly flour your work surface and unroll one sheet of the refrigerated pie crust dough. Use the 3 1/2-inch round cookie cutter or the rim of a drinking glass to cut out circles. You should get about 6 circles per crust (12 total). Gently press each circle into the cups of the standard 12-cup muffin tin, making sure the dough fits snugly against the bottom and sides. You can re-roll the scraps to get a few more.
- Preheat the Oven: Preheat your oven to 350°F (175°C).
- Mix the Filling: In a large bowl, whisk together the canned pumpkin purée, evaporated milk, egg, egg yolk, brown sugar, granulated sugar, pumpkin pie spice, vanilla extract, and salt. Whisk until the mixture is completely smooth and uniform in color. Remember: use pumpkin purée, not pie filling.
- Fill and Bake: Carefully pour or spoon the pumpkin filling into each crust-lined muffin cup, filling them about three-quarters of the way full.
- Bake to Set: Bake for 20–25 minutes. The mini pies are done when the edges look set and slightly puffed, but the center still has a slight jiggle to it when you gently tap the pan.
- Cool and Chill: Remove the muffin tin from the oven and place it on a cooling rack for 1 hour to cool completely. Once cool, transfer the pies (still in the tin) to the refrigerator and chill for at least 4 hours (or overnight) until the filling is completely set.
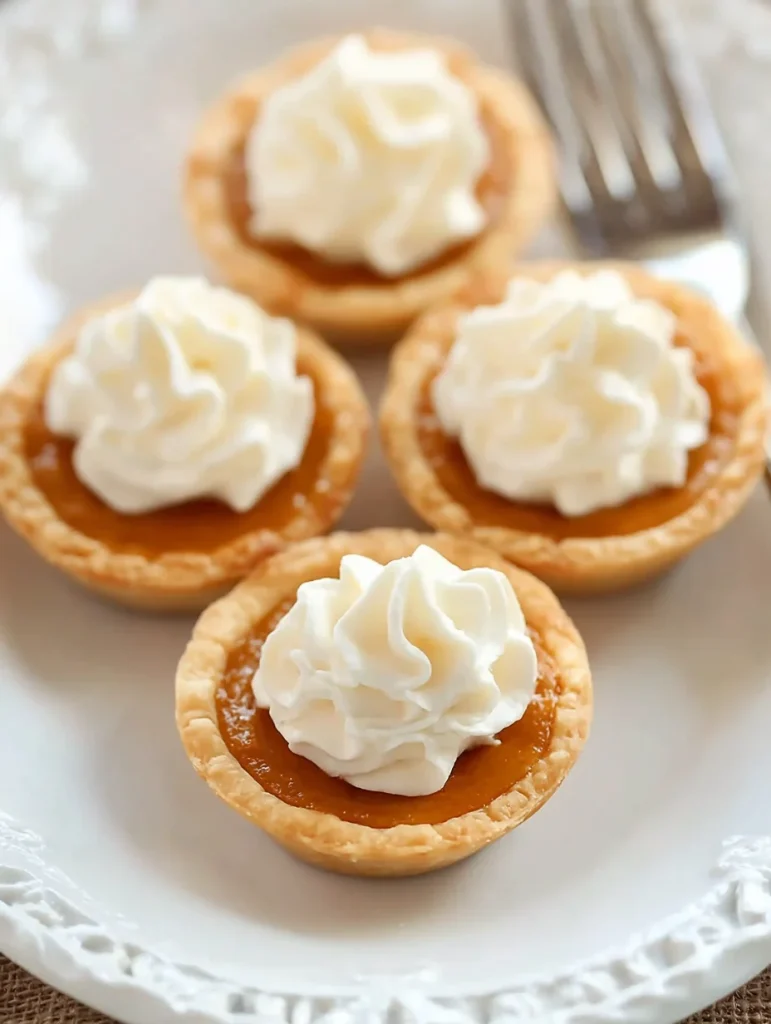
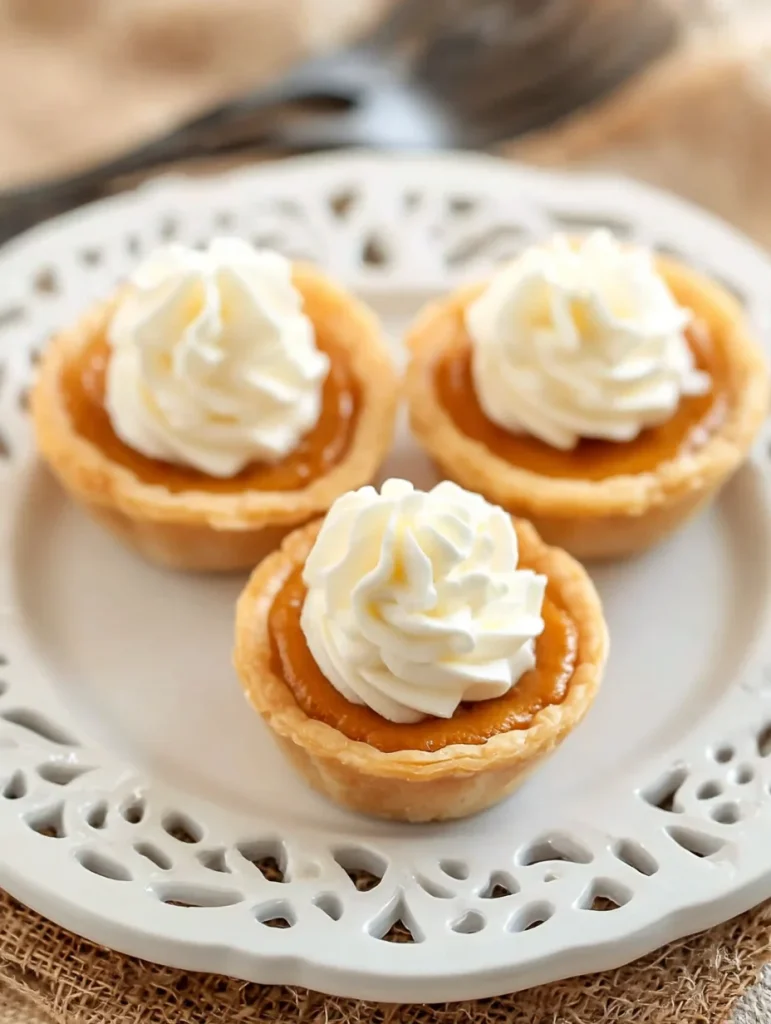
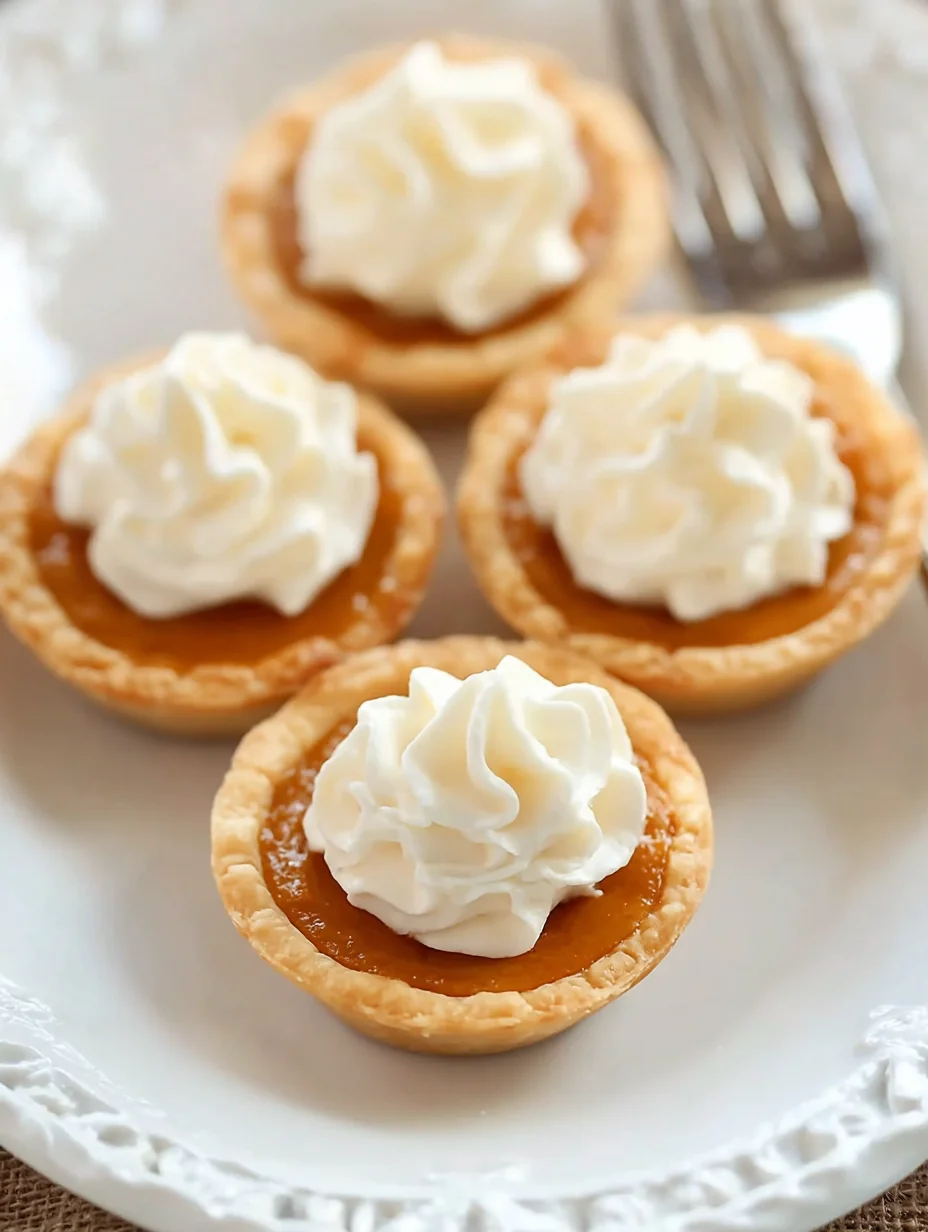
- Serve: To remove the pies, run a thin knife around the edge of each cup, then gently lift them out. Garnish each pie with a dollop of whipped cream and a sprinkle of cinnamon just before serving.
Substitutions and Variations
- Crust: For a nuttier crust, you can press a mixture of crushed graham crackers, butter, and brown sugar into the muffin cups instead of using pie dough. For a spicier crust, use crushed gingersnap cookies.
- Dairy-Free: Substitute the evaporated milk with full-fat canned coconut milk for a richer texture, or use a rich plant-based milk.
- Garnish: Instead of whipped cream, you can top the cooled pies with a sprinkling of chopped pecans or a simple streusel topping before baking.
- Spice: If you don’t have pumpkin pie spice, you can use a mix of 1/2 teaspoon cinnamon, 1/4 teaspoon ground ginger, and a dash of ground cloves and nutmeg.
Pro Tips and Common Mistakes to Avoid
- Don’t Overbake: Overbaking is the number one cause of cracks in pumpkin pie filling. Once the edges are set and the center is just a little wobbly, take them out. They will finish cooking as they cool.
- Use the Right Pumpkin: Always use 100% pure canned pumpkin purée, which has no added sugar or spices. Pumpkin pie filling is pre-sweetened and pre-spiced, and it will ruin the texture and flavor balance of this recipe.
- Seal the Edges: When pressing the dough into the muffin cups, make sure the bottom edge where the sides meet the base is firmly pressed down. This prevents the sides from shrinking down during baking.
- Chill Completely: The chilling step is essential. The filling continues to set as it cools, giving you that clean, perfect slice (or in this case, a perfect whole mini pie).
Storage, Make-Ahead, and Reheating
- Make-Ahead (Unbaked): You can assemble the mini pies completely in the muffin tin (with the filling poured in), cover the tin tightly with plastic wrap, and refrigerate for up to 24 hours before baking.
- Storage (Baked): Store the baked and cooled mini pies in an airtight container in the refrigerator for up to 4 days. They taste great cold!
- Freezing: These pies freeze beautifully! Once fully baked and completely cooled, arrange them in a single layer in an airtight container and freeze for up to 1 month. Thaw them in the refrigerator overnight before serving. Do not freeze them with the whipped cream topping.
- Reheating: While they are delicious cold, if you prefer them warm, heat them in a 300°F (150°C) oven for about 8–10 minutes.
Serving Suggestions
The classic choice is a generous swirl of freshly whipped cream or a scoop of vanilla ice cream. For a festive presentation, dust the whipped cream with a tiny sprinkle of cinnamon or nutmeg. Serve these alongside coffee, tea, or a glass of hot spiced cider.
Approximate Nutrition
- Yields: 12 mini pies
- Serving Size: 1 mini pie
- Calories: 260 kcal
- Protein: 4 g
- Fat: 13 g
- Carbohydrates: 32 g
Note: These are approximations and can vary based on the specific type of crust and whether you use milk or cream.
FAQs
Q: Why did my pie filling crack after cooling?
A: Cracking is usually caused by overbaking or cooling too quickly. Overbaking dries out the filling, causing it to contract and crack. Avoid putting the hot tin directly into the fridge or a cold place; let it cool gradually on the counter first.
Q: Can I use a regular full-sized pie crust recipe instead of store-bought?
A: Yes, you can. You will need a recipe that yields enough dough for two 9-inch crusts. Be sure to chill the dough well before rolling it out and cutting the circles.
Q: How do I get the crusts to look neat in the muffin tin?
A: For a neat look, press the dough circles firmly into the cups, but leave a small overhang. You can gently trim the overhang with a knife, or you can use a smaller cookie cutter to cut out a decorative top (like a leaf shape) and place it on the filling before baking.
Q: Can I use fresh pumpkin purée?
A: Yes, you can. If you use fresh purée, make sure to cook it down until it’s very thick and then blot it with a paper towel to remove as much excess moisture as possible. Too much water will prevent the filling from setting properly.
Q: How long do these keep in the refrigerator?
A: When stored in an airtight container, the mini pies will stay fresh and delicious in the refrigerator for up to 4 days. They are a wonderful dessert to make a day or two before an event.
Mini Pumpkin Pies
Equipment
- Standard 12-cup muffin tin
- 3.5-inch round cutter or glass
- Large mixing bowl
- Whisk
- Measuring cups and spoons
- Rolling Pin
Ingredients
- 1 package (14.1 oz / 400 g) refrigerated pie crust dough (2 crusts)
- All-purpose flour, for rolling
- 1 cup (240 g) canned pumpkin purée (not pie filling)
- 1/2 cup (120 ml) evaporated milk or heavy cream
- 1 large egg
- 1 large egg yolk
- 1/2 cup (110 g) light brown sugar, packed
- 2 tbsp (25 g) granulated sugar
- 1 tsp pumpkin pie spice
- 1/2 tsp vanilla extract
- 1/4 tsp salt
Instructions
- Lightly flour surface and unroll dough. Cut 3.5-inch circles and press into muffin tin cups. Re-roll scraps if needed.
- Preheat oven to 350°F (175°C).
- Whisk pumpkin purée, evaporated milk, egg, yolk, brown sugar, sugar, spice, vanilla, and salt until smooth.
- Spoon filling into crusts, about 3/4 full. Bake 20–25 min until edges are set and center jiggles slightly.
- Cool 1 hour on rack, then chill 4+ hours (or overnight) until set.
- Run knife around edges to release. Garnish with whipped cream and cinnamon before serving.