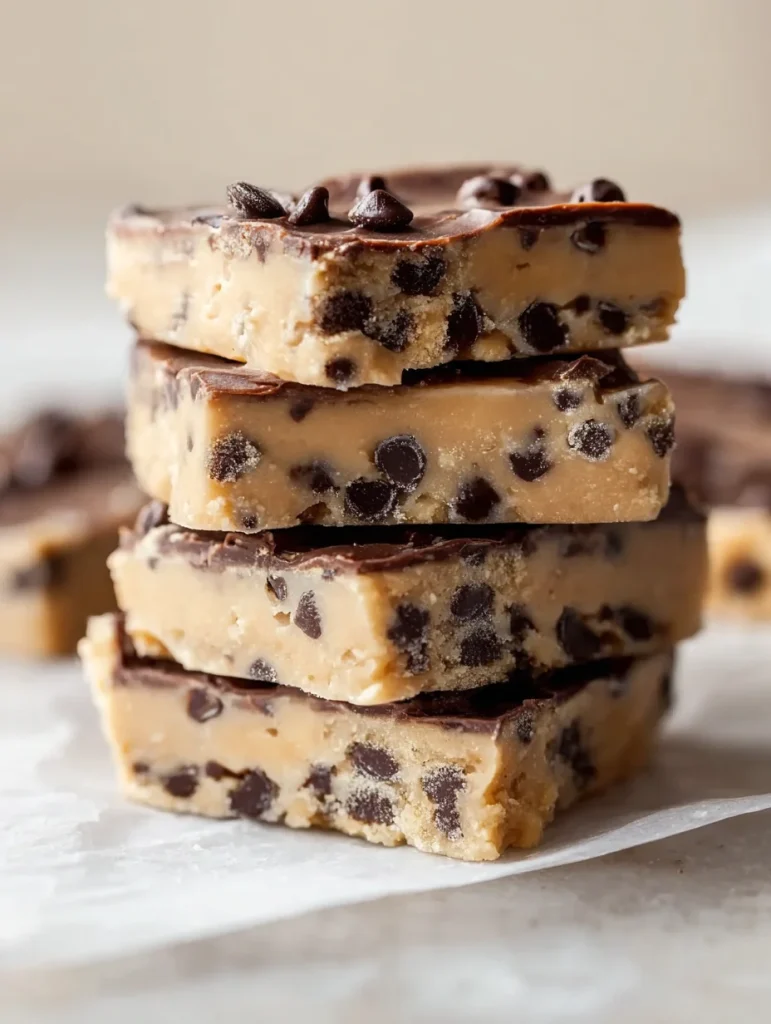
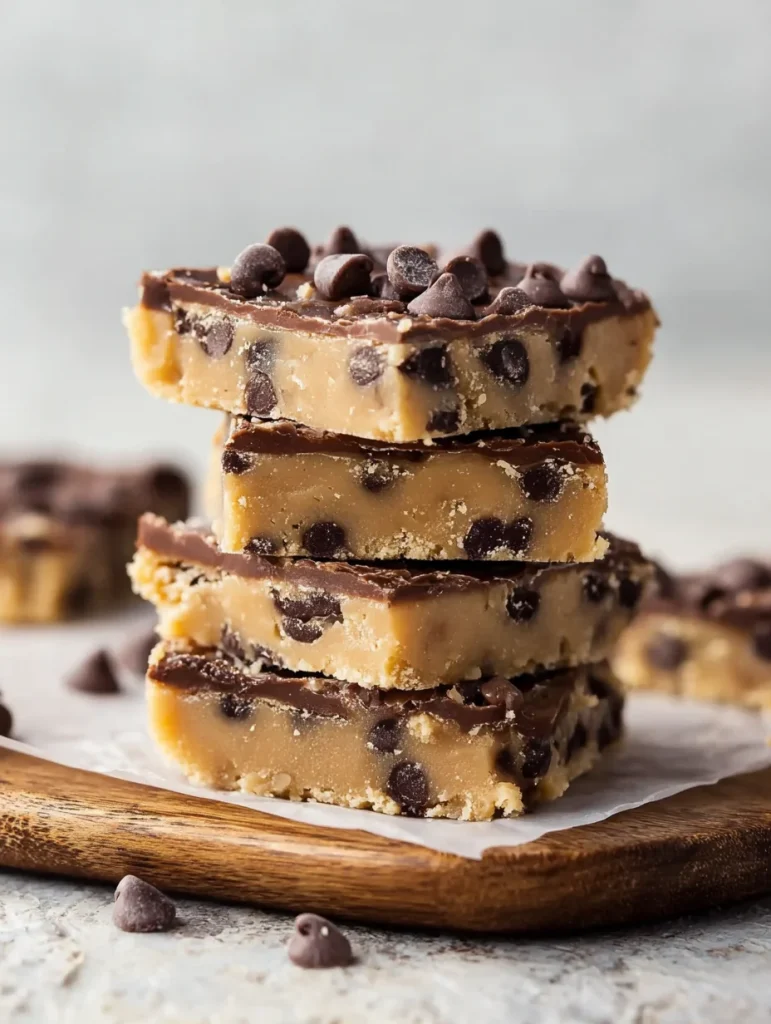
Let’s be honest—who among us hasn’t snuck a spoonful (or three) of raw cookie dough when nobody’s looking? I mean, we all know we’re not supposed to, but there’s something absolutely irresistible about that sweet, creamy texture that just screams “eat me now!” Well, guess what? No bake cookie dough bars are here to make all your childhood dreams come true, minus the salmonella scare and judgmental looks from your family.
These bars are basically everything you love about cookie dough, but in a safe, shareable, and ridiculously easy format. Plus, you don’t even need to turn on your oven—perfect for those sweltering summer days when the thought of heating up your kitchen makes you want to melt into a puddle.
What Makes No Bake Cookie Dough Bars So Addictive?
Ever wondered why cookie dough tastes so much better than actual cookies sometimes? There’s something about that raw, uncooked sweetness that hits different. No bake cookie dough bars capture that exact flavor profile while giving you a dessert that’s actually safe to devour by the handful.
The beauty lies in their simplicity. You get all the buttery, vanilla-packed goodness of traditional cookie dough, but it’s transformed into neat little squares that you can actually serve to guests without feeling like you’re feeding them potentially dangerous raw eggs. It’s like having your cake and eating it too, except it’s cookie dough and you’re eating way more than you should 🙂
The Texture Game-Changer
What really sets these bars apart is the perfect chewy-yet-firm texture. Unlike regular cookie dough that can be a bit too soft and sticky, no bake bars hold their shape beautifully. You can pick them up without your fingers going through them, making them ideal for parties, potlucks, or just when you want to eat dessert like a civilized human being.
The secret? Most recipes combine the cookie dough base with ingredients that help it set up naturally—think cream cheese, powdered sugar, or even a touch of coconut oil. These additions create structure without compromising that signature cookie dough flavor we all crave.
Essential Ingredients That Make the Magic Happen
Creating the perfect no bake cookie dough bars isn’t rocket science, but having the right ingredients makes all the difference. Let me break down the must-have components that’ll turn your kitchen experiment into a guaranteed success:
The Foundation Players
Butter (and lots of it) forms the creamy base that gives you that authentic cookie dough richness. I always use unsalted butter at room temperature—it mixes better and gives you more control over the saltiness level.
Brown sugar beats white sugar every time for these bars. Why? It adds that deep, molasses-like flavor that makes cookie dough taste like, well, actual cookie dough instead of just sweet butter paste.
Vanilla extract is non-negotiable. Don’t even think about skipping it or using that artificial vanilla flavoring your aunt left in your pantry from 2015. Real vanilla extract or bust.
The Safety Squad
Here’s where things get interesting. Since we’re avoiding raw eggs (smart move, IMO), you need ingredients that’ll give you that creamy binding effect eggs usually provide:
- Cream cheese – adds richness and helps everything stick together
- Powdered sugar – dissolves easily and creates smooth texture
- A pinch of salt – because everything tastes better with salt, and it balances the sweetness
The Fun Stuff
Chocolate chips are basically mandatory. Mini chips work better than regular-sized ones because they distribute more evenly, but honestly, use whatever you’ve got. Life’s too short to worry about chocolate chip sizes.
Heat-treated flour is crucial for food safety. Just spread regular all-purpose flour on a baking sheet and bake it at 350°F for about 5 minutes. This kills any potential bacteria without changing the flour’s taste or texture.
Step-by-Step Guide to Cookie Dough Bar Perfection
Ready to become the hero of your next gathering? This process is so straightforward, you’ll wonder why you ever bothered with actual baking in the first place.
Prep Work (5 Minutes, Max)
Line an 8×8 or 9×9 pan with parchment paper, leaving some overhang for easy removal later. Trust me on this—trying to cut bars directly from the pan is a recipe for frustration and messy squares.
Heat-treat your flour if you haven’t already. While it’s cooling, get your butter to room temperature if you forgot to take it out earlier. Pro tip: cut it into small cubes and it’ll soften way faster.
The Mixing Magic
Cream your butter and brown sugar until it’s light and fluffy. This takes about 2-3 minutes with an electric mixer, but you can absolutely do it by hand if you’re feeling ambitious (or your mixer decided to break at the worst possible moment).
Add your vanilla and cream cheese, mixing until everything’s combined. The mixture might look a bit lumpy at this point—totally normal, don’t panic.
Gradually mix in the powdered sugar and that heat-treated flour. Start slow or you’ll create a powdered sugar snowstorm in your kitchen. Been there, done that, still finding sugar dust in weird places.
Final Assembly
Fold in those chocolate chips gently. You want them evenly distributed but not crushed to bits. Press the mixture firmly into your prepared pan, making sure it’s level and compact.
Chill for at least 2 hours before cutting. I know waiting is torture when you can smell all that vanilla and butter goodness, but trust the process. These bars need that time to firm up properly.
Pro Tips That’ll Make You Look Like a Dessert Genius
Want to take your no bake cookie dough bars from good to “where did you buy these?” level? Here are some game-changing tricks I’ve picked up over the years:
Flavor Variations That Actually Work
Peanut butter version: Replace half the butter with creamy peanut butter and add a handful of peanut butter chips alongside the chocolate ones. Suddenly you’ve got a Reese’s situation happening, and nobody’s complaining about that.
Birthday cake style: Add a tablespoon of rainbow sprinkles and use vanilla cake mix (about 1/4 cup) instead of some of the flour. It sounds weird, but it creates this amazing funfetti flavor that hits right in the nostalgia.
Coffee shop inspired: Mix in a tablespoon of instant espresso powder. The coffee doesn’t overpower the cookie dough flavor—it just makes everything taste more complex and grown-up.
Storage and Serving Secrets
Keep these bars refrigerated in an airtight container for up to a week. They actually taste better after the first day because all the flavors have time to meld together.
For serving, let them sit at room temperature for about 10-15 minutes before cutting. They’ll be easier to slice and won’t feel quite so cold and hard when you bite into them.
Cut with a warm knife for the cleanest edges. Just run your knife under hot water, dry it off, and slice away. Repeat as needed between cuts.
Common Mistakes That’ll Ruin Your Cookie Dough Dreams
Let’s talk about the rookie errors that can turn your dessert dreams into a sticky nightmare. I’ve made most of these mistakes so you don’t have to:
The Butter Temperature Trap
Using butter that’s too cold will give you lumpy, poorly mixed bars. Too warm, and your mixture will be soupy and won’t set up properly. Room temperature butter should give slightly when you press it, but not leave a finger indentation.
The Sugar Situation
Don’t substitute granulated sugar for powdered sugar thinking they’re basically the same thing. Powdered sugar dissolves completely and creates that smooth texture you want. Granulated sugar will leave you with gritty, unpleasant bars that nobody wants to eat.
The Flour Fiasco
Skipping the heat-treating step is tempting, but don’t do it. Raw flour can harbor bacteria just like raw eggs, and heating it takes literally five minutes. Also, don’t go overboard with the flour—too much will make your bars dry and crumbly instead of fudgy and delicious.
Why These Bars Beat Store-Bought Every Time
Here’s the thing about homemade no bake cookie dough bars—they taste infinitely better than anything you’ll find in the dessert aisle. Store-bought versions are usually loaded with preservatives and artificial flavors that leave this weird aftertaste that screams “I came from a factory.”
When you make them yourself, you control every ingredient. Want them sweeter? Add more sugar. Prefer less vanilla? Use less. It’s your kitchen, your rules.
Plus, there’s something deeply satisfying about creating something this delicious without even turning on your oven. It feels almost like cheating, but in the best possible way.
Making Them Pinterest-Perfect
Let’s be real—half the reason we make desserts these days is for the Instagram potential, right? These bars are naturally photogenic, but here are some styling tricks that’ll make your photos pop:
Drizzle some melted chocolate over the top before they set completely. It creates beautiful contrast and makes them look professionally made.
Dust with powdered sugar right before photographing. It gives them that bakery-fresh appearance that makes people think you spent way more effort than you actually did.
Cut them into different shapes using cookie cutters while they’re still soft. Circles, hearts, or stars make them feel more special than basic squares, even though they taste exactly the same.
The Final Verdict: Your New Go-To Dessert
Look, I’m not saying no bake cookie dough bars will solve all your problems, but they’ll definitely solve your “what should I bring to the potluck” dilemma. They’re foolproof, crowd-pleasing, and require zero baking skills beyond the ability to use a mixing bowl.
Whether you’re dealing with a broken oven, trying to keep your kitchen cool, or just embracing your inner lazy baker, these bars deliver everything you want in a dessert. They taste like childhood memories, look impressive enough for company, and disappear faster than you can say “who ate the last one?”
So go ahead, give them a try. Your taste buds (and your reputation as the friend who always brings the good stuff) will thank you. And hey, if anyone asks for the recipe, just tell them it’s a family secret—they don’t need to know how ridiculously easy it actually was

No Bake Cookie Dough Bars
Equipment
- 8×8 inch baking pan
- Parchment paper
- Electric mixer or whisk
- Mixing bowls
- Measuring cups and spoons
Ingredients
- 1 cup unsalted butter, softened
- 1 cup brown sugar, packed
- 1 tsp vanilla extract
- 4 oz cream cheese, softened
- 2 cups powdered sugar
- 2 cups all-purpose flour, heat-treated
- 1/2 tsp salt
- 1 1/2 cups mini chocolate chips
Instructions
- Line an 8×8-inch pan with parchment paper, leaving overhang for easy removal. Heat-treat flour at 350°F for 5 minutes, then let cool.
- Cream softened butter and brown sugar until light and fluffy, about 2–3 minutes.
- Add vanilla extract and cream cheese, mixing until smooth.
- Gradually beat in powdered sugar and cooled flour until well combined.
- Fold in mini chocolate chips evenly.
- Press mixture firmly into prepared pan. Chill for at least 2 hours until set.
- Lift from pan, cut into bars with a warm knife, and serve.