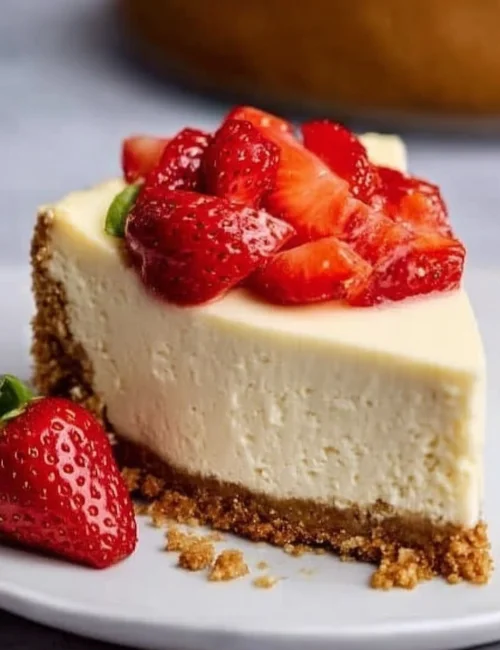
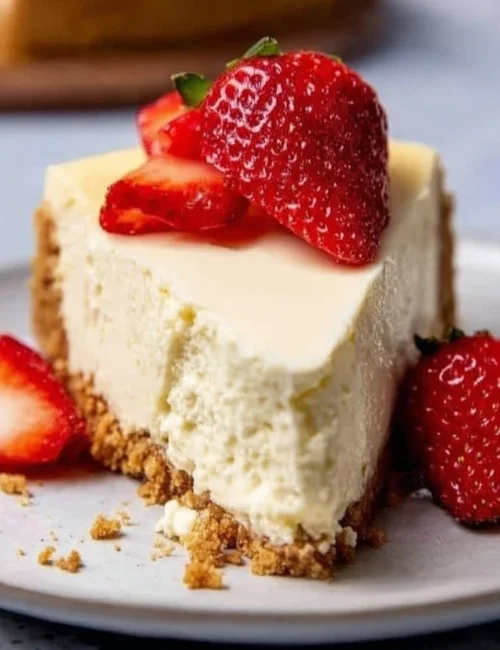
No-Bake Gluten Free Cheesecake is a delightful treat that will impress your family and friends without taking much time in the kitchen. With a creamy filling and a golden, crispy crust, it’s perfect for any occasion. Whether it’s a birthday party or a simple family gathering, this cheesecake will bring smiles all around. Plus, it’s super easy to make!
Why You Will Love This Cheesecake
This cheesecake is not just delicious but also incredibly easy to prepare. You don’t need an oven for the filling, and it comes together quickly. It’s a family-friendly dessert that uses everyday ingredients you likely already have at home. With minimal prep time, it’s perfect for busy schedules. Everyone will love this rich and creamy treat!
How to Make Cheesecake
Making this cheesecake is straightforward. You’ll start by preparing the crust, then mix up the filling and combine them. The baking process is simple, and using a water bath helps keep the cheesecake smooth and lovely. Just let it chill, and it will be ready for your gathering!
What You Need
- 2 1/2 cups Gluten free graham crackers (about 2 boxes Kinnikinnick crackers)
- 1/3 cup Brown sugar, packed (light or dark)
- 1/2 tsp Ground cinnamon
- 10 TBSP Unsalted butter, melted
- 24 oz Cream cheese, room temperature
- 3/4 cup White granulated sugar
- 1/2 cup Sour cream, room temperature
- 1/4 cup Heavy cream, room temperature
- 1 tsp Pure vanilla extract
- 4 Large eggs, room temperature
- 1 Egg yolk, room temperature
- Fresh fruit or fresh berries
Step-by-Step
- Preheat your oven to 325℉ (163℃). Spray a 9-inch springform pan with baking spray and line the bottom with a 9-inch parchment paper circle; spray the parchment again to prevent sticking.
- Using a food processor, pulse the gluten free graham crackers into fine crumbs. Add the brown sugar, ground cinnamon, and melted butter to the crumbs. Mix until the mixture has the texture of wet sand.
- Pour the crumb mixture into the prepared springform pan. Using your hands, press the crumbs evenly to form the crust halfway up the sides of the pan. Use the bottom of a measuring cup to firmly compact the crust for an even base.
- Bake the crust in the oven for 12 minutes. While it bakes, you can start preparing the cheesecake batter so it’s ready as the crust cools slightly.
- In a stand mixer fitted with the paddle attachment, beat the cream cheese and granulated sugar on high speed for 2 minutes, stopping halfway to scrape down the sides of the bowl with a rubber spatula to ensure smoothness.
- Reduce mixer speed to medium and add the sour cream, heavy cream, and vanilla extract. Mix until fully combined, scraping the bowl to remove any lumps and achieve a smooth batter.
- Lower the mixer speed to low and add the eggs and egg yolk one at a time, mixing just until combined after each addition. Avoid overmixing to prevent air incorporation.
- To prevent cracking, prepare a water bath using one of these methods: (1) Place the springform pan in a cake pan, then place it inside a large roasting pan. Pour hot water into the roasting pan until it reaches halfway up the sides of the cake pan. (2) Alternatively, wrap the springform pan tightly twice in aluminum foil, place it inside the roasting pan, and fill halfway with hot water.
- Pour the batter over the cooled crust in the springform pan. Place the assembled pans with the water bath into the preheated oven. Bake for 70 to 80 minutes, until the edges are set and the center has a slight jiggle.
- Turn off the oven and crack the door open. Let the cheesecake cool inside the oven for 30 minutes.
- Remove the cheesecake from the oven and transfer to a cooling rack. Allow it to cool completely at room temperature.
- Wrap the cheesecake tightly with foil and refrigerate for at least 6 hours or preferably overnight for best texture and flavor development.
- Remove the cheesecake from the pan, peel away the parchment paper from the bottom, and top with fresh fruits or berries for a delightful finishing touch.
How to Serve Cheesecake
This cheesecake is perfect on its own, but you can also jazz it up with toppings! Consider adding fresh fruits, a drizzle of chocolate sauce, or a dollop of whipped cream. It pairs wonderfully with coffee or tea, making it ideal for dessert time or a cozy afternoon treat.
How to Store Cheesecake
To keep your cheesecake fresh, store it in the refrigerator wrapped tightly with foil or plastic wrap. It can last up to a week in the fridge. If you have leftovers, you can freeze pieces for later enjoyment. Just wrap them well and place them in an airtight container. Defrost in the fridge before serving for the best texture!
Recipe Tips
- Room Temperature Ingredients: Always use room temperature cream cheese and eggs for a smoother batter.
- Avoid Overmixing: Mix the eggs gently; overmixing can cause cracks in your cheesecake.
- Water Bath: This is crucial for preventing cracks. Make sure the water doesn’t seep into the crust.
- Chill Time: Allow overnight chilling for the best flavor and texture.
- Don’t Rush: Let the cheesecake cool gradually in the oven; this minimizes the risk of cracking.
Variations & Swaps
- Flavor Twists: For a fruity flavor, mash strawberries or blueberries into the batter before baking.
- Chocolate Lovers: Add cocoa powder to the cream cheese mixture for a chocolaty twist.
- No Sugar: Substitute granulated sugar with coconut sugar or a sugar alternative for a healthier option.
FAQs
Can I make this cheesecake ahead of time?
Yes! This cheesecake is perfect for making a day ahead of your event. Chilling it overnight enhances the flavor and texture.
Is it possible to freeze the cheesecake?
Absolutely! Wrap individual slices well and store them in an airtight container in the freezer. Just remember to thaw them in the refrigerator before serving.
How do I reheat the cheesecake?
For best results, let it come to room temperature after taking it out of the fridge. Freezer slices can be left in the refrigerator overnight to thaw slowly.
Can I substitute ingredients?
Yes! You can use different creams or sweeteners, depending on your dietary requirements. Just ensure you maintain the same ratios for best results.
How can I avoid cracking?
Using a water bath and letting your cheesecake cool gradually prevents sudden temperature changes that lead to cracking. Be gentle when mixing the batter!
Enjoy making this delightful No-Bake Gluten Free Cheesecake! It’s simple, creamy, and sure to please everyone around your table.
No-Bake Gluten Free Cheesecake
Ingredients
For the crust
- 2 1/2 cups Gluten free graham crackers (about 2 boxes Kinnikinnick crackers)
- 1/3 cup Brown sugar, packed (light or dark)
- 1/2 tsp Ground cinnamon
- 10 TBSP Unsalted butter, melted
For the filling
- 24 oz Cream cheese, room temperature
- 3/4 cup White granulated sugar
- 1/2 cup Sour cream, room temperature
- 1/4 cup Heavy cream, room temperature
- 1 tsp Pure vanilla extract
- 4 Large Eggs, room temperature
- 1 Egg yolk Egg yolk, room temperature
- to taste Fresh fruit or fresh berries For topping
Instructions
Preparation
- Preheat your oven to 325℉ (163℃). Spray a 9-inch springform pan with baking spray and line the bottom with a parchment paper circle; spray the parchment again to prevent sticking.
- Using a food processor, pulse the gluten-free graham crackers into fine crumbs. Add the brown sugar, ground cinnamon, and melted butter to the crumbs and mix until the texture resembles wet sand.
- Pour the crumb mixture into the prepared springform pan. Press the crumbs evenly to form the crust up the sides of the pan, using a measuring cup to compact it evenly.
- Bake the crust in the oven for 12 minutes, then allow it to cool slightly.
Making the Filling
- In a stand mixer, beat the cream cheese and granulated sugar on high for 2 minutes, scraping down the sides halfway.
- Reduce speed to medium and add the sour cream, heavy cream, and vanilla extract. Mix until smooth, scraping the bowl to remove lumps.
- Lower the speed to low and add the eggs and egg yolk one at a time, mixing gently after each addition to avoid overmixing.
Baking
- Prepare a water bath by either placing the springform pan in a cake pan inside a roasting pan and adding hot water, or wrapping the pan tightly in foil and placing it in a roasting pan with water.
- Pour the batter over the cooled crust and place in the preheated oven. Bake for 70 to 80 minutes until the edges set, and the center jiggles slightly.
- Turn off the oven and crack the door open. Let the cheesecake cool inside for 30 minutes.
- Remove from the oven, transfer to a cooling rack, and allow to cool completely.
- Wrap tightly with foil and refrigerate for at least 6 hours or overnight for best texture and flavor.
- Remove from the pan, peel the parchment, and top with fresh fruits or berries before serving.