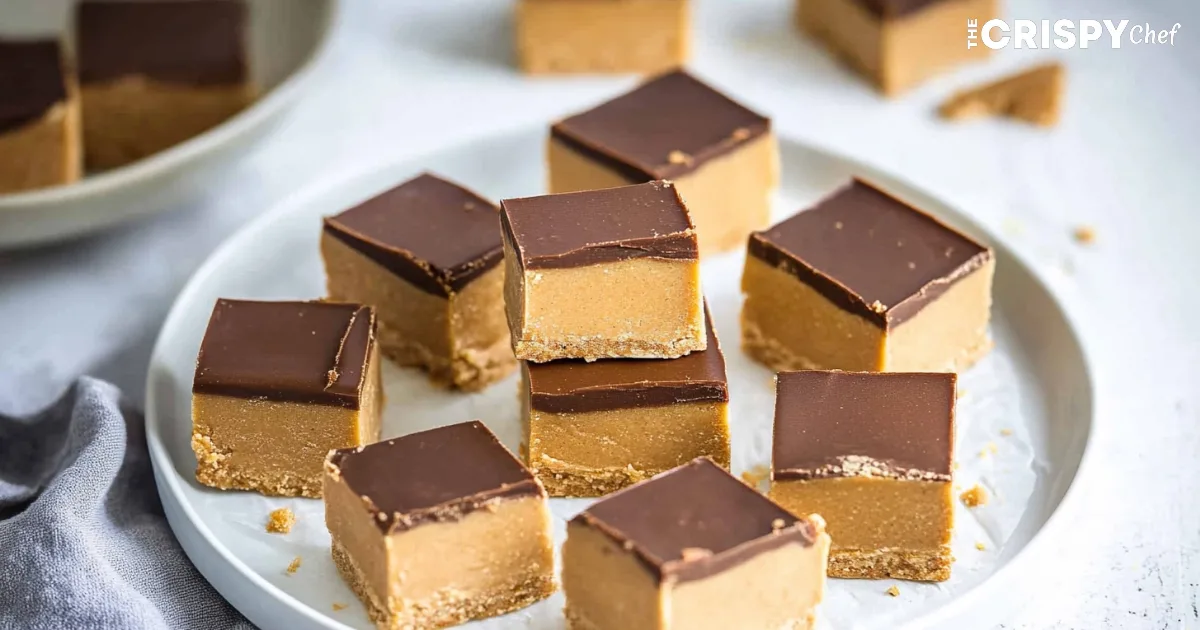
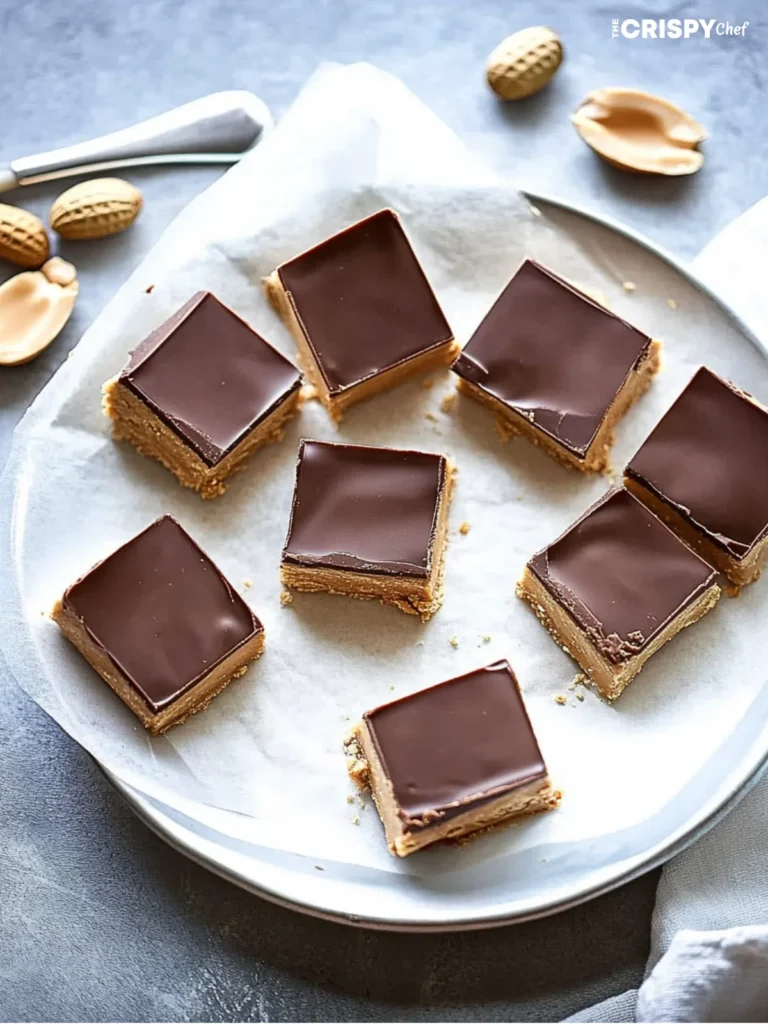
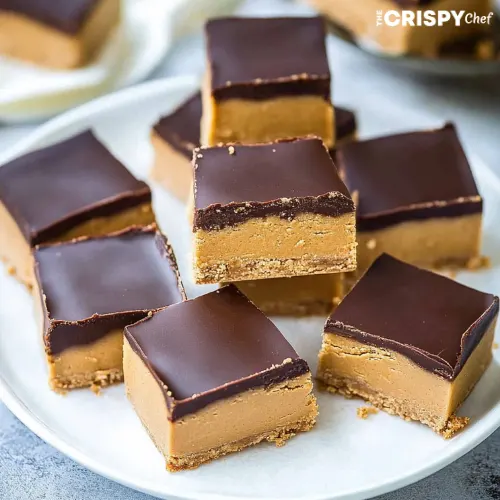
OMG these no bake peanut butter bars are seriously life-changing. I’ve been making them for years and they’re always the first thing to disappear at parties. The combo of creamy peanut butter and rich chocolate creates this indulgent treat that tastes EXACTLY like Reese’s cups but way better cause they’re homemade. Best part? You can whip these up in like 15 minutes with stuff you probably already have in your pantry. Keep reading to discover my secret ingredient that makes these bars extra special!
More Desserts ideas
Why You’ll Love These No Bake Peanut Butter Bars
Listen, we’ve all been there – craving something sweet but not wanting to heat up the kitchen or spend hours baking. These no bake peanut butter bars totally solve that problem!
I first made these when my oven broke during a holiday party (nightmare!), and they ended up being the most requested recipe of the night. My brother-in-law who “doesn’t like sweets” ate four of them and asked to take some home!
What makes these homemade peanut butter bars amazing:
- Ready in just 15 mins (seriously!)
- No oven needed – perfect for summer
- Uses simple ingredients
- Customize with different mix-ins
- Tastes BETTER than store-bought candy
- Great for meal prep – they freeze beautifully
Whether you need a quick dessert for unexpected guests or a make-ahead treat for busy weeks, these easy chocolate peanut butter bars are your new go-to.
Ingredients You’ll Need
For the peanut butter layer:
- 1 cup creamy peanut butter (the regular kind works best here, not natural)
- 1/2 cup unsalted butter, melted
- 2 cups graham cracker crumbs (about 16 full sheets)
- 2 cups powdered sugar
- 1 tsp vanilla extract
- 1/4 tsp salt
For the chocolate topping:
- 1 1/2 cups semi-sweet chocolate chips
- 2 tbsp peanut butter
The peanut butter is obvs the star here. I recommend using regular creamy peanut butter like Jif or Skippy instead of natural peanut butter. The natural kind can separate and make the bars too oily.
For graham crackers, you can buy pre-made crumbs or crush them yourself. If you’ve got dietary restrictions, gluten-free graham crackers work great too.
Don’t have graham crackers? No problem! You can sub in vanilla wafers, digestive biscuits, or even crushed pretzels for a sweet-salty twist.
Powdered sugar provides sweetness and helps bind everything together. If you want a less sweet version, you can reduce to 1 1/2 cups.
For the chocolate layer, I usually go with semi-sweet chips, but dark chocolate or milk chocolate chips work too depending on how sweet you like things. The added peanut butter in the chocolate layer helps keep it from cracking when you cut the bars.
How to Make No Bake Peanut Butter Bars
Step 1: Prep your pan
Line an 8×8 or 9×9 inch square pan with parchment paper, leaving some overhang for easy removal later. This step is super important – don’t skip it!
Step 2: Make the peanut butter base
In a large bowl, mix the melted butter and peanut butter until smooth. Add the graham cracker crumbs, powdered sugar, vanilla, and salt. Mix until everything is well combined. The mixture will be thick and a bit crumbly but should hold together when pressed.
Press this mixture firmly into your prepared pan. I use the bottom of a measuring cup to get a nice smooth, even layer. The more firmly you press, the better your bars will hold together.
Step 3: Make the chocolate topping
In a microwave-safe bowl, combine chocolate chips and 2 tbsp peanut butter. Microwave in 30-second intervals, stirring between each, until completely melted and smooth. This usually takes about 1-1.5 minutes total.
Pour the melted chocolate over the peanut butter layer and spread evenly. For that professional bakery look, give the pan a few gentle taps on the counter to get a smooth surface.
Step 4: Chill and cut
Refrigerate the bars for at least 1 hour or until the chocolate is set. If you’re in a hurry, pop them in the freezer for about 30 minutes.
Once set, use the parchment paper overhang to lift the entire block out of the pan. With a sharp knife, cut into squares or rectangles. Pro tip: For super clean cuts, run your knife under hot water and wipe it clean between cuts.
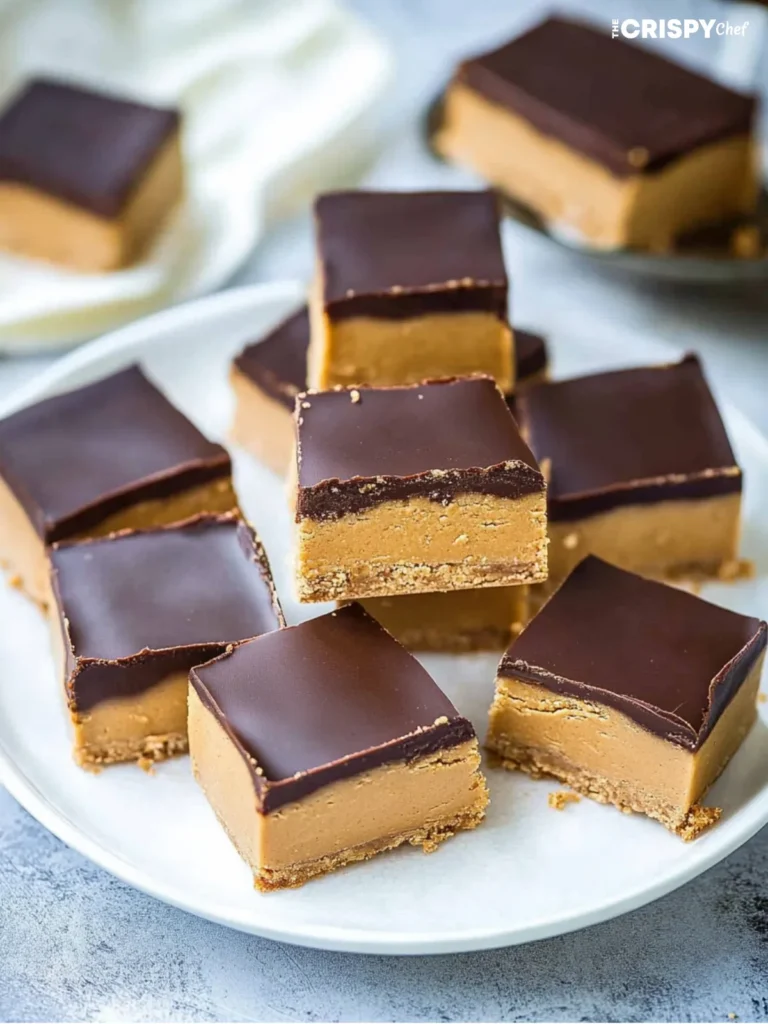
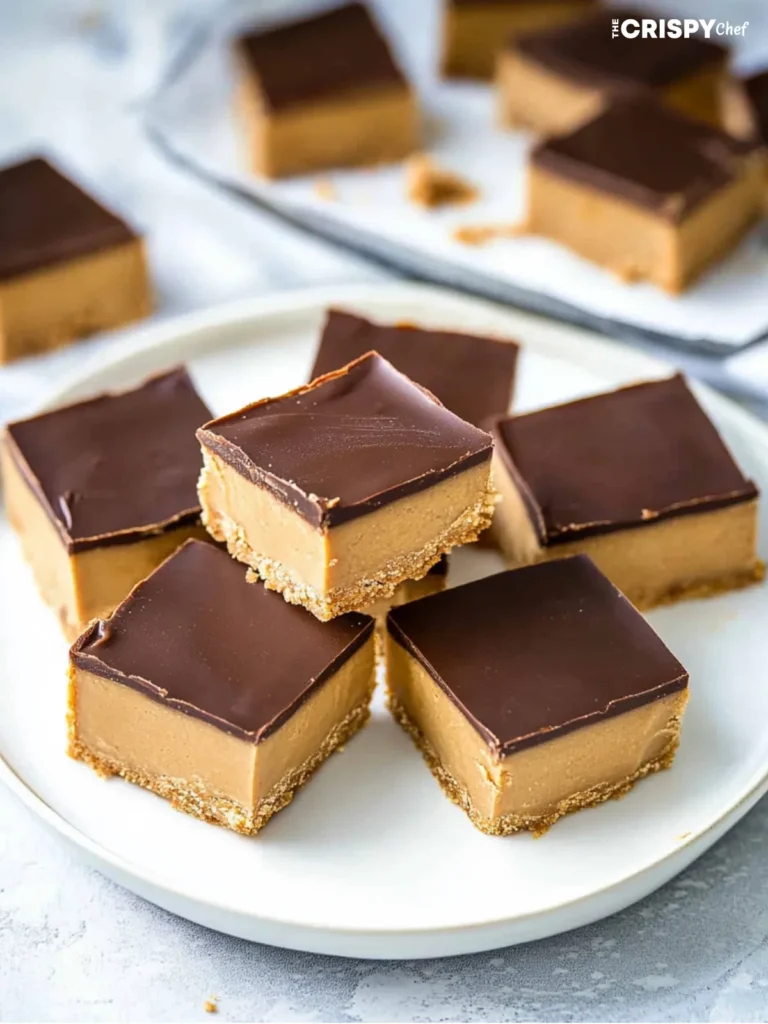
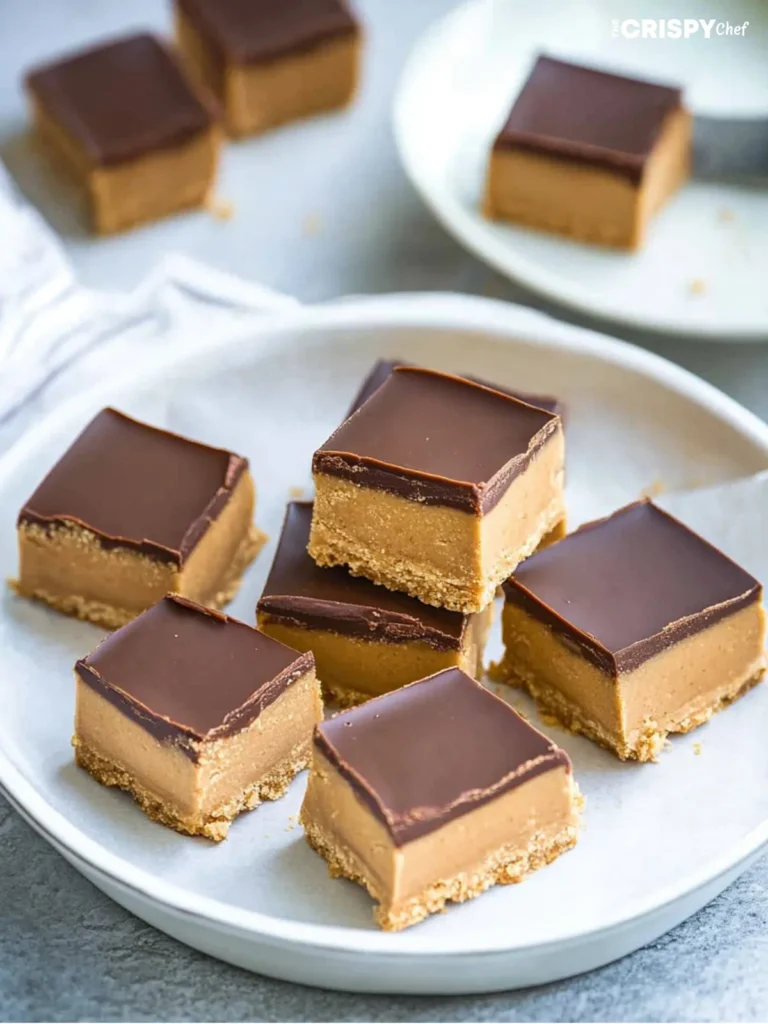
That’s it! Your homemade Reese’s peanut butter bars are ready to enjoy!
Tasty Variations to Try
1. Crunchy No Bake Peanut Butter Bars
Add 1/2 cup chopped peanuts or rice krispies to the peanut butter mixture for extra crunch and texture.
2. S’mores Peanut Butter Bars
Swap half the graham crackers for crushed golden grahams cereal and add 1/2 cup mini marshmallows to the peanut butter layer.
3. No Bake Peanut Butter Oatmeal Bars
Add 1/2 cup quick oats to the base for extra texture and fiber. These make a great grab-and-go breakfast bar!
4. Salted Caramel Peanut Butter Bars
Drizzle caramel sauce over the peanut butter layer before adding the chocolate, then sprinkle with flaky sea salt after spreading the chocolate layer.
5. Pretzel Peanut Butter Bars
Replace half the graham crackers with crushed pretzels for a sweet and salty twist that’s absolutely addictive.
6. Cookie Butter Bars
Swap half the peanut butter for cookie butter (Biscoff spread) for a unique flavor that’ll blow your mind.
No Bake Peanut Butter Bars
Equipment
- 8×8 or 9×9 inch square pan
- Parchment paper
- Large mixing bowl
- Microwave-safe bowl
- Spoon or spatula
- Measuring cups and spoons
- Sharp Knife
Ingredients
For the peanut butter layer:
- 1 cup creamy peanut butter
- 1/2 cup unsalted butter melted
- 2 cups graham cracker crumbs about 16 full sheets
- 2 cups powdered sugar
- 1 tsp vanilla extract
- 1/4 tsp salt
For the chocolate topping:
- 1 1/2 cups semi-sweet chocolate chips
- 2 tbsp peanut butter
Instructions
- Prep your pan: Line an 8×8 or 9×9 inch square pan with parchment paper, leaving some overhang for easy removal.
- Make the peanut butter base: In a large bowl, mix melted butter and peanut butter until smooth. Stir in graham cracker crumbs, powdered sugar, vanilla extract, and salt until well combined.
- Press into pan: Firmly press the mixture into the lined pan using the back of a measuring cup to create an even layer.
- Make the chocolate topping: In a microwave-safe bowl, melt the chocolate chips and 2 tbsp peanut butter in 30-second intervals, stirring in between, until smooth.
- Spread and chill: Pour melted chocolate over the peanut butter layer, spreading evenly. Refrigerate for at least 1 hour or freeze for 30 minutes until set.
- Cut and serve: Lift the bars out using the parchment paper and cut into squares. Enjoy!
Notes
Frequently Asked Questions
What to do with peanut butter without bread?
Besides these amazing no bake peanut butter bars, you can use peanut butter in smoothies, oatmeal, as a dip for fruit or pretzels, spread on apple slices, or mix into yogurt. It’s also great in savory dishes like Thai peanut sauce for noodles or as a protein-rich addition to soups.
Can dogs have peanut butter no bake cookies?
Most peanut butter is safe for dogs in small amounts, BUT these no bake peanut butter bars contain ingredients that are harmful to dogs, including chocolate and potentially xylitol if using certain brands of peanut butter. Always check peanut butter ingredients for xylitol, which is toxic to dogs. These bars are best kept as a human-only treat!
Can you freeze peanut butter bars?
Absolutely! These no bake peanut butter bars freeze beautifully for up to 3 months. Cut them first, then place in an airtight container with parchment paper between layers. Thaw in the fridge for a few hours before serving, or enjoy them slightly frozen for a different texture experience!
How long to bake Reese’s peanut butter cookies?
The beauty of these homemade Reese’s peanut butter bars is that they require NO baking! However, if you’re making traditional peanut butter cookies with Reese’s pieces or cups mixed in, those typically bake at 350°F for 8-10 minutes. You want them slightly underbaked for that perfect chewy texture.
Why are my 3 ingredient peanut butter cookies falling apart?
For 3-ingredient peanut butter cookies (typically made with just peanut butter, sugar, and egg), they might fall apart if the peanut butter is too oily or natural, if the ratio of ingredients is off, or if they’re overbaked. For these no bake peanut butter bars, if they’re crumbly, you might need to add a bit more peanut butter or press the mixture more firmly into the pan.
How do I store these no bake chocolate peanut butter bars?
Store these bars in an airtight container in the refrigerator for up to 1 week. They’re actually best served slightly chilled, as they get a bit too soft at room temperature, especially in warm weather.
Can I make these bars without graham crackers?
Definitely! You can substitute graham crackers with vanilla wafers, digestive biscuits, golden oreos (with filling removed), or even crushed pretzels for a sweet-salty combo. The key is to have about 2 cups of fine crumbs, whatever the source.
Make These Easy No Bake Peanut Butter Bars Your Own
I still remember making these bars with my kids during a power outage last winter. We were all cooped up, getting cranky, and needed something to do. With just a flashlight and ingredients from the pantry, we created what my daughter now calls our “emergency happiness bars.”
There’s something special about a recipe that’s been passed around, tweaked, and personalized. Maybe you’ll add a sprinkle of sea salt on top, or mix in some mini chocolate chips to the base. Or perhaps you’ll create a third layer with white chocolate or caramel.
Whatever version you create, these no bake peanut butter bars have that magical quality of bringing people together. They’re perfect for bake sales, holiday platters, or just keeping in the fridge for when you need a little something sweet.
So go ahead, make them your own. And when people ask for the recipe (trust me, they will), pass it on with your personal twist. That’s how the best recipes live on.

3 Comments