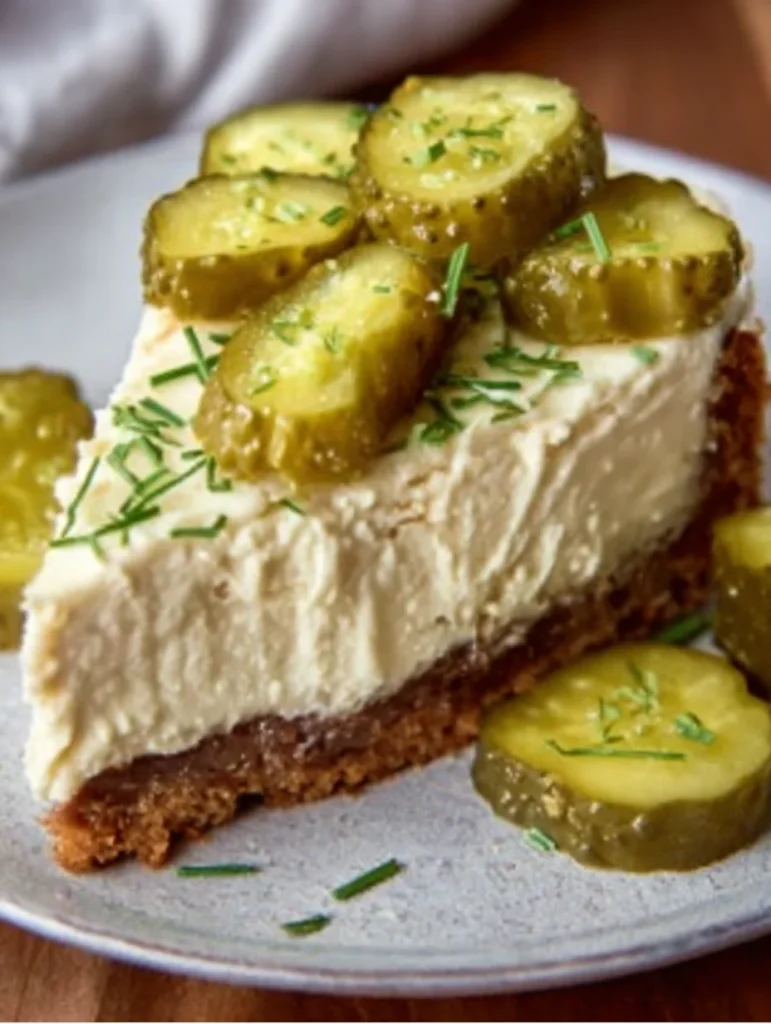
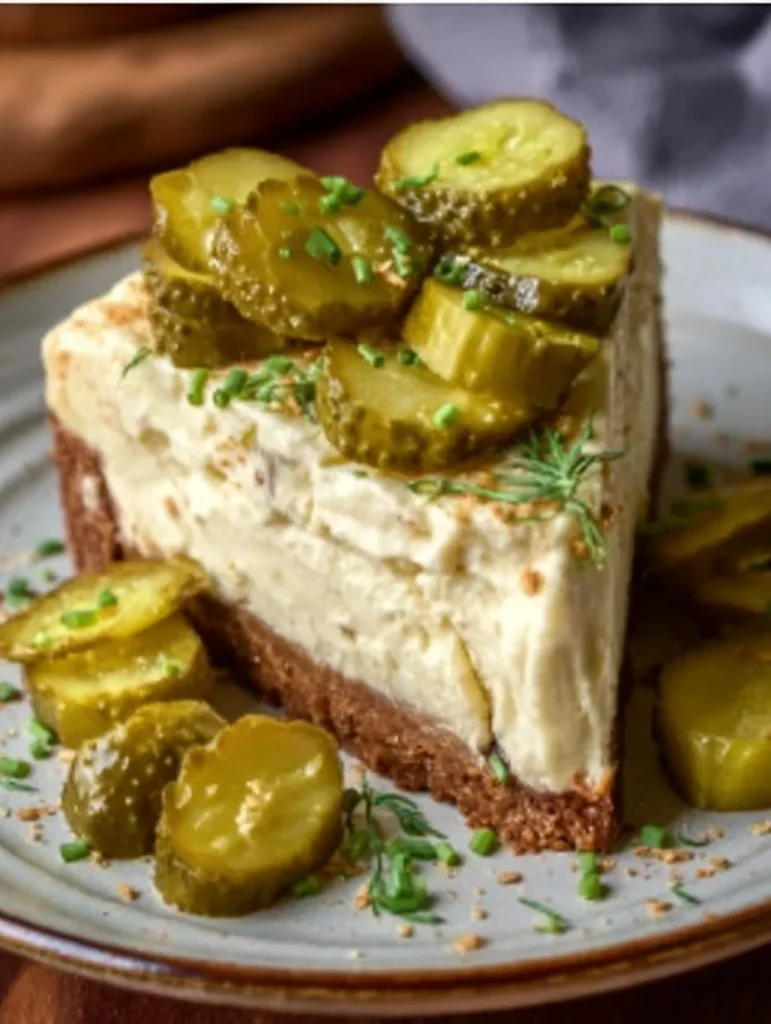
Pickle cheesecake bars are basically the most unexpectedly brilliant dessert you’ll ever make—creamy, tangy cheesecake with subtle dill pickle flavor that somehow works so perfectly you’ll wonder why this wasn’t already a thing. I’m talking about rich, velvety cheesecake with just enough pickle juice to add complexity and intrigue, all sitting on a buttery graham cracker crust that balances the tangy sweetness perfectly. This isn’t some gross internet challenge dessert; this is legitimate culinary creativity that happens to sound completely insane until you try it.
I created these pickle cheesecake bars during one of those “what’s the weirdest thing I can put in dessert” experiments, and honestly, they became the most talked-about thing I’ve ever brought to a party. The pickle flavor is subtle and sophisticated think more “interesting complexity” than “I’m eating a pickle for dessert.” Now they’re my secret weapon for impressing people who think they’ve tried every dessert combination under the sun. Fair warning: people will demand the recipe, and some will refuse to believe you until they taste them.
Why These Pickle Cheesecake Bars Will Blow Everyone’s Mind
• Unexpectedly sophisticated flavor – Sweet, tangy, and complex in ways that shouldn’t work but absolutely do • Ultimate conversation starter – People will be talking about these bars for months • Easier than regular cheesecake – No water bath, no cracking, just simple bar perfection • Instagram-worthy weirdness – The perfect combination of delicious and shareable • Surprisingly addictive – The flavor grows on you until you’re genuinely craving them
What You’ll Need (Ingredients)
For the Graham Cracker Crust:
- 1½ cups graham cracker crumbs (150g) – about 10-12 crackers
- ¼ cup granulated sugar (50g)
- 6 tbsp butter, melted (90g)
- Pinch of salt
For the Pickle Cheesecake Filling:
- 24 oz cream cheese, softened (680g) – room temperature is crucial
- ¾ cup granulated sugar (150g)
- 3 large eggs, room temperature
- ⅓ cup sour cream (80g)
- 3 tbsp dill pickle juice (45ml) – from a good jar of pickles
- 1 tbsp fresh lemon juice (15ml)
- 1 tsp vanilla extract
- 2 tbsp all-purpose flour (15g)
- ¼ tsp salt
For the Topping and Garnish:
- 1 cup sour cream (240g)
- 2 tbsp powdered sugar (15g)
- 1 tbsp pickle juice (15ml)
- Fresh dill sprigs for garnish
- Finely diced pickles (optional, for the brave)
- Lemon zest for color contrast
Essential Equipment
- 9×13 inch baking pan
- Parchment paper
- Food processor (for crust)
- Large mixing bowl
- Electric mixer (hand or stand)
- Wire cooling rack
- Sharp knife for clean cuts
Step-by-Step Instructions for Perfect Pickle Cheesecake Bars
Create That Perfect Crust
- Preheat and prep – Heat oven to 350°F (175°C). Line a 9×13 inch pan with parchment paper, leaving overhang for easy removal.
- Make crust – In a food processor, pulse graham crackers until fine crumbs form. Add sugar and salt, then drizzle in melted butter while pulsing until mixture holds together when squeezed.
- Press and bake – Press crust mixture evenly into prepared pan. Bake for 10 minutes until lightly golden. Remove and let cool while making filling.
Mix Up That Intriguing Filling
- Soften cream cheese properly – Make sure cream cheese is completely room temperature—cold cream cheese creates lumps that ruin the smooth texture.
- Beat cream cheese smooth – In a large bowl, beat cream cheese with an electric mixer until completely smooth and fluffy, about 3-4 minutes. Scrape bowl frequently.
- Add sugar gradually – Beat in granulated sugar until well combined and mixture is light and fluffy, another 2-3 minutes.
Build the Pickle Magic
- Add eggs one at a time – Beat in eggs one at a time, mixing well after each addition. Don’t overmix once eggs are added.
- Incorporate pickle elements – Beat in sour cream, pickle juice, lemon juice, and vanilla extract. The mixture should be smooth and well combined.
- Finish with flour and salt – Gently fold in flour and salt until just combined. Don’t overmix or the bars can become dense.
Bake to Creamy Perfection
- Pour over crust – Pour filling over the baked crust, spreading evenly to corners. Give the pan a gentle tap to release air bubbles.
- Bake until set – Bake for 25-30 minutes until center is almost set but still slightly jiggly. Don’t overbake—they’ll continue setting as they cool.
- Cool completely – Let cool completely at room temperature, then refrigerate for at least 4 hours or preferably overnight.
Create the Finishing Touch
- Make topping – Whisk together sour cream, powdered sugar, and remaining pickle juice until smooth. This adds extra tang and visual appeal.
- Spread and garnish – Spread topping over chilled bars, then garnish with fresh dill sprigs and lemon zest. For the truly adventurous, add tiny diced pickles.
- Cut and serve – Use the parchment overhang to lift bars out of pan. Cut into squares with a sharp knife, cleaning between cuts for neat edges.
Smart Variations and Flavor Experiments
Bread and butter pickle version: Use sweet pickle juice and add a pinch of turmeric for color.
Spicy pickle twist: Add a dash of hot sauce or use spicy pickle juice for heat lovers.
Chocolate crust: Use chocolate graham crackers for the crust to add another layer of complexity.
Mini versions: Make in a muffin tin for individual servings that are perfect for parties.
No-bake version: Skip baking and use gelatin to set the filling for a lighter texture.
Pro Tips for Pickle Cheesecake Bar Success
• Room temperature ingredients – Cold cream cheese and eggs don’t mix smoothly and can create lumps in your filling.
• Don’t overbake – Cheesecake bars continue cooking from residual heat. Slightly underdone is better than overdone.
• Strain your pickle juice – If your pickle juice has floating bits, strain it first for the smoothest texture.
• Start with less pickle juice – You can always add more, but you can’t take it back. Taste and adjust carefully.
• Chill overnight – The flavors develop and meld beautifully with time, and the texture improves too.
Common Mistakes That’ll Mess Up Your Bars
Using cold cream cheese – This creates lumps that never smooth out, ruining the silky texture.
Adding too much pickle juice – Start conservative. The flavor should be intriguing, not overwhelming.
Overbaking – Cheesecake bars should still jiggle slightly when done. They firm up as they cool.
Cutting too soon – Warm cheesecake is messy. Always chill completely before cutting.
Using low-quality pickle juice – The flavor of your bars depends on good pickle juice. Use juice from pickles you’d actually eat.
Storage and Make-Ahead Magic
Storage: These pickle cheesecake bars keep for up to 5 days in the fridge and actually taste better after the first day.
Freezing: They freeze beautifully for up to 2 months. Thaw overnight in the fridge before serving.
Make-ahead: Perfect make-ahead dessert—they need overnight chilling anyway, so plan accordingly.
Transport: These travel well to parties and potlucks. Just keep them chilled until serving.
Perfect Pairing Suggestions
These pickle cheesecake bars pair surprisingly well with:
- Strong coffee or espresso to balance the tangy sweetness
- Dry white wine or champagne for sophisticated flavor contrast
- Fresh berries for color and complementary tartness
- Salted caramel sauce for those who want to double down on sweet-salty
- Craft beer for adventurous flavor pairing
Nutritional Info (Per Bar, Makes 16)
Being honest about this indulgent experiment
- Calories: 285
- Protein: 5g
- Carbohydrates: 24g
- Fat: 18g
- Sugar: 20g
- Sodium: 350mg (from pickle juice)
- Weirdness factor: Off the charts

Pickle Cheesecake Bars
Equipment
- 9×13-inch baking pan
- Parchment paper
- Food processor
- Large mixing bowl
- electric mixer (hand or stand)
- Wire cooling rack
- Sharp Knife for clean cuts
Ingredients
- 1½ cups graham cracker crumbs
- ¼ cup granulated sugar (for crust)
- 6 tbsp butter, melted
- 1 pinch salt (for crust)
- 24 oz cream cheese, softened
- ¾ cup granulated sugar (for filling)
- 3 large eggs
- ⅓ cup sour cream (for filling)
- 3 tbsp dill pickle juice (for filling)
- 1 tbsp lemon juice
- 1 tsp vanilla extract
- 2 tbsp all-purpose flour
- ¼ tsp salt (for filling)
- 1 cup sour cream (for topping)
- 2 tbsp powdered sugar
- 1 tbsp pickle juice (for topping)
- fresh dill sprigs, for garnish
- finely diced pickles (optional garnish)
- lemon zest, for garnish
Instructions
- Preheat oven to 350°F (175°C). Line a 9×13 inch pan with parchment paper, leaving overhang for easy removal.
- Pulse graham crackers in a food processor until fine. Add sugar and salt, then pulse with melted butter until it resembles wet sand.
- Press crust mixture into the pan evenly. Bake 10 minutes until golden. Cool while making the filling.
- Ensure cream cheese is fully softened at room temp. This is crucial for a lump-free texture.
- In a large bowl, beat cream cheese until fluffy and smooth (3–4 min), scraping sides frequently.
- Add sugar and beat another 2–3 min until light and creamy.
- Add eggs one at a time, mixing on low and scraping between additions. Do not overbeat.
- Mix in sour cream, pickle juice, lemon juice, and vanilla until fully incorporated.
- Fold in flour and salt gently until just combined. Do not overmix.
- Pour filling over baked crust. Spread evenly and tap gently to release air bubbles.
- Bake 25–30 min until center is slightly jiggly but set. Do not overbake.
- Cool completely on a wire rack. Refrigerate at least 4 hours or overnight.
- Whisk together sour cream, powdered sugar, and pickle juice until smooth.
- Spread topping over chilled bars. Garnish with dill, zest, or diced pickles if desired.
- Use parchment overhang to lift bars from pan. Cut into 16 squares with a clean knife.
- Refrigerate leftovers in airtight container for up to 5 days, or freeze up to 2 months.
Notes
Your Most Important Questions About These Wild Bars
Q: Do these pickle cheesecake bars actually taste good, or are they just a novelty? A: They genuinely taste incredible! The pickle flavor is subtle and adds complexity rather than overwhelming the dessert. Think sophisticated tangy cheesecake, not “pickle dessert.”
Q: What kind of pickle juice should I use? A: Classic dill pickle juice works best. Avoid sweet pickles or anything too heavily spiced. The juice should be clean, briny, and garlicky.
Q: How strong is the pickle flavor? A: It’s surprisingly subtle—more like a sophisticated tang that makes people say “what’s in this?” rather than “this tastes like pickles.” Start with less and adjust to taste.
Q: Can I make these without pickle juice? A: You could, but then they’d just be regular cheesecake bars. The pickle juice is what makes them special and conversation-worthy.
Q: How do I convince people to try them? A: Don’t tell them what’s in them until after they taste! Most people are pleasantly surprised once they try them. FYI, calling them “tangy cheesecake bars” helps get people to take that first bite.