You know that moment when you bite into a store-bought pickle and think, “Meh, this tastes like disappointment wrapped in brine”? Yeah, I’ve been there too. That’s exactly why I fell head-over-heels for refrigerator pickles – and trust me, once you try making these bad boys at home, you’ll never look back at those sad, soggy supermarket pickles the same way again.
Here’s the thing about refrigerator pickles: they’re ridiculously simple, incredibly delicious, and ready to eat in just a few hours. No canning equipment, no boiling water baths, no fear of accidentally poisoning your family with botulism (because let’s be honest, that’s always lurking in the back of our minds with traditional canning, right?). Just fresh vegetables, a killer brine, and your trusty refrigerator doing all the heavy lifting.
What Exactly Are Refrigerator Pickles?
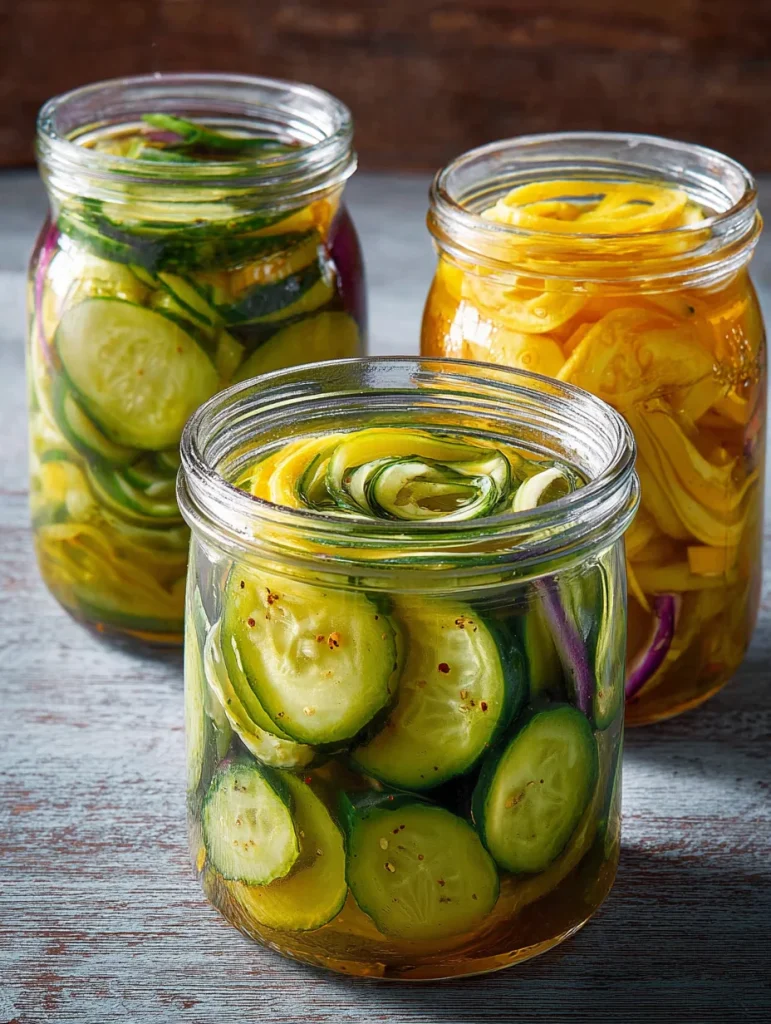
Let me break this down for you in the simplest terms possible. Refrigerator pickles are fresh vegetables that you pickle using a quick brine method and store in – you guessed it – your refrigerator. Unlike traditional canned pickles that go through a whole song and dance with sterilization and processing, these babies are all about instant gratification.
The magic happens when you pour hot brine over your fresh veggies, let them cool, and pop them in the fridge. Within hours, you’ve got crispy, tangy, flavor-packed pickles that taste like they came from a fancy artisan shop. IMO, they’re actually better than most store-bought varieties because you control every single ingredient.
Want to know the best part? They last for weeks in your fridge, getting more flavorful with each passing day. It’s like having a pickle fairy that keeps improving your snacks while you sleep 🙂
Why Choose Refrigerator Pickles Over Traditional Canning?
Ever spent an entire weekend sweating over a hot stove, sterilizing jars, and timing everything perfectly for canning? Yeah, me too, and honestly, it’s exhausting. Refrigerator pickles eliminate all that hassle while delivering superior taste and texture.
Here’s why I’m completely obsessed with this method:
Speed and Convenience
- Ready to eat in 2-4 hours (though they get better after 24 hours)
- No special equipment required – just basic kitchen stuff
- Takes about 15 minutes of actual work time
- Perfect for small batches when you don’t want 47 jars of pickles
Superior Texture
Traditional canning uses high heat that can make vegetables mushy. Refrigerator pickles stay incredibly crispy because they never get cooked. The vegetables maintain their fresh crunch while absorbing all those amazing flavors.
Flavor Flexibility
Want to experiment with weird spice combinations? Go for it! Since you’re not committing to shelf-stable preservation, you can try crazy flavor profiles without worrying about wasting months of storage space if they don’t work out.
Safety Factor
No pressure canning means no risk of improper sealing or botulism concerns. The acidity and refrigeration keep everything safe and delicious.
The Science Behind the Magic
Okay, let’s get slightly nerdy for a hot minute. The pickling process works through osmosis and acid penetration. When you pour that hot, salty, acidic brine over your vegetables, several things happen simultaneously:
The salt draws out water from the vegetable cells, creating that characteristic pickle texture. The acid (usually vinegar) penetrates the cell walls, preserving the vegetables and creating that tangy flavor we all crave. Meanwhile, your spices infuse their flavors throughout the entire mixture.
The temperature difference is crucial here. Hot brine penetrates faster and more thoroughly than cold brine, which is why most refrigerator pickle recipes start with heating the brine mixture. Once it cools in your fridge, the flavors continue to develop and intensify.
Essential Equipment and Ingredients
Let’s talk about what you actually need to become a refrigerator pickle master. Spoiler alert: you probably already have most of this stuff.
Equipment You’ll Need
- Clean glass jars (Mason jars work perfectly)
- A medium saucepan
- Measuring cups and spoons
- A sharp knife for slicing vegetables
- A cutting board
That’s it. Seriously. No fancy canning equipment, no pressure cookers, no special thermometers. Just basic kitchen tools you use every day.
The Holy Trinity of Pickle Ingredients
Vinegar: This is your acid base and flavor foundation. I personally love using apple cider vinegar for a slightly sweet, complex flavor, but white vinegar works great too. Rice vinegar creates more delicate pickles, perfect for Asian-inspired variations.
Salt: Use kosher salt or pickling salt – avoid table salt because the anti-caking agents can make your brine cloudy. Nobody wants murky pickles, right?
Sugar: Balances the acidity and adds depth. You don’t need much, but this little bit makes a huge difference in the final flavor profile.
Master Recipe: Basic Refrigerator Pickle Brine
This is my go-to base recipe that works for pretty much any vegetable. I’ve tweaked this formula over years of pickle experimentation, and it never disappoints:
Ingredients:
- 1 cup white or apple cider vinegar
- 1 cup water
- 2 tablespoons kosher salt
- 1 tablespoon sugar
- 2 cloves garlic, smashed
- 1 teaspoon whole peppercorns
- 1 bay leaf
Instructions:
- Combine everything in a saucepan and bring to a boil
- Stir until salt and sugar dissolve completely
- Pour hot brine over your prepared vegetables in clean jars
- Let cool to room temperature, then refrigerate
This recipe makes enough brine for about 2-3 cups of sliced vegetables. Want to make more? Just double or triple the recipe – the ratios stay exactly the same.
Vegetable Prep: Getting Your Produce Ready
The key to amazing refrigerator pickles starts with proper vegetable preparation. Here’s what I’ve learned through trial and error (mostly error, let’s be honest):
Cucumber Pickles
Slice them about 1/4 inch thick for the perfect bite. Too thin and they get mushy, too thick and the brine doesn’t penetrate properly. Pro tip: If you’re using regular cucumbers instead of pickling cukes, remove some seeds to prevent excess water content.
Quick Pickled Onions
These are absolute game-changers on burgers and tacos. Slice red onions thin – like, really thin. The sharper bite of raw onion mellows beautifully in the acidic brine.
Pickled Radishes
Slice these about 1/8 inch thick. They pickle super quickly and add an amazing pop of color and crunch to salads.
Cauliflower and Carrots
Cut into bite-sized florets and sticks respectively. These heartier vegetables can handle slightly thicker cuts and actually benefit from the extra substance.
Flavor Variations That’ll Blow Your Mind
This is where refrigerator pickles get really fun. Once you master the basic technique, you can go completely wild with flavor combinations. Here are some of my favorites that never fail to impress:
Spicy Dill Pickles
Add fresh dill sprigs, red pepper flakes, and mustard seeds to your basic brine. These taste like the pickles you wish you could buy at the store.
Asian-Inspired Pickles
Use rice vinegar, add fresh ginger slices, a splash of soy sauce, and sesame oil. Perfect with cucumber or daikon radish.
Mediterranean Style
Throw in fresh oregano, lemon zest, and a few olives. These work amazingly well with cauliflower and carrots.
Sweet and Spicy
Add jalapeño slices and increase the sugar to 3 tablespoons. The combination of heat and sweetness is absolutely addictive.
Storage and Safety Tips
Let’s talk about keeping your refrigerator pickles safe and delicious for as long as possible. FYI, proper storage makes all the difference between pickles that last weeks and pickles that go bad in days.
Proper Storage
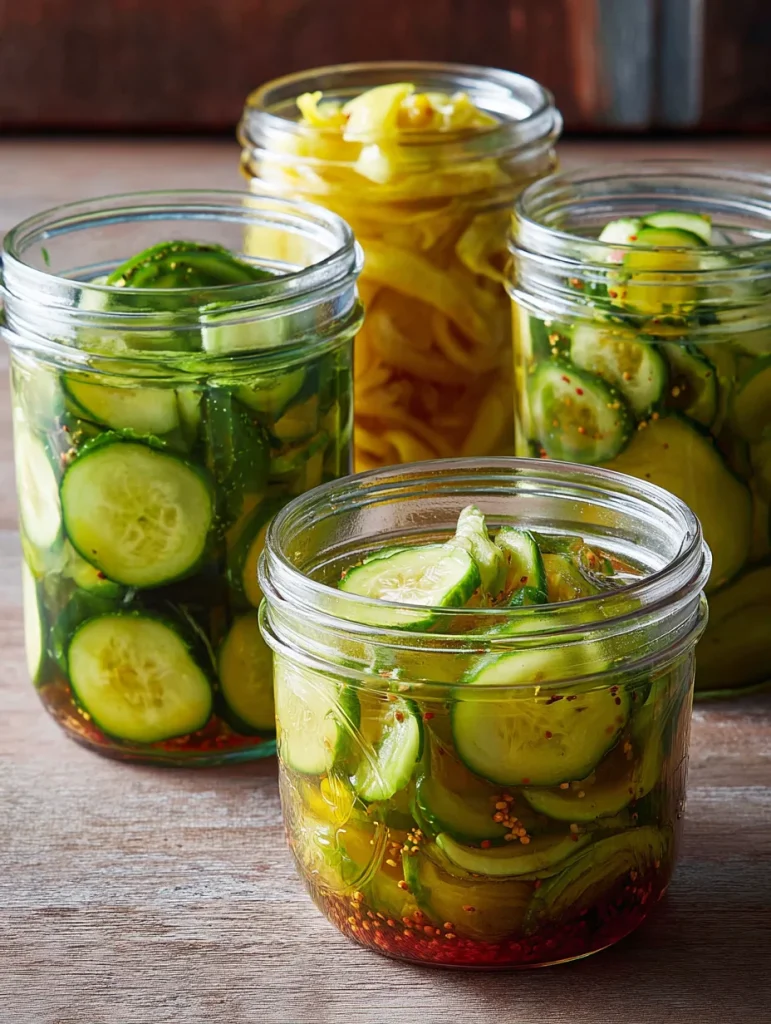
Always use clean glass jars – I can’t stress this enough. Any residue or contamination will affect both flavor and safety. Make sure your vegetables are completely submerged in brine. If they float above the liquid, they can develop mold or off-flavors.
How Long Do They Last?
Most refrigerator pickles stay good for 4-6 weeks when stored properly in the refrigerator. The high acidity and salt content naturally preserve them, but they’re not shelf-stable like traditionally canned pickles.
Signs They’ve Gone Bad
Trust your senses here. If they smell off, look cloudy when they shouldn’t be, or develop any fuzzy growth, toss them out. Better safe than sorry, especially when making fresh pickles is so quick and easy.
Troubleshooting Common Pickle Problems
Even with the simplest recipes, sometimes things go sideways. Here are the most common issues I’ve encountered and how to fix them:
Pickles Are Too Salty
This usually happens when you use table salt instead of kosher salt, or if you accidentally add too much. Next time, stick to the measurements and use the right type of salt. Unfortunately, there’s not much you can do to fix overly salty pickles after the fact.
Pickles Are Too Soft
This typically means your vegetables were either too ripe to begin with, or you used hot brine that was too hot. Let your brine cool slightly before pouring, and choose firm, fresh vegetables.
Brine Is Cloudy
Usually caused by table salt with anti-caking agents, or contamination during the process. Stick to kosher or pickling salt and make sure everything is clean.
Not Enough Flavor
Sometimes pickles taste bland even after proper brining time. This often means you need more acid, salt, or spices in your brine ratio. Don’t be afraid to adjust the recipe to your taste preferences.
Creative Uses for Your Homemade Pickles
Once you start making refrigerator pickles, you’ll find yourself putting them on absolutely everything. Here are some of my favorite ways to use them beyond just snacking straight from the jar (though that’s perfectly valid too):
Sandwich Game-Changers
Quick pickled onions on grilled cheese? Mind-blowing. Pickled radishes on bánh mì? Traditional and delicious. Dill cucumber pickles on literally any sandwich? Always a winner.
Salad Toppers
Chopped pickles add incredible flavor and texture to potato salad, egg salad, or green salads. The acidity brightens everything up and adds that perfect tangy crunch.
Cocktail Garnishes
Pickled vegetables make fantastic garnishes for Bloody Marys, dirty martinis, or even as accompaniments to cheese and charcuterie boards.
The Bottom Line on Refrigerator Pickles
Look, I’m not going to lie to you – once you start making refrigerator pickles, you’ll become slightly obsessed. There’s something incredibly satisfying about transforming ordinary vegetables into these flavor-packed, crunchy delights with just a few simple ingredients and minimal effort.
The beauty of this method lies in its flexibility and forgiveness. You can experiment with different vegetables, play around with spice combinations, and adjust flavors to your heart’s content. Plus, you’ll save money compared to buying fancy artisanal pickles, and you’ll always know exactly what’s going into your food.
Whether you’re looking to preserve garden surplus, add more vegetables to your diet, or just want to impress your friends with your newfound pickle prowess, refrigerator pickles deliver on all fronts. They’re quick, they’re delicious, and they make everything better – what more could you ask for from a simple kitchen technique?
So grab some vegetables, heat up that brine, and get ready to discover your new favorite snack. Trust me, your taste buds will thank you

Basic Refrigerator Pickles
Equipment
- clean glass jars (Mason jars)
- Medium saucepan
- Measuring cups and spoons
- Sharp Knife
- Cutting board
Ingredients
- 1 cup white or apple cider vinegar
- 1 cup water
- 2 tbsp kosher salt
- 1 tbsp sugar
- 2 cloves garlic, smashed
- 1 tsp whole peppercorns
- 1 bay leaf
- 2-3 cups sliced vegetables of choice (cucumbers, onions, radishes, carrots, cauliflower)
Instructions
- Combine vinegar, water, salt, sugar, garlic, peppercorns, and bay leaf in a saucepan. Bring to a boil.
- Stir until salt and sugar fully dissolve.
- Pour the hot brine over prepared vegetables in clean glass jars.
- Let jars cool to room temperature, then cover and refrigerate.