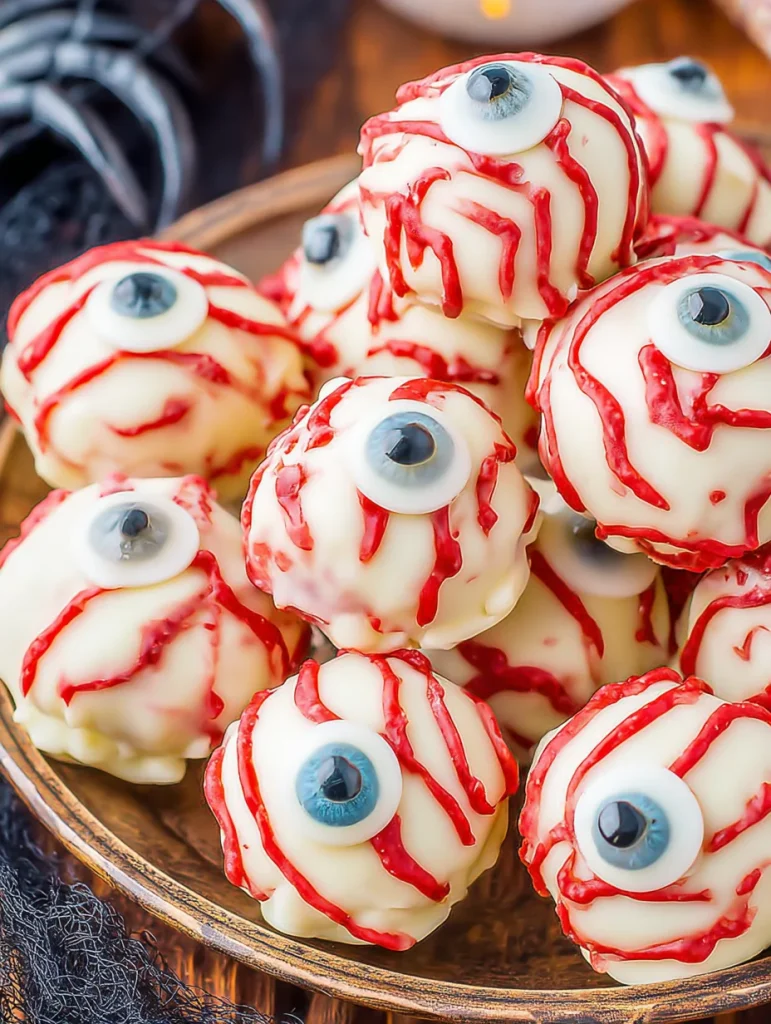
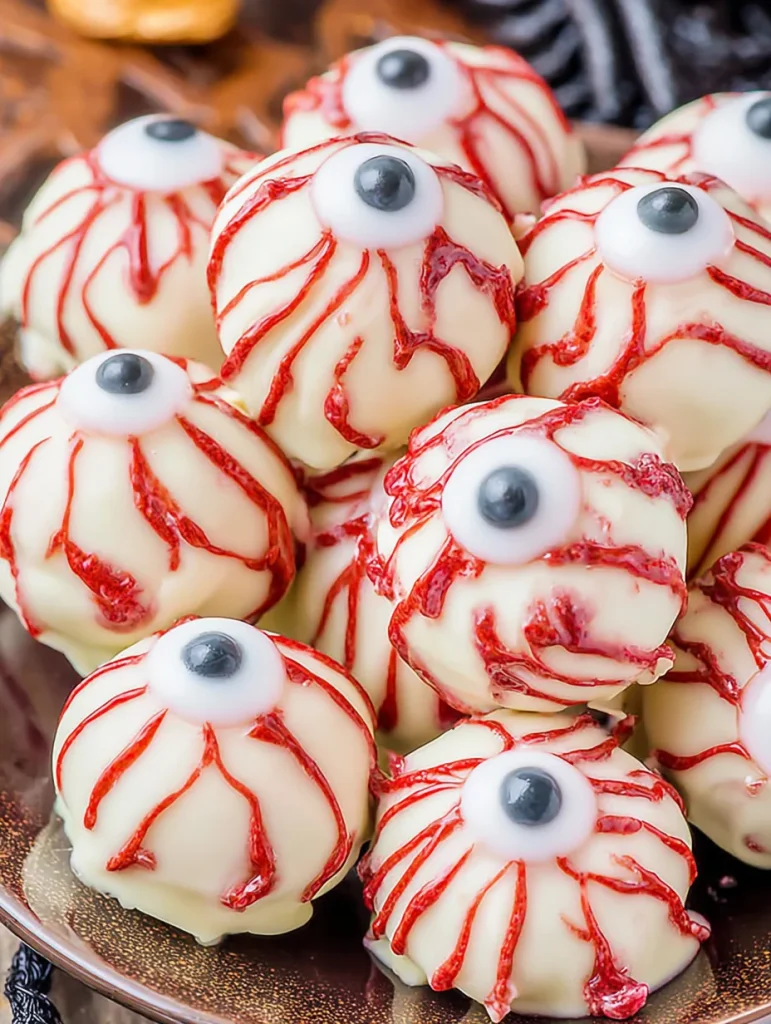
If you’re looking for a Halloween dessert that’s equal parts spooky and scrumptious, Spooky Eyeball Truffles are the perfect pick. These eerie little treats are creamy, chocolatey, and covered in white chocolate “eyes” with candy irises that stare right back at you! They’re easy to make, fun to decorate, and almost too realistic to eat almost.
Each truffle hides a rich, fudgy center (made with OREOs, cookie crumbs, or cake) beneath a smooth white chocolate coating. With their creepy candy eyes and a drizzle of red “veins,” they look straight out of a mad scientist’s lab yet they taste like pure indulgence. Ideal for Halloween parties, trick-or-treat tables, or movie nights, these bite-sized eyeballs are spooky, sweet, and totally unforgettable.
Why You’ll Love This Recipe
- No-bake dessert: Simple, fast, and perfect for Halloween prep.
- Rich and creamy filling: Like cookies-and-cream fudge wrapped in chocolate.
- Spooky but cute: Eye-catching (literally) and fun to decorate.
- Customizable: Choose your “eye” colors — green, blue, or red!
- Make-ahead friendly: Chill until party time for a mess-free, crowd-pleasing treat.
Ingredients for Spooky Eyeball Truffles
- 36 OREO cookies (or similar chocolate sandwich cookies)
- 8 ounces cream cheese, softened
- 12 ounces white chocolate or white candy melts
- 1 teaspoon coconut oil or shortening (optional, for thinning chocolate)
- Candy eyes (large or medium size) or colored M&Ms for irises
- Red decorating gel or melted red candy melts (for bloodshot details)
- Optional: Food coloring or candy melts for different “eye” colors
Step-by-Step Instructions
Step 1: Make the Filling
Place OREO cookies in a food processor and pulse until finely crushed. Add softened cream cheese and blend until the mixture forms a smooth, thick dough. If you don’t have a processor, crush the cookies in a zip-top bag and mix by hand.
Step 2: Shape the Truffles
Scoop out about 1 tablespoon of mixture and roll into smooth balls. Place them on a parchment-lined baking sheet. Chill for 30–40 minutes in the refrigerator or 15 minutes in the freezer until firm.
Step 3: Melt the Chocolate
In a microwave-safe bowl, melt the white chocolate or candy melts with the coconut oil in 20-second intervals, stirring between each, until smooth and glossy.
Step 4: Dip the Eyeballs
Using a fork or dipping tool, dip each chilled truffle into the melted white chocolate, coating completely. Gently tap off excess and place back on the parchment paper.
Step 5: Add the Eyes
Immediately press a candy eye or M&M (flat side up) on top of each truffle while the coating is still wet. Allow to set slightly.
Step 6: Add the Spooky Details
Once the coating has hardened, use red decorating gel or melted red candy melts to draw thin, branching “veins” around each eye. For a glowing look, use colored candy melts (green, blue, or yellow) for the iris before adding the candy pupil.
Step 7: Chill and Serve
Refrigerate the truffles for 20 minutes, or until fully set. Serve cold or at room temperature for a perfectly fudgy texture.
Flavor and Texture Profile
These Spooky Eyeball Truffles are smooth, rich, and melt-in-your-mouth delicious. The chocolatey OREO base creates a creamy, fudge-like center, perfectly balanced by the sweet crunch of the white chocolate shell. Each bite offers that cookies-and-cream flavor you know and love, wrapped in a spooky, festive presentation that screams Halloween.
The red “veins” add just enough eeriness without overpowering the sweetness, making these truffles as delicious as they are devilishly fun to look at.
Tips for Perfect Eyeball Truffles
- Chill the mixture well: Makes shaping and dipping easier.
- Use gel food coloring sparingly: A little goes a long way if tinting the white chocolate.
- Work in batches: Keep half of the truffles chilled while you dip the rest.
- Add eyes while coating is wet: Ensures they stick securely.
- Thin chocolate if needed: A teaspoon of coconut oil helps create a smooth, even shell.
Make-Ahead and Storage Tips
- Make Ahead: Prepare and decorate up to 3 days in advance. Store in the fridge until serving.
- Storage: Keep in an airtight container in the refrigerator for up to 5 days.
- Freezing: Freeze uncoated truffles for up to 2 months. Thaw in the fridge before dipping.
- Serving Tip: Serve chilled for firmness or slightly softened for creamier centers.
Variations and Add-Ons
- Monster Eyeballs: Use colored candy melts (green, purple, or blue) for the coating.
- Bloody Eyeballs: Drizzle red candy melts thickly for a gory effect.
- Chocolate Eyeballs: Use milk or dark chocolate coating for a “shadowy” vibe.
- Pumpkin Spice Eyeballs: Add ½ teaspoon pumpkin pie spice to the filling.
- Candy Center Surprise: Press a mini peanut butter cup or caramel bit inside before rolling.
Serving Ideas
These creepy treats are perfect for:
- Halloween parties: A spooky centerpiece dessert.
- Movie marathons: Perfect snack for a horror night.
- Dessert tables: Add variety with themed cupcakes or dirt cups.
- Kids’ events: Safe, no-bake activity for little ghouls and goblins.
- Gift boxes: Wrap in mini candy cups for take-home favors.
Nutritional Snapshot
Each truffle (based on 24 servings) contains approximately:
- Calories: 140
- Fat: 8g
- Carbohydrates: 15g
- Protein: 1g
- Sugar: 12g
They’re indulgent and rich — a little spooky bite goes a long way.
Frequently Asked Questions
Can I use other cookies instead of OREOs?
Yes! Chocolate wafers, sandwich cookies, or even graham crackers work well — just adjust the cream cheese slightly for consistency.
Can I make them without cream cheese?
You can use frosting instead for a sweeter filling, or peanut butter for a richer flavor.
How do I make them dairy-free?
Use dairy-free cream cheese and vegan white chocolate.
Can I use store-bought candy eyes?
Yes — they’re the easiest option, but you can also make your own using white chocolate chips and mini chocolate chips.
How long do they last?
They’ll stay fresh for up to 5 days in the fridge or 2 months in the freezer.
Expert Tips for Success
- Decorate quickly: The coating sets fast, so add eyes before it hardens.
- Use good-quality chocolate: Ensures a smoother texture and better flavor.
- Keep hands cool: Prevents the filling from softening while shaping.
- Pipe the veins carefully: A thin nozzle or toothpick gives a realistic look.
- Serve on a black platter: Makes the eyeballs stand out dramatically on your table.
A Frighteningly Fun Halloween Treat
These Spooky Eyeball Truffles are the perfect combination of creepy and crave-worthy. They look gruesomely realistic but taste like a bite of heaven — smooth, chocolatey, and perfectly sweet. Whether you serve them on a spooky dessert board or pack them into treat bags, they’re guaranteed to impress (and maybe even freak out) your guests.
They’re fun to make, fun to decorate, and fun to devour — the ultimate Halloween truffle that’s scary good in every sense.

Spooky Eyeball Truffles
Equipment
- food processor or zip-top bag & rolling pin
- Mixing bowl
- Microwave-safe bowl
- Spoon or cookie scoop
- Parchment-lined baking sheet
- Fork or dipping tool
- decorating gel or piping bag
Ingredients
- 36 OREO cookies or similar sandwich cookies
- 8 oz cream cheese, softened
- 12 oz white chocolate or white candy melts
- 1 tsp coconut oil or shortening (optional)
- candy eyes or colored M&Ms for irises
- red decorating gel or melted red candy melts
- optional: colored candy melts or food coloring
Instructions
- Place cookies in a food processor and pulse until crushed. Add softened cream cheese and blend until smooth. If no processor, crush cookies in a zip-top bag and mix by hand.
- Roll about 1 tablespoon of mixture into smooth balls. Place on a parchment-lined tray and chill for 30–40 minutes in the fridge or 15 minutes in the freezer.
- In a microwave-safe bowl, melt white chocolate and optional coconut oil in 20-second intervals, stirring until smooth.
- Dip each chilled truffle into melted white chocolate. Tap off excess and place back on parchment.
- Immediately press a candy eye or M&M on top while coating is still wet. Let set slightly.
- Once set, use red gel or melted red candy to draw thin veins for a realistic “bloodshot” look. Optional: add iris color first using candy melts.
- Chill for 20 minutes until firm. Serve chilled or at room temp for soft centers.
Notes
Final Thoughts
Spooky Eyeball Truffles are a must for any Halloween celebration — simple, creative, and absolutely delicious. With their creamy centers, sweet white chocolate shells, and eerie candy eyes, they bring a perfect balance of fright and delight to your dessert table.
Make them once, and you’ll find yourself making them every Halloween. They’re spooky, sweet, and downright irresistible — a treat that proves sometimes the scariest things are also the most delicious!