Okay so here’s the thing about Halloween desserts – most of them are all costume, no substance. You bite into something that looks incredible and it tastes like someone added food coloring to sadness. I’ve been burned too many times by desserts that promised everything and delivered mediocre cake with too much frosting.
Then I made this Vampire Bite Red Velvet Cheesecake and everything changed. Like, I brought it to a Halloween potluck and three different people offered to pay me to make one for their parties. One woman literally followed me to my car asking for the recipe. That’s when you know you’ve got something special.
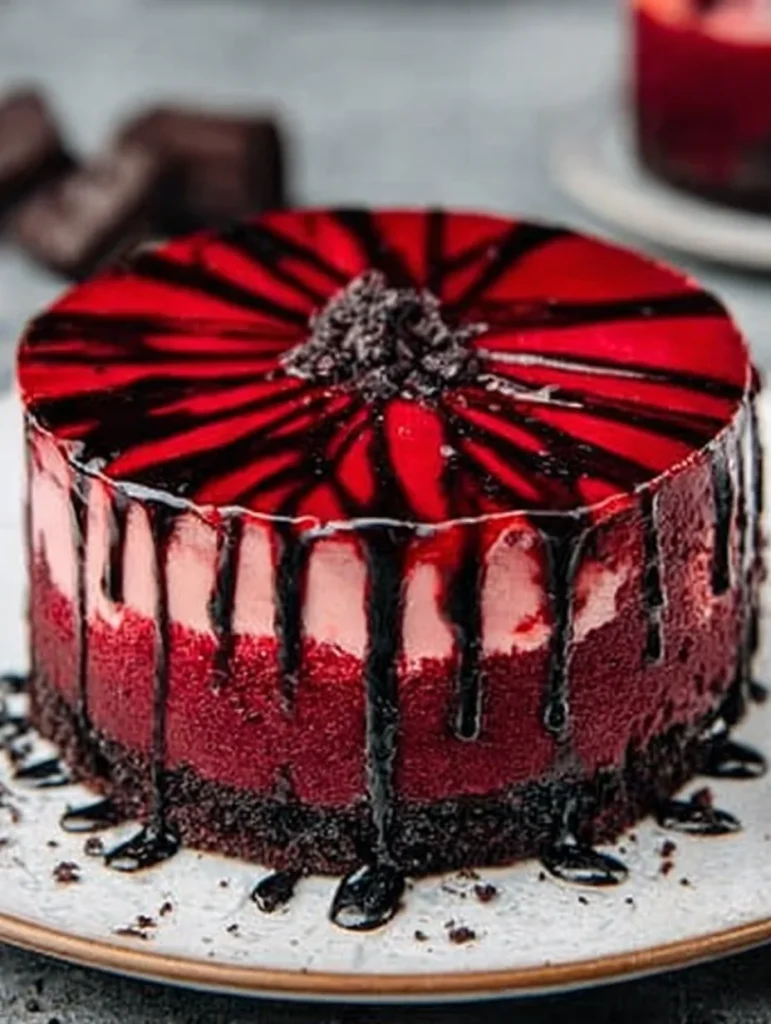
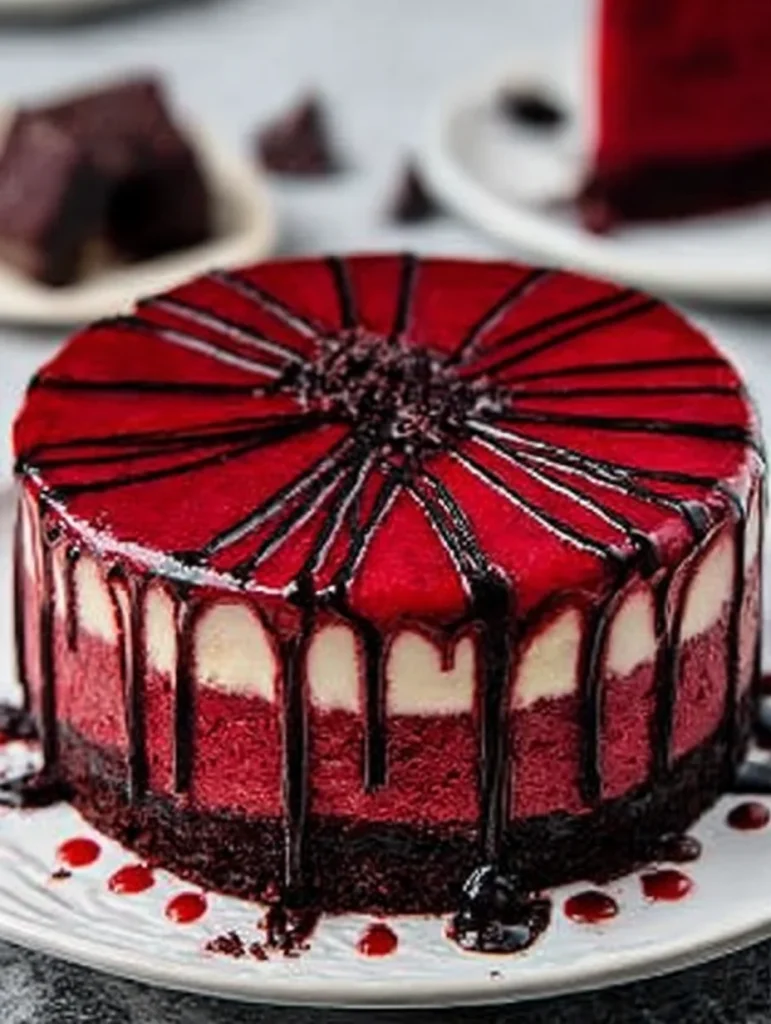
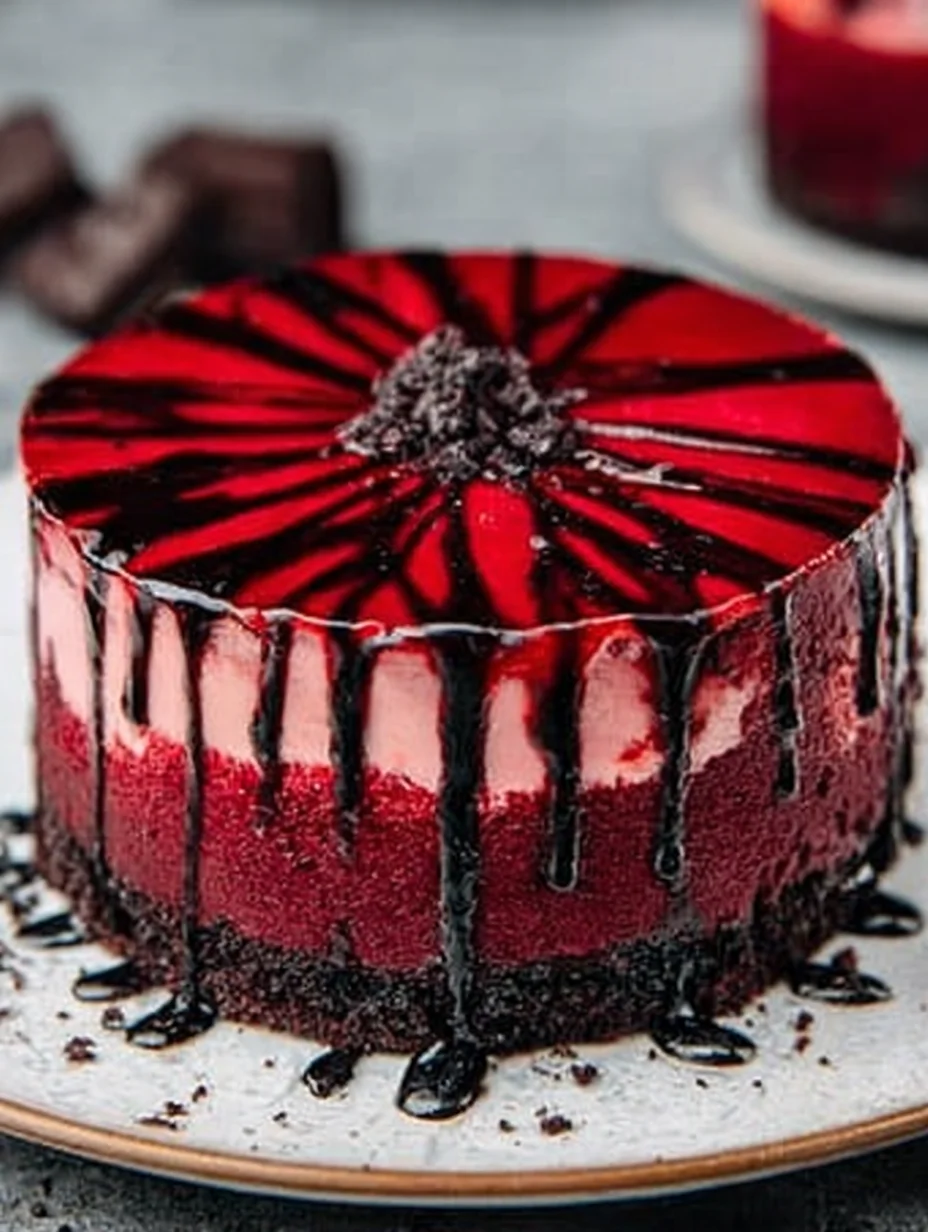
We’re combining red velvet cake (already dramatic and delicious) with rich cheesecake, then adding a raspberry “blood” center that oozes when you cut into it. The white chocolate fangs on top seal the vampire theme, and honestly? This tastes way better than it has any right to. The cream cheese tanginess against the cocoa-vanilla combo is just chef’s kiss.
Best part – it looks like you attended pastry school but really you just followed some instructions and let physics do the work.
Why This Cheesecake Beats Every Other Halloween Treat
Ever notice how Halloween desserts either taste good OR look good, never both? This red velvet cheesecake is the exception that proves the rule. It’s genuinely show-stopping but also something you’ll want to eat the leftovers of for breakfast (not that I’ve done that, obviously).
I made this for my friend’s “adult Halloween” party last year where everyone was trying to outdo each other. The competition was intense – someone brought a three-tier spiderweb cake, another person made elaborate witch hat cookies. I sliced into this cheesecake and the raspberry filling oozed out like fresh blood, and I’m pretty sure I heard someone gasp. Dramatic? Yes. Effective? Absolutely.
Here’s why you’re gonna want to make this:
- The color is naturally creepy without needing weird ingredients
- Cheesecake impresses people automatically – it just does
- The raspberry “blood” center is both disturbing and delicious
- You can make it 1-2 days ahead (actually tastes better after sitting)
- Feeds like 12-16 people so one dessert handles a whole party
- The red velvet base isn’t too sweet, which adults appreciate
Plus this works for people who claim they don’t like cheesecake because “it’s too rich.” The red velvet layer adds texture and cuts through that density. My brother hates cheesecake with a passion and even he admitted this one was “pretty good” which from him is basically a standing ovation.
What You Need for This Vampire Cheesecake
For the Red Velvet Base
This isn’t optional – the red velvet layer is what makes this special, not just a regular cheesecake with decorations.
Dry Ingredients:
- All-purpose flour (1½ cups)
- Cocoa powder (2 tablespoons – just enough for flavor, not chocolate overload)
- Baking soda (½ teaspoon)
- Salt (½ teaspoon)
Wet Ingredients:
- Vegetable oil (½ cup – keeps it moist)
- Granulated sugar (1 cup)
- Large egg (1)
- Buttermilk (½ cup – this is non-negotiable for red velvet)
- Vanilla extract (1 teaspoon)
- White vinegar (1 teaspoon – reacts with baking soda for texture)
- Red gel food coloring (1-2 tablespoons – liquid won’t give you that deep red)
Why these ingredients matter: Red velvet is basically a mild chocolate cake with tang from buttermilk and vinegar. That tanginess plays perfectly with cheesecake. The small amount of cocoa gives you flavor without making it taste like chocolate cake. And that red color? It needs gel coloring to get vibrant without adding too much liquid.
Substitutions that work:
- No buttermilk? Mix ½ cup milk with 1½ teaspoons vinegar, let sit 5 minutes
- Dairy-free? Use oat milk with vinegar for buttermilk substitute
- The vinegar is essential – don’t skip it or substitute it
For the Cheesecake Layer
This is where you don’t cheap out. Full-fat cream cheese only, or the texture will be wrong.
- Cream cheese (24 oz – that’s three 8-oz blocks, softened)
- Granulated sugar (¾ cup)
- Sour cream (½ cup – adds tanginess and prevents cracks)
- Large eggs (3 – room temperature)
- Vanilla extract (2 teaspoons)
- Heavy cream (¼ cup)
Critical info: Softened cream cheese means it’s been sitting out for at least an hour. You should be able to press a finger into it easily. Cold cream cheese = lumpy cheesecake = sad times. Also, room temperature eggs blend smoother and prevent overmixing.
For the Raspberry “Blood” Center
This is what makes people lose their minds when you cut into it.
- Fresh or frozen raspberries (2 cups)
- Granulated sugar (⅓ cup)
- Cornstarch (2 tablespoons)
- Lemon juice (1 tablespoon)
- Red food coloring (optional but makes it more dramatic)
- Water (2 tablespoons)
Why this works: The cornstarch thickens the raspberry mixture so it stays in the center instead of bleeding throughout the cheesecake. The lemon juice brightens the flavor so it doesn’t taste flat. And that extra red coloring? Makes it look genuinely blood-like, which is the whole point.
For the Vampire Decorations
- White chocolate chips or candy melts (1 cup)
- Black food coloring or edible marker
- Extra raspberry sauce for dripping
- Whipped cream (optional for serving)
You can buy pre-made fangs if crafting isn’t your thing. Halloween stores have them everywhere in October. Zero judgment – I’ve done it.
Equipment You Actually Need
- 9-inch springform pan (don’t use a regular cake pan, you can’t get it out)
- Roasting pan for water bath
- Electric mixer
- Aluminum foil (heavy duty)
- Patience (seriously, cheesecake requires chill time)
How to Make This Vampire Bite Cheesecake
Step 1: Prep That Pan Properly
Wrap the outside of your springform pan with heavy-duty aluminum foil, going up the sides. This prevents water from the water bath leaking in. I learned this lesson the hard way with a soggy-bottomed cheesecake :/
Spray the inside with non-stick spray. Preheat your oven to 350°F.
Step 2: Make the Red Velvet Layer
Whisk together flour, cocoa powder, baking soda, and salt in a bowl. In another bowl, whisk oil, sugar, and egg until combined. Add buttermilk, vanilla, and vinegar, then mix in your red food coloring – start with 1 tablespoon and add more for deeper color.
Fold wet ingredients into dry ingredients until just combined. Don’t overmix or your cake layer will be tough. The batter will be thin – that’s correct.
Pour into your prepared springform pan and bake for 15-18 minutes until a toothpick comes out clean. Let it cool completely while you make the cheesecake layer. If you put cheesecake batter on a warm cake, everything melts together into chaos.
Step 3: Create the Raspberry Blood
Combine raspberries, sugar, and lemon juice in a saucepan over medium heat. Cook for about 5 minutes, stirring occasionally, until berries break down and release juice.
Mix cornstarch with water to make a slurry. Pour it into the raspberry mixture, stirring constantly. Keep cooking for 2-3 minutes until it thickens noticeably – should coat the back of a spoon. Remove from heat, add food coloring if using, and let it cool completely. This needs to be cold before going into the cheesecake.
Step 4: Make the Cheesecake Batter
Lower oven temperature to 325°F. Beat cream cheese and sugar together for about 3 minutes until fluffy and smooth. Scrape down the sides – cream cheese loves hiding there.
Add sour cream and mix until incorporated. Add eggs one at a time, beating on low speed after each addition. Do not overmix once eggs are in. Overmixed cheesecake puffs up then collapses and cracks. Add vanilla and heavy cream, mix just until smooth.
Step 5: Assemble This Masterpiece
Pour half the cheesecake batter over your cooled red velvet layer. Smooth it out gently.
Take your cooled raspberry filling and drop spoonfuls into the center of the cheesecake, staying away from the edges. You want it centered so when you cut slices, everyone gets some of that blood effect. Pour remaining cheesecake batter over top, smoothing gently.
Pro tip: Tap the pan on the counter a few times to release air bubbles. Bubbles = holes in your cheesecake.
Step 6: Water Bath and Bake
Place your wrapped springform pan into a larger roasting pan. Pour hot water into the roasting pan until it comes halfway up the sides of the springform. This water bath prevents cracking and ensures even cooking.
Bake for 60-75 minutes. The cheesecake is done when the edges are set but the center still jiggles slightly when you shake the pan – like jello, not liquid. It continues cooking as it cools.
Turn off the oven, crack the door open, and let the cheesecake sit in there for 1 hour. This gradual cooling prevents cracks from thermal shock.
Step 7: The Waiting Game
Remove from oven and water bath. Let it cool to room temperature, then refrigerate for at least 6 hours, preferably overnight. I know this is torture, but cheesecake needs time to set properly. Cutting into it early gives you soup, not cheesecake.
Step 8: Decorate Like a Vampire
Remove springform pan sides carefully. Melt white chocolate and pipe fang shapes onto parchment paper – two triangles per fang. Let them harden completely in the fridge.
Drizzle reserved raspberry sauce around the edges so it drips down the sides like blood. Place white chocolate fangs strategically around the top edge. You can draw details on the fangs with black edible marker if you’re feeling artistic.
Some people add plastic vampire teeth as decorations. Tacky? Maybe. Fun? Definitely.
Creative Variations Worth Trying
Chocolate Vampire Cheesecake
Use chocolate cake as the base instead of red velvet. Keep the raspberry filling and decorations the same. More chocolate-forward flavor but loses some of that dramatic red effect.
Strawberry Blood Version
Use strawberries instead of raspberries for the filling. Sweeter, less tart, still looks appropriately bloody. Add a bit of balsamic vinegar for depth if you’re feeling fancy.
Black Forest Vampire Cake
Use chocolate cake base and cherry filling instead of raspberry. The cherry-chocolate combo is classic for a reason. Use dark sweet cherries for best results.
Pumpkin Spice Vampire Cheesecake
Mix pumpkin puree and pumpkin pie spice into half the cheesecake batter. Swirl it with plain batter for a marbled effect. Different vibe, still seasonal, still has the blood center.
White Chocolate Raspberry Version
Add white chocolate chips to the cheesecake batter. The white chocolate-raspberry combo is undefeated, IMO. Makes it sweeter though, so adjust accordingly.
Oreo Crust Vampire Cheesecake
Replace the red velvet base with crushed Oreo crust. Easier to make, different texture, still delicious. Press 2 cups Oreo crumbs mixed with ¼ cup melted butter into the pan bottom.
Frequently Asked Questions
Why did my cheesecake crack on top?
Several reasons – overmixing after adding eggs, too high oven temperature, skipping the water bath, or cooling too quickly. The water bath and gradual cooling are your crack prevention strategies. If it cracks anyway, cover it with decorations and nobody will know.
Can I make this vampire bite red velvet cheesecake ahead of time?
Absolutely. Make it 1-2 days ahead – it actually tastes better after sitting in the fridge as flavors meld. Don’t add the decorations until the day you’re serving though. The raspberry drips can make things messy if left too long.
My raspberry filling sank to the bottom instead of staying centered – what happened?
The filling was probably too warm when you added it, or too thin. Make sure it’s completely cooled and thick enough to hold its shape before spooning it into the cheesecake batter. Also make sure you’re centering it properly with enough batter underneath.
Do I really need a water bath or can I skip it?
You can skip it, but your chances of cracking increase significantly. The water bath regulates temperature and adds moisture to prevent the top from drying out and splitting. It’s worth the minor hassle of wrapping your pan in foil.
How do I know when the cheesecake is done if the center still jiggles?
That jiggle should look like jello, not liquid. The edges should be completely set and pulling away slightly from the pan. A 2-3 inch circle in the very center can still wobble – it’ll set during cooling. Overbaked cheesecake is dry and grainy.
Can I freeze this cheesecake?
You can freeze the plain cheesecake for up to 2 months. Wrap it tightly in plastic wrap then foil. Don’t freeze it with the decorations – add those after thawing. Thaw in the fridge overnight before serving.
My red velvet layer is sticking to the pan bottom – how do I fix this?
Make sure you spray the pan well before adding batter. When removing the springform sides, run a thin knife around the edge first. For the bottom, slide a thin spatula between the crust and pan base while it’s still slightly chilled.
Vampire Bite Red Velvet Cheesecake
Equipment
- 9-inch springform pan
- Roasting Pan for water bath
- Electric mixer
- Saucepan
- Rubber spatula
- Mixing bowls
- Aluminum foil heavy duty
Ingredients
- 1 1/2 cups all-purpose flour
- 2 tbsp cocoa powder
- 1/2 tsp baking soda
- 1/2 tsp salt
- 1/2 cup vegetable oil
- 1 cup granulated sugar
- 1 large egg
- 1/2 cup buttermilk
- 1 tsp vanilla extract
- 1 tsp white vinegar
- 1–2 tbsp red gel food coloring
- 24 oz cream cheese, softened
- 3/4 cup granulated sugar
- 1/2 cup sour cream
- 3 large eggs, room temperature
- 2 tsp vanilla extract
- 1/4 cup heavy cream
- 2 cups fresh or frozen raspberries
- 1/3 cup granulated sugar
- 2 tbsp cornstarch
- 1 tbsp lemon juice
- 2 tbsp water
- 1 cup white chocolate chips or candy melts
- 1 black food coloring or edible marker
- to taste whipped cream (optional for serving)
Instructions
- Wrap a 9-inch springform pan with heavy-duty foil and spray the inside with non-stick spray. Preheat oven to 350°F.
- Whisk together flour, cocoa, baking soda, and salt. In a separate bowl, whisk oil, sugar, and egg, then mix in buttermilk, vanilla, vinegar, and food coloring. Combine wet and dry mixtures until smooth.
- Pour batter into pan and bake for 15–18 minutes. Cool completely before proceeding.
- In a saucepan, heat raspberries, sugar, and lemon juice until broken down. Mix water and cornstarch into a slurry, then stir into raspberries until thickened. Cool completely.
- Reduce oven temp to 325°F. Beat cream cheese and sugar until smooth. Add sour cream, then eggs one at a time, then vanilla and cream. Don’t overmix.
- Spread half the cheesecake batter over cooled red velvet base. Spoon raspberry filling into center. Top with remaining cheesecake batter and smooth out.
- Place cheesecake pan in a larger pan and add hot water halfway up sides. Bake 60–75 minutes. Let sit in off oven with door cracked for 1 hour.
- Remove and let cool to room temp, then chill at least 6 hours or overnight.
- Pipe melted white chocolate fangs on parchment and chill until set. Drizzle raspberry sauce over cake and add decorations before serving.
Notes
My Final Bite on This Cheesecake
I’ve made probably 20 different cheesecakes over the years. Plain ones, fruit-topped ones, those mini individual ones that seem like a good idea until you’re making 24 of them. But this Vampire Bite Red Velvet Cheesecake is the one that gets requested by name at every Halloween gathering.
Last year my cousin asked me to make it for her wedding because she was having a Halloween-themed reception. A vampire cheesecake at a wedding felt weird to me, but apparently it was the hit of the dessert table and people are still talking about it at family dinners. The groom’s mom asked if I did commissions, which is both flattering and slightly terrifying.
What makes this cheesecake work is that it doesn’t rely on gimmicks. Yeah, the vampire aesthetic is fun and the raspberry blood center is dramatic, but strip all that away and you’re still left with legitimately delicious red velvet cheesecake. The decorations are just bonus points.
Make this for your Halloween party and watch it become the thing people remember about your party six months later. Make it for yourself and eat it slowly throughout the week while feeling fancy. Make it to impress someone – it’ll work, I’ve seen it happen multiple times.
Just make it, because eating store-bought cake on Halloween when you could be eating a dessert that oozes raspberry blood is honestly kind of a waste of the holiday. Your Halloween dessert game is about to reach legendary status.
Now go create some vampire magic and prepare for people to ask if you’re secretly a pastry chef. The answer is no, you just followed instructions and let time do most of the work. But you don’t have to tell them that 🙂