Let me be real with you – when I first saw witch hat cupcakes on Pinterest I thought “absolutely not, that’s too complicated for me.” Then I actually made them and realized the entire “hat” is just an ice cream cone dipped in chocolate with a cookie brim. That’s it. I’d been intimidated by chocolate-covered cones and cookies. I felt personally betrayed by how easy they actually were.
I brought these to a Halloween bake sale last year and they sold out in like 15 minutes. Parents were asking if I did custom orders. One woman offered me $40 for a dozen. Lady, I made these while watching reality TV and they cost maybe $12 total to make. The gap between effort and impression here is absolutely wild.

Best part? Kids think they’re magical, adults think they’re adorable, and you can customize the colors to match whatever witch aesthetic you’re going for. Plus they actually taste good – not just Instagram bait that nobody wants to eat.
Why These Cupcakes Beat Other Halloween Desserts
Most decorated Halloween cupcakes require frosting skills I simply don’t have. Perfect swirls, smooth surfaces, intricate piping – no thanks. These witch hat cupcakes bypass all that because the decoration is literally placing a cone on top. If you can put a hat on your head, you can decorate these cupcakes.
I made these for my coworker’s kid’s Halloween party after she specifically requested “something impressive but not too sweet because these kids are already hyped up enough.” These were perfect – the cupcake itself is just chocolate cake, the hat is mostly visual, and kids went crazy for them without bouncing off walls afterward. Well, not MORE than they already were :/
Here’s why you need these cupcakes:
- The decoration looks way harder than it actually is
- Uses mostly standard ingredients you probably have
- You can make components ahead and assemble day-of
- Customizable colors for different witch themes
- Feeds a crowd without individual frosting torture
- Kids legitimately think they’re cool
Plus these work for people who claim frosted cupcakes are “too sweet.” The hat is mostly cone and cookie – not a sugar overload situation. My uncle who never eats dessert tried one and finished the whole thing. That’s unheard of.
What You Need for Witch Hat Cupcakes
For the Cupcakes
Don’t overthink the base – good chocolate cupcakes are the foundation.
Dry Ingredients:
- All-purpose flour (1½ cups)
- Cocoa powder (½ cup – use good quality for better flavor)
- Baking soda (1½ teaspoons)
- Baking powder (½ teaspoon)
- Salt (½ teaspoon)
Wet Ingredients:
- Granulated sugar (1 cup)
- Large eggs (2)
- Vegetable oil (½ cup)
- Vanilla extract (2 teaspoons)
- Hot coffee or water (1 cup – makes chocolate flavor deeper)
Why these ingredients work: The oil keeps cupcakes moist longer than butter. Hot liquid blooms the cocoa powder for intense chocolate taste. Simple recipe that actually delivers on flavor.
Substitutions that work:
- Buttermilk instead of coffee/water for tangy richness
- Melted butter instead of oil if you prefer
- Box mix works if you’re short on time – no judgment
For the Witch Hats
This is where the magic happens with minimal effort.
Hat Components:
- Sugar cones or waffle cones (12 – one per cupcake)
- Chocolate cookies (12 – Oreos, chocolate chip, or fudge stripe)
- Semi-sweet chocolate chips or candy melts (2 cups for dipping)
- Vegetable oil (1 tablespoon – keeps chocolate smooth)
Decorations:
- Colored frosting or icing (orange, purple, green for hat bands)
- Sprinkles or sanding sugar
- Mini candy buckles or edible gold stars
- Black food coloring gel if you want darker chocolate
Why this works: Ice cream cones are already cone-shaped (obviously) and sturdy enough to hold their shape. Cookies provide a stable brim. Chocolate acts as both coating and glue. It’s engineering disguised as baking.
For Assembly
- Green or purple frosting (for attaching hats to cupcakes)
- Piping bag or knife for frosting
- Wax paper for setting chocolate
You don’t need fancy buttercream here – store-bought frosting works fine since it’s mostly hidden under the hat.
Equipment You Actually Need
- Muffin tin and cupcake liners
- Mixing bowls
- Microwave-safe bowl for melting chocolate
- Baking sheet for setting hats
- Toothpicks for decorating details
How to Make Witch Hat Cupcakes
Step 1: Bake the Cupcakes
Preheat oven to 350°F and line a muffin tin with cupcake liners. Mix all dry ingredients in one bowl. Whisk all wet ingredients in another bowl – yes including the hot coffee, trust me on this.
Pour wet into dry and stir just until combined. Don’t overmix or you’ll get tough cupcakes. The batter will be thin and liquidy – that’s correct, don’t panic.
Fill cupcake liners about ⅔ full. Bake for 18-20 minutes until a toothpick comes out clean. Cool in the pan for 5 minutes, then transfer to a wire rack to cool completely.
You can’t frost warm cupcakes so be patient here. Go watch an episode of something while they cool.
Step 2: Make the Witch Hats
Line a baking sheet with wax or parchment paper. Melt chocolate chips with vegetable oil in the microwave – 30 second bursts, stirring between each. Usually takes 2-3 cycles total.
Dip each cone in the melted chocolate, coating it completely. Let excess drip off. Place on prepared baking sheet to set.
Take your cookies and dip the top surface in chocolate – this will be the underside of the brim that attaches to the cone. Place each chocolate-coated cookie on the sheet.
While the chocolate is still wet, place the wide end of a chocolate-coated cone in the center of each cookie. Press gently so it sticks. The chocolate acts as glue.
Let everything set at room temperature for about 30 minutes, or refrigerate for 10 minutes to speed it up.
Step 3: Decorate the Hats
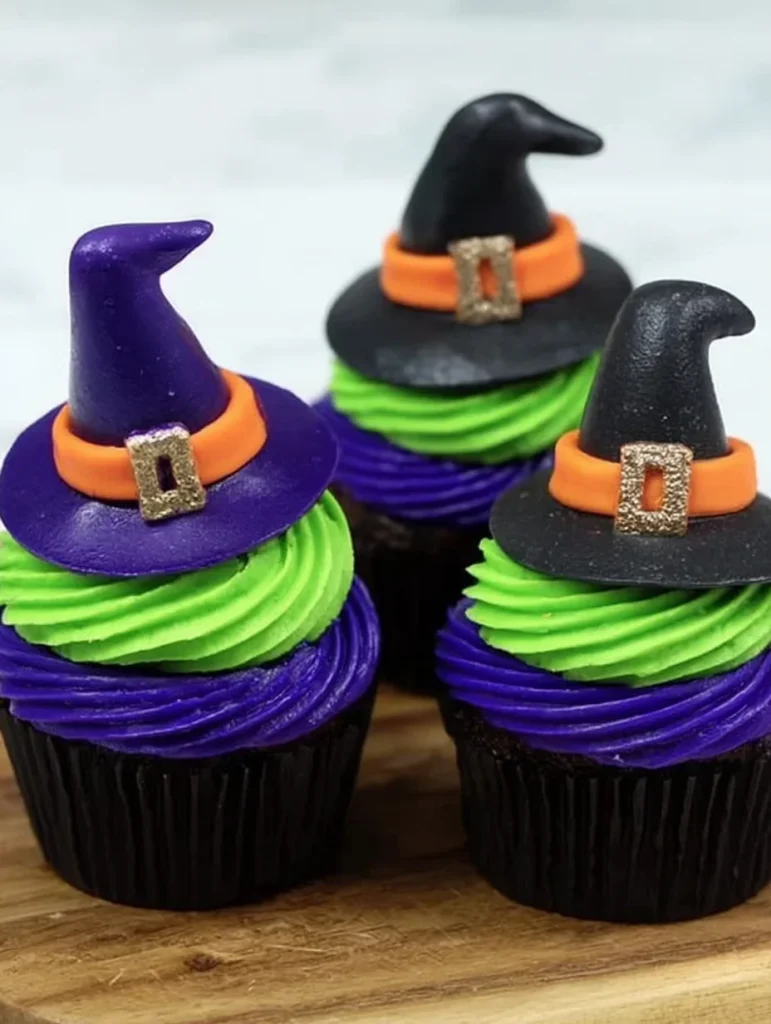
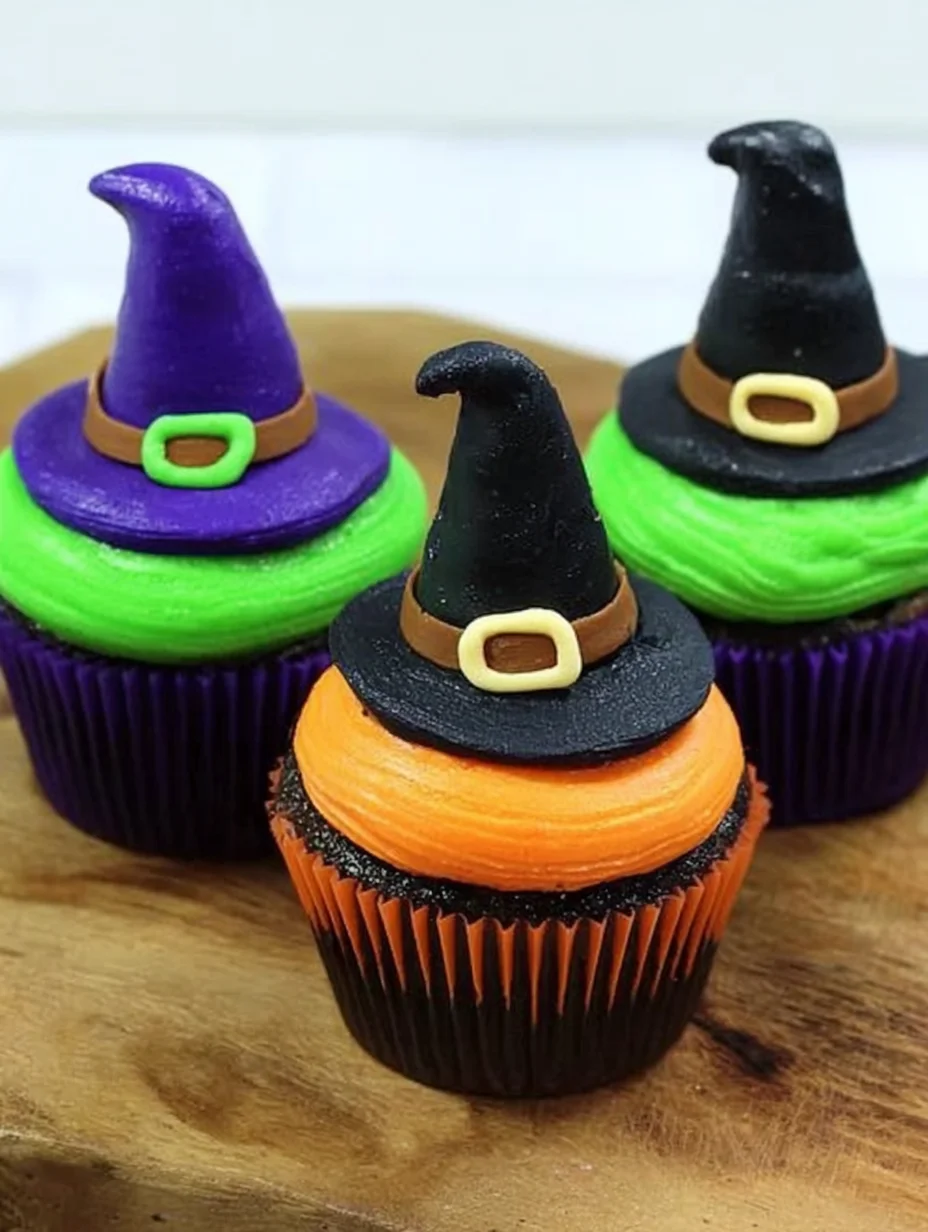
Once the chocolate is completely set, add decorative details. Use colored frosting or icing to pipe a band around each hat where the cone meets the brim – classic witch hat style.
Add sprinkles, mini candy buckles, stars, or whatever decorations match your theme. You can go simple or elaborate here depending on time and energy levels.
Purple bands with gold stars look witchy and elegant. Orange bands with black sprinkles lean more Halloween festive. Green bands look properly wicked witch vibes.
Step 4: Frost the Cupcakes
You don’t need perfect frosting swirls here since the hat covers most of it. Just dollop a generous amount of frosting on each cooled cupcake and spread it slightly.
Green frosting looks most witch-like. Purple works too. Even chocolate frosting is fine – the hat is the star anyway.
The frosting serves two purposes – tastes good and acts as glue for the hat. Make sure you use enough to anchor the hat securely.
Step 5: Add the Hats
Gently press a completed witch hat onto each frosted cupcake. The frosting should hold it in place. Press down just enough to secure it but not so hard the cookie brim sinks into the frosting.
The hat should sit at a slight angle for that whimsical witch look. Perfectly straight looks too formal. Let them lean a bit – adds character.
Step 6: Final Touches
Add any extra decorations around the base if you want – candy corn, sprinkles, mini chocolate chips. Or keep it simple and let the hats speak for themselves.
These witch hat cupcakes look impressive as-is without additional fussing. Sometimes less is more, especially with something this visually interesting already.
Store at room temperature in a container tall enough to not squish the hats. They keep for 2-3 days but honestly they’ll be gone way before that.
Creative Variations Worth Trying
Rainbow Witch Hats
Use different colored candy melts for each hat – pink, blue, purple, orange. Creates a whole rainbow coven of witch hats. Kids especially love the variety.
Striped Wizard Hats
Before the chocolate sets on the cones, drizzle contrasting color in stripes. Orange and black stripes look very Halloween. Purple and silver stripes look magical.
Glitter Witch Hats
While chocolate is still wet, dust the entire cone with edible glitter or disco dust. Creates sparkly, glamorous witch hats. More fairy tale than spooky but still cute.
Mini Witch Hat Cupcakes
Use mini cupcakes and bugles chips instead of full cones. Mini Oreos for brims. Adorable bite-sized versions perfect for parties where people want to try multiple desserts.
White Chocolate Witch Hats
Use white chocolate for coating and tint it with food coloring. Pastel witch hats in lavender, mint, or pale pink. Different aesthetic but equally charming.
Witch Hat Cupcakes
Equipment
- Muffin tin and cupcake liners
- Mixing bowls
- Microwave-safe bowl
- Baking sheet
- Toothpicks
- Piping bag or knife
- Wax paper or parchment
Ingredients
- 1½ cups all-purpose flour
- ½ cup unsweetened cocoa powder
- 1½ teaspoons baking soda
- ½ teaspoon baking powder
- ½ teaspoon salt
- 1 cup granulated sugar
- 2 large eggs
- ½ cup vegetable oil
- 2 teaspoons vanilla extract
- 1 cup hot coffee or water
- 12 sugar cones or waffle cones
- 12 chocolate cookies (Oreos or similar)
- 2 cups semi-sweet chocolate chips or candy melts
- 1 tablespoon vegetable oil (for melting chocolate)
- as needed colored frosting (green, purple, orange, etc.)
- optional sprinkles, candy stars, or edible glitter
- as needed frosting (for cupcake tops and securing hats)
Instructions
- Preheat oven to 350°F. Line muffin tin with cupcake liners. Mix dry ingredients in one bowl. Whisk wet ingredients in another, including hot coffee. Combine just until mixed.
- Fill liners ⅔ full. Bake 18–20 minutes until a toothpick comes out clean. Cool completely before decorating.
- Melt chocolate chips with oil in microwave-safe bowl. Dip cones fully and cookies partially. Assemble hat by placing dipped cone onto cookie. Let set.
- Once set, pipe frosting bands around base of cones. Add sprinkles or decorative elements as desired.
- Frost each cupcake lightly. Press a hat gently onto each cupcake so it sticks.
- Optionally add decorations at cupcake base. Store at room temp in a tall container. Enjoy within 2–3 days.
Notes
Frequently Asked Questions
My witch hats keep falling off the cupcakes – how do I fix this?
Use more frosting as the base – it’s your glue. Also make sure the frosting is thick, not runny. And press the cookie brim down into the frosting slightly so it has something to grip onto.
The chocolate coating is too thick and clumpy – what happened?
You didn’t add oil to thin it, or you overheated the chocolate. Add a tablespoon of vegetable oil and stir – this should smooth it out. If it’s seized from water contact, start over with new chocolate.
Can I make these witch hat cupcakes ahead of time?
Yes. Bake cupcakes up to 2 days ahead and store unfrosted. Make the hats up to a week ahead and store in an airtight container. Assemble the day you’re serving for best results – assembled cupcakes don’t store as well.
My cones broke when I tried to dip them – any tips?
Hold the cone by the tip and dip the wider end first, rotating as you go. Don’t submerge the entire thing. Or use a spoon to pour chocolate over the cone instead of dunking it.
The cookie brims cracked when I pressed the cones on – why?
Your cookies were too hard or you pressed too firmly. Use softer cookies like Oreos. And press gently – you just need the chocolate to make contact and stick, not create a structural bond.
Can I use something other than ice cream cones for the hat?
You could try those pointy sugar cookie Christmas trees turned upside down. Or make cone shapes from modeling chocolate. But honestly regular cones are the easiest and most effective option.