Gotta say, I’m obsessed with this crispy chicken katsu. Made it last night and the family couldn’t stop raving bout it! The golden crust has this amazing crunch that just feels right when u bite into it. What makes this crispy chicken katsu special is how the panko creates this amazing texture while the inside stays super juicy. It’s honestly become my go-to weeknight dinner when I want something that feels special without tons of work. Stick around and I’ll show u exactly how to nail this recipe every time.
Why You’ll Love This Crispy Chicken Katsu
Making good Japanese food at home used to intimidate me. All those restaurant versions seemed impossible to copy until I figured out this crispy chicken katsu recipe. My husband was skeptical when I first mentioned making it – he’s picky about his katsu. But when he tried it? Total convert.
This recipe solves that problem of wanting restaurant-quality food without leaving home. Plus it’s way more affordable than takeout. I love that you can prep most components ahead of time, and customize the sauce depending on what ur family likes.
The best part might be how versatile it is. Serve it with rice and curry sauce for katsu curry, slice it for katsu sandwiches, or top a bowl of ramen. No matter how u serve it, that crispy chicken katsu crust stays amazing.
Ingredients You’ll Need for Perfect Crispy Chicken Katsu
For the Chicken:
- 4 boneless, skinless chicken breasts – pounding them thin is key for even cooking! Can sub thighs if u prefer dark meat
- Salt and pepper – don’t skimp here, proper seasoning makes all the difference
- 1 cup all-purpose flour – creates the base layer that helps everything stick
- 2 large eggs – room temp works best
- 2 cups panko breadcrumbs – the secret to that signature crispy chicken katsu texture! Don’t substitute regular breadcrumbs
- Vegetable oil for frying – need something with high smoke point
For the Katsu Sauce:
- 1/2 cup ketchup – adds sweetness and tang
- 2 tbsp Worcestershire sauce – gives depth
- 2 tbsp soy sauce – I use low sodium but regular works too
- 1 tbsp sugar – balances everything out
- 1 tsp garlic powder – for extra flavor dimension
- 1/2 tsp mustard powder – optional but recommended
The panko breadcrumbs are absolutely essential for authentic crispy chicken katsu. They’re lighter and airier than western breadcrumbs which is what gives that signature crunch. If ur watching carbs, you could try crushed pork rinds, but honestly, the traditional panko is worth the splurge.
For my gluten-free friends, rice flour and gluten-free panko work great as substitutes. The texture’s slightly different but still delicious.
How to Make the Best Crispy Chicken Katsu
Step 1: Prepare the Chicken
- Place chicken breasts between plastic wrap or in a ziplock bag
- Pound to even 1/2-inch thickness using meat mallet or heavy pan
- Season both sides generously with salt and pepper
- Let sit 10 mins to come to room temp for even cooking
The chicken should look evenly flat when done. If it’s still uneven, keep pounding! This step is super important for crispy chicken katsu that cooks evenly.
Step 2: Set Up Breading Station
- Grab 3 shallow dishes or plates
- Put flour in first dish, season with pinch of salt
- Beat eggs in second dish until no streaks remain
- Pour panko in third dish, break up any clumps with fingers
Keep one hand dry for flour and panko, use other hand for egg dipping. Trust me – prevents the dreaded breading fingers!
Step 3: Bread the Chicken
- Dredge chicken in flour, shake off excess
- Dip in beaten egg, letting extra drip off
- Press firmly into panko on both sides, really pack it on!
- Place breaded pieces on wire rack while u finish the rest
If ur panko isn’t sticking well, try pressing chicken down firmly and scooping more panko on top. The coating should look thick and even.
Step 4: Fry to Perfection
- Heat 1/2 inch oil in large skillet to 350°F (use thermometer if u have one)
- Test with tiny pinch of panko – should sizzle immediately
- Add chicken carefully, don’t crowd the pan!
- Fry 3-4 mins per side until golden brown and internal temp hits 165°F
- Transfer to wire rack over paper towels to drain, not directly on paper
The color should be deep golden brown, not pale. If browning too fast, lower heat slightly. If too slow, increase a bit.
Step 5: Make Katsu Sauce
- Mix all sauce ingredients in small bowl until smooth
- Adjust sweetness/saltiness to taste
- Let sit 5 mins for flavors to meld
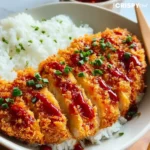
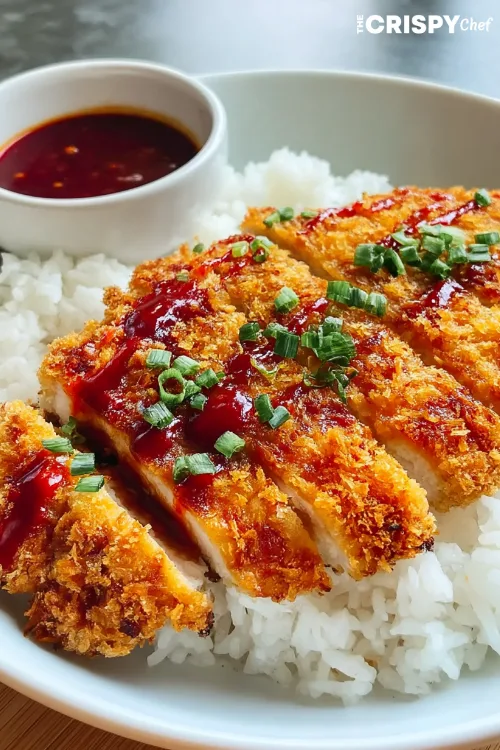
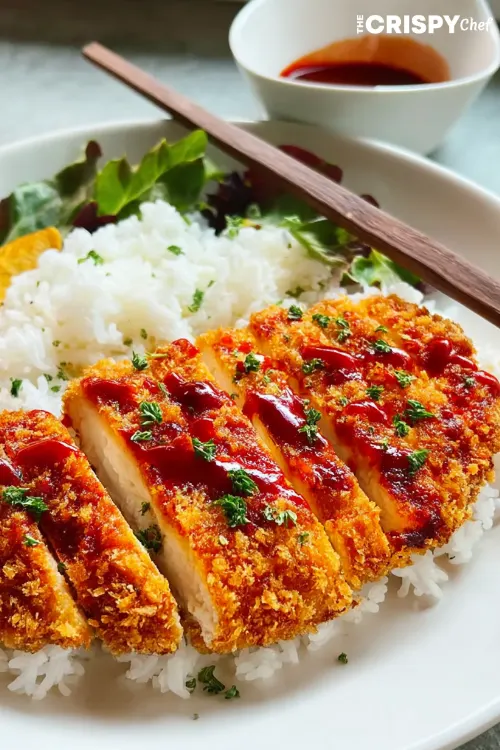
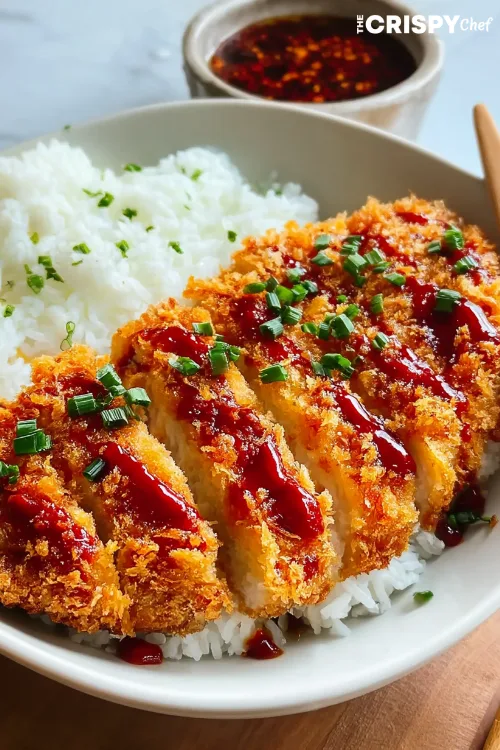
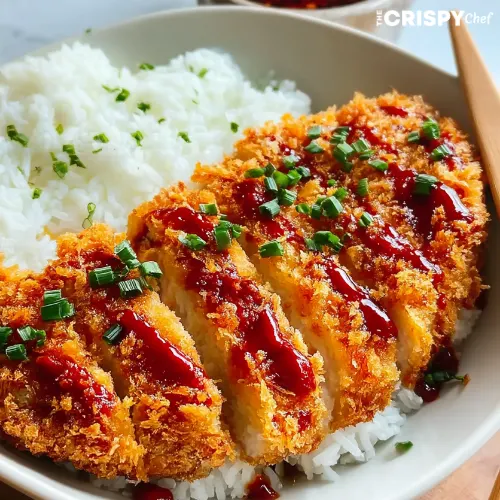
Step 6: Slice and Serve
- Let chicken rest 5 mins before cutting
- Slice into strips using sharp knife
- Serve with sauce for dipping
- Add side of steamed rice and simple cabbage slaw
For best presentation, cut at slight angle to show off that crispy katsu crust!
Crispy Chicken Katsu Variations to Try
Spicy Katsu
Add 1 tbsp sriracha to egg mixture and mix 1 tsp cayenne into panko for heat lovers. The contrast between spicy coating and juicy chicken is amazing.
Curry Katsu
Serve with Japanese curry sauce instead of katsu sauce. Nothing beats crispy chicken katsu smothered in thick curry! Check out my Cowboy Butter Chicken Pasta for another delicious sauce option.
Katsu Sandwiches
Use fluffy white bread, spread with kewpie mayo, add shredded cabbage and crispy chicken katsu for the ultimate sandwich. Slice into quarters like they do in Japan!
Cheese-Stuffed Katsu
Butterfly chicken, stuff with slice of cheese, then close and secure with toothpicks before breading. The melty cheese surprise makes this version irresistible.
Katsu Don Bowl
Place crispy chicken katsu over steamed rice, top with scrambled egg, onion and sweet-savory sauce. Total comfort food! This reminds me of my Healthy Crockpot Chicken Tacos – different flavor profile but same level of comfort.
Chicken Katsu Parmesan
Top fried katsu with marinara sauce and melted mozzarella for Italian-Japanese fusion. If u like my Chicken Cordon Bleu recipe, you’ll love this mashup!
Frequently Asked Questions About Crispy Chicken Katsu
How do I keep my chicken katsu crispy longer?
Keep ur crispy chicken katsu crunchy by placing it on a wire rack after frying instead of on paper towels directly. For leftovers, reheat in 350°F oven for 10 mins rather than microwave. The microwave makes it soggy! Also make sure ur oil is hot enough when frying – too low temp and the chicken absorbs oil making it heavy.
Can I make crispy chicken katsu ahead of time?
Totally! You can bread the chicken up to 6 hours ahead and keep in fridge on wire rack. Or fully cook, cool completely, then refrigerate up to 2 days. For best results when making crispy chicken katsu ahead, reheat in oven at 350°F for 10-15 mins until hot throughout. The texture won’t be 100% same as fresh but still pretty darn good.
Can I bake or air fry chicken katsu instead of deep frying?
Yep! For baking, spray breaded chicken with cooking oil spray, bake at 400°F for 20-25 mins, flipping halfway. For air fryer, cook at 360°F for 15-18 mins, also flipping halfway. The crust won’t be exactly like traditional crispy chicken katsu but comes pretty close with way less oil.
What sides go best with crispy chicken katsu?
My faves are steamed rice, shredded cabbage slaw with rice vinegar dressing, miso soup, and quick pickled cucumbers. Japanese-style potato salad is amazing too. The simple sides balance the richness of the crispy chicken katsu perfectly.
Can I use chicken thighs instead of breasts?
Absolutely! Thighs make super juicy crispy chicken katsu. Just pound them like u would breasts, though they don’t need to be as thin since dark meat stays moist. Cooking time might be slightly longer – use meat thermometer to confirm 165°F internal temp.
How do I fix katsu if the breading falls off?
Make sure to follow the flour-egg-panko order exactly. Pat chicken dry before starting. Really press panko on firmly. Let breaded chicken rest 5-10 mins before frying to help coating adhere. If breading still falls off ur crispy chicken katsu, try chilling the breaded pieces for 30 mins before frying.
What’s the difference between chicken katsu and tonkatsu?
The techniques identical but tonkatsu uses pork cutlet while crispy chicken katsu uses chicken. Both have that awesome panko crust and are served with similar sides and sauces. If u love this chicken version, def try making tonkatsu sometime too!
Final Thoughts on Crispy Chicken Katsu
This crispy chicken katsu recipe reminds me of when I visited Japan years ago. I watched this chef in small restaurant making katsu with such care – pressing the panko on just right, monitoring the oil temp constantly. When I finally recreated that same perfect crunch at home, it brought back all those memories.
What makes this dish special is how it balances tradition with accessibility. The technique is authentic but ingredients are easy to find. My kids have started requesting “katsu night” weekly, and watching them enjoy something that connects them to another culture makes the effort so worthwhile.
Make this crispy chicken katsu your own. Play with the seasonings, try different dipping sauces, serve it how ur family likes it best. Food tastes better when it has ur personal touch anyway.
Hope u enjoy this crispy chicken katsu as much as we do in my house! If it becomes a regular in ur dinner rotation, I’d love to hear about it.
Crispy Chicken Katsu
Equipment
- Large skillet or frying pan
- Kitchen thermometer
- 3 shallow bowls or plates
- Meat mallet or rolling pin
- Sharp Knife
- Cutting board
- Wire rack or paper towels
Ingredients
For the chicken:
- 4 boneless skinless chicken breasts
- Salt and pepper to taste
- 1 cup all-purpose flour
- 2 eggs beaten
- 2 cups panko breadcrumbs
- Vegetable oil for frying
For the Katsu sauce:
- 1/2 cup ketchup
- 2 tablespoons Worcestershire sauce
- 2 tablespoons soy sauce
- 1 tablespoon sugar
- 1 teaspoon garlic powder
- 1/2 teaspoon dry mustard optional
Instructions
Prepare the Chicken
- Place each chicken breast between two sheets of plastic wrap and gently pound to even thickness (about 1.5 cm / 1/2 inch). Season both sides with salt and pepper.
Bread the Chicken
- In one shallow bowl: add flour.
- In the second bowl: add beaten eggs.
- In the third bowl: add panko breadcrumbs.
- Dredge each chicken breast in flour, dip into the egg, and coat thoroughly with panko.
Fry the Chicken
- Heat about 1/2 inch of vegetable oil in a skillet over medium-high heat (350°F / 175°C).
- Fry the chicken in batches for 3–4 minutes per side or until golden brown and cooked through (internal temp: 165°F / 74°C).
- Place on a wire rack or paper towels to drain.
Make the Katsu Sauce
- In a small bowl, mix ketchup, Worcestershire sauce, soy sauce, sugar, garlic powder, and mustard. Stir until smooth.
Serve
- Slice the chicken into strips and drizzle with Katsu sauce. Serve with steamed rice, shredded cabbage, or Japanese curry if desired.
3 thoughts on “Crispy Chicken Katsu”