You know that one dish that shows up at every potluck, family gathering, and yes—every funeral—that somehow manages to disappear faster than your patience at a family reunion? Funeral potatoes are Utah’s not-so-secret weapon in the comfort food arsenal, and honestly, they deserve way more credit than their morbid name suggests.

I’ve been making these cheesy, crispy-topped beauties for years, and let me tell you something: once you master funeral potatoes, you’ll become the person everyone secretly hopes will show up to their events. These aren’t just potatoes—they’re a warm hug on a plate that happens to feed a crowd without breaking the bank.
What Exactly Are Funeral Potatoes?
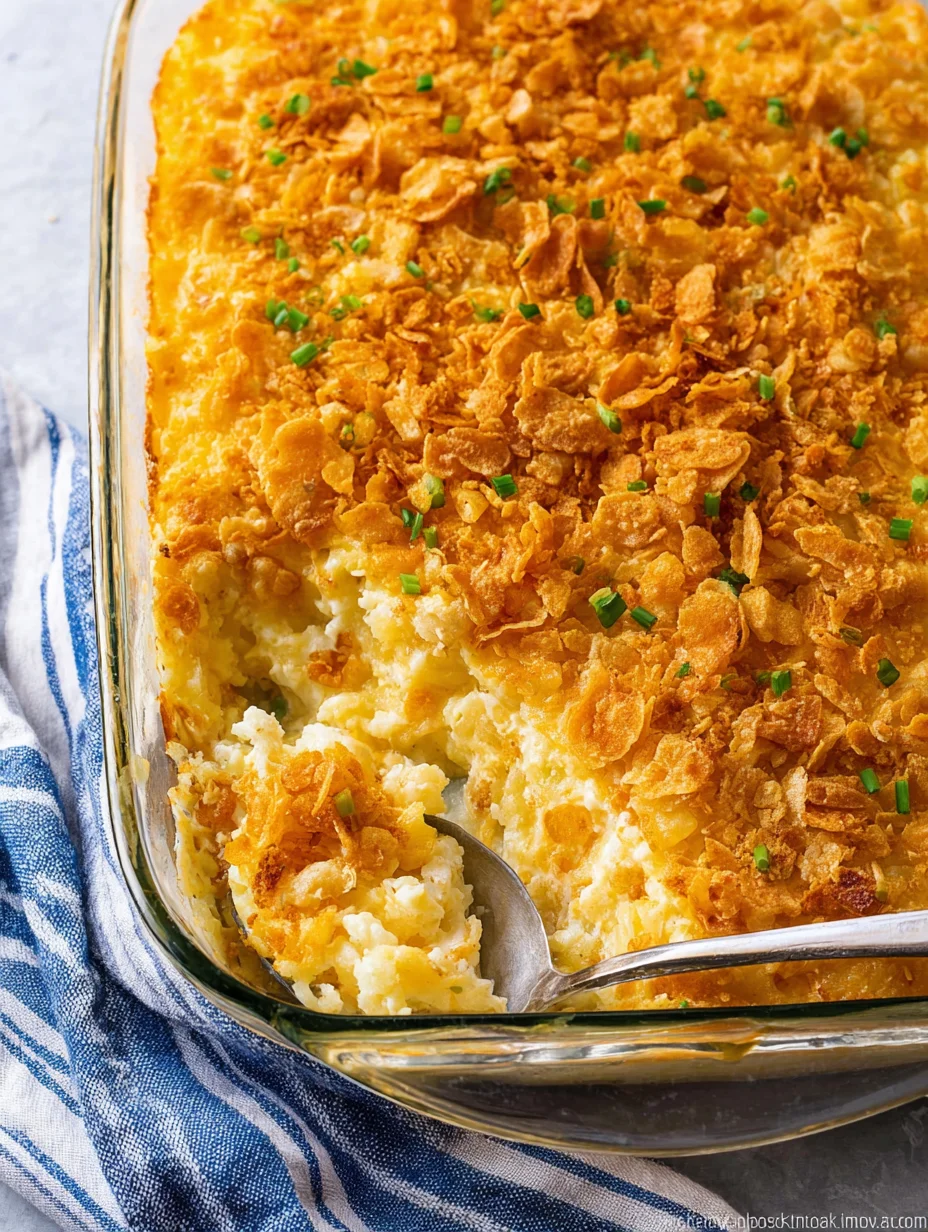
Let’s clear this up right away because I get this question constantly. Funeral potatoes aren’t some weird Mormon ritual involving root vegetables (though they are deeply tied to LDS culture). They’re a casserole made with hash browns, cheese, sour cream, and cream of chicken soup, topped with buttery cornflakes or breadcrumbs.
The name comes from their popularity at funeral luncheons, particularly in Utah and other areas with large LDS populations. These potatoes became the go-to comfort food because they’re easy to make in large quantities, they transport well, and frankly, they taste like childhood wrapped in melted cheese.
But here’s the thing—calling them “funeral potatoes” feels like we’re limiting their potential. IMO, these beauties deserve to shine at every occasion, not just sad ones 🙂
The Secret to Perfect Funeral Potatoes
Want to know what separates amateur funeral potato makers from the pros? It’s all about the texture balance. You want creamy, cheesy insides with a golden, crispy top that makes that satisfying crunch when you dig in.
Here’s what I’ve learned after countless batches:
The Base Ingredients That Matter
Hash browns form the foundation, and you’ve got two main options. Frozen shredded hash browns work perfectly—just make sure you thaw them completely and squeeze out excess moisture. Fresh grated potatoes work too, but require more prep time.
Cheese selection makes or breaks the dish. I always use sharp cheddar because mild cheese just disappears into the background. You want that cheese flavor to punch through all that creamy goodness.
Sour cream and cream of chicken soup create the signature creamy texture. Some people substitute Greek yogurt for sour cream, but honestly, save the health kick for your salad. This is comfort food territory.
The Topping Game-Changer
The topping separates good funeral potatoes from legendary ones. Traditional cornflakes mixed with melted butter create that iconic crunch, but I’ve experimented with alternatives:
• Panko breadcrumbs for extra crispiness • Crushed Ritz crackers for buttery flavor • French fried onions for added texture • Potato chips (trust me on this one)
How to Make Funeral Potatoes That Actually Impress
Ready to become the funeral potato champion of your neighborhood? Here’s my foolproof method that’s saved me from countless potluck disasters.
Preparation Steps
Start by preheating your oven to 350°F. Grab a 9×13 inch baking dish and give it a good butter coating—don’t skip this step unless you enjoy scraping stuck potatoes off the bottom.
Mix your thawed hash browns with shredded sharp cheddar cheese, sour cream, and cream of chicken soup in a large bowl. Season with salt, pepper, and a pinch of garlic powder. Some recipes call for onion powder too, but I find it can overpower the cheese.
The Assembly Process
Spread your potato mixture evenly in the prepared dish. Press it down gently—you want it compact but not smashed. This helps everything cook evenly and prevents dry spots.
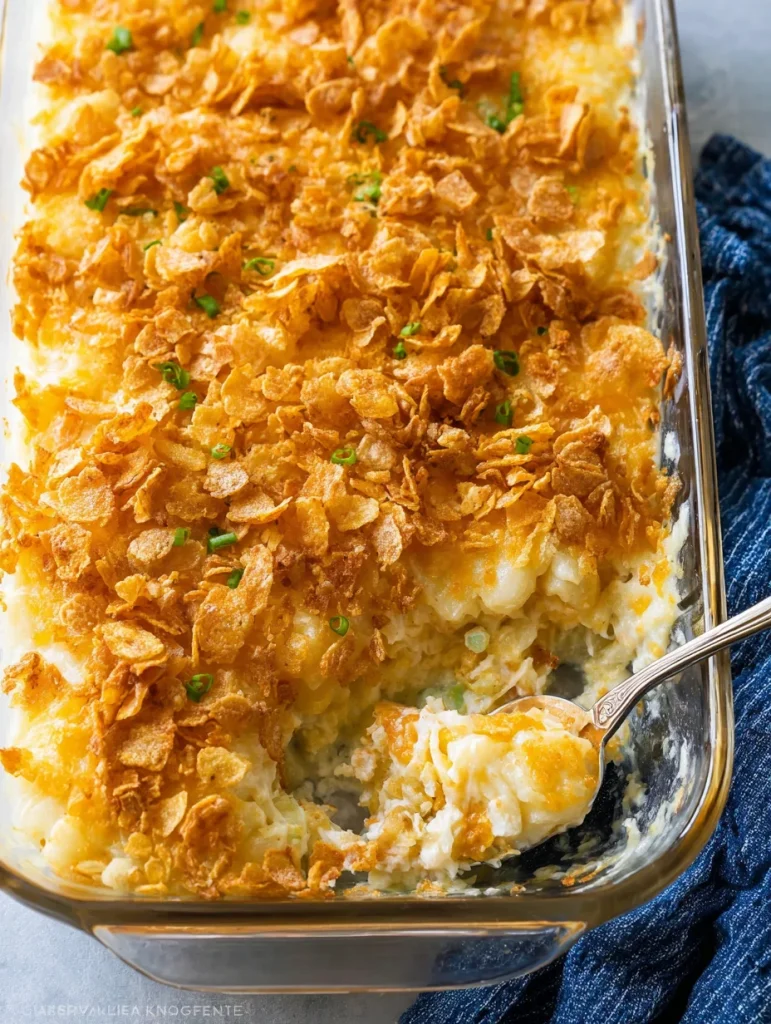
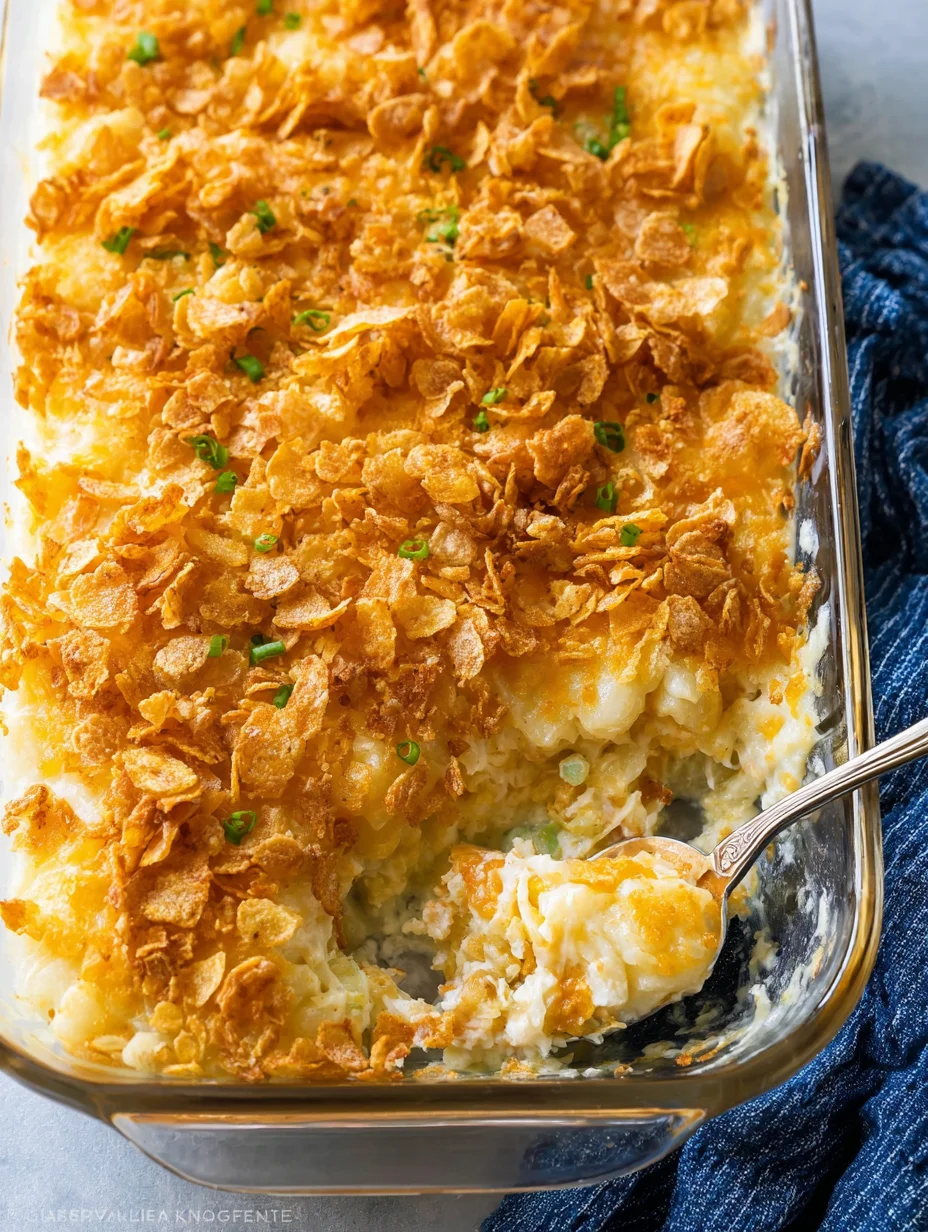
For the topping, crush your cornflakes and mix them with melted butter. Spread this golden mixture across the top, making sure you get good coverage. Those bare spots will haunt you later when everyone fights over the crispy pieces.
Baking to Perfection
Bake for 45-60 minutes until the top turns golden brown and the edges start bubbling. The key indicator? When you insert a knife into the center, it should come out mostly clean, and the top should sound hollow when you tap it lightly.
Ever wonder why some funeral potatoes turn out soggy while others achieve that perfect texture? It’s all about moisture control and proper baking time.
Regional Variations and Personal Twists
Funeral potatoes have evolved beyond their Utah origins, and different regions have put their own spin on this classic. In Idaho, they sometimes add actual funeral attendance (kidding—they just use more potato varieties).
Popular Variations I’ve Tried
The Loaded Version: Add bacon bits, green onions, and jalapeños for those who like their comfort food with a kick. This version transforms funeral potatoes into something that could honestly pass as a main dish.
The Healthier Twist: Substitute Greek yogurt for half the sour cream and use reduced-fat cheese. It’s not quite the same, but it won’t leave you in a food coma for three hours :/
The Deluxe Edition: Mix in some cream cheese for extra richness and add a layer of additional cheese halfway through baking. This creates multiple cheese layers that’ll make you question why you ever ate regular potatoes.
International Influences
I’ve seen people incorporate international flavors too. Mexican-inspired versions use pepper jack cheese and add diced green chiles. European-style versions might include herbs like thyme or rosemary in the topping.
When and Where to Serve Funeral Potatoes
Despite their name, funeral potatoes work brilliantly at any gathering where you need to feed a crowd. I’ve brought them to:
• Holiday dinners (they pair surprisingly well with ham) • Potluck parties (guaranteed crowd-pleaser) • Game day gatherings (better than any stadium food) • Brunch events (yes, they work for breakfast too) • Camping trips (prep ahead and bake over the fire)
The beauty lies in their make-ahead friendly nature. You can assemble the entire dish the night before, cover it, and bake it the next day. This makes them perfect for those chaotic hosting situations where you’re juggling seventeen different dishes.
Storage and Reheating Tips
FYI, funeral potatoes keep well in the refrigerator for up to four days. The trick to reheating lies in restoring that crispy topping without overcooking the potato base.
Best Reheating Methods
Oven reheating works best. Cover the dish with foil and warm at 325°F for about 20 minutes, then remove the foil for the last 5 minutes to re-crisp the topping.
Individual portions reheat well in the microwave, though you’ll lose the crispy texture. For better results, finish individual servings under the broiler for a minute or two.
Freezer storage works too, though the texture changes slightly. Thaw completely before reheating, and expect the potatoes to be a bit softer than the original batch.
Why Funeral Potatoes Deserve Better Marketing
Look, I love this dish, but can we talk about the branding problem? Funeral potatoes sounds like something you’d avoid at a buffet, not something you’d actively seek out. These deserve a rebrand—maybe “Comfort Casserole” or “Golden Hash Bake” or literally anything that doesn’t reference death.
The irony hits me every time I make them. Here’s this absolutely delicious, soul-warming dish that brings families together and creates lasting memories, but we’ve named it after the saddest occasions in human experience. It’s like calling chocolate cake “divorce dessert” or naming pizza “breakup bread.”
But you know what? Maybe that’s exactly why they work so well. Life throws us curveballs, and sometimes we need food that acknowledges the tough times while still tasting like hope mixed with cheese.
Making Funeral Potatoes Your Signature Dish
Want to become known as the funeral potato expert in your circle? Start experimenting with your own variations while keeping the core elements intact. The base recipe provides the foundation, but the details make it memorable.
Consider your audience when making adjustments. Conservative crowds might appreciate traditional versions, while adventurous eaters might enjoy your creative twists. I’ve found that starting with the classic version and gradually introducing variations works best.
Document your experiments too. Nothing’s worse than creating the perfect batch and then forgetting exactly what you did differently. Trust me—I’ve been there, staring at a amazing casserole wondering if it was the extra cheese or the different baking temperature that made it special.
The Final Verdict on Funeral Potatoes
Funeral potatoes represent everything good about comfort food: they’re simple to make, feed a crowd, taste incredible, and create connections between people. They might have the world’s most unfortunate name, but they’ve earned their place in the comfort food hall of fame.
Next time someone mentions funeral potatoes, don’t think about the name—think about the warm kitchen, the bubbling cheese, and the satisfied faces around the dinner table. Because that’s what this dish really delivers: pure, cheesy comfort that reminds us why we gather around food in the first place.
Whether you’re facing a difficult time or celebrating life’s good moments, funeral potatoes have your back. And honestly, in a world full of complicated recipes and trendy ingredients, sometimes we all need a dish that’s just reliably, wonderfully, perfectly simple.
Funeral Potatoes
Equipment
- 9×13-inch baking dish
- Large mixing bowl
- mixing spoon or spatula
- Measuring cups and spoons
- Oven
Ingredients
- 1 bag (30 oz) frozen shredded hash browns, thawed and drained
- 2 cups sharp cheddar cheese, shredded
- 1 can (10.5 oz) cream of chicken soup
- 2 cups sour cream
- 0.25 cup butter, melted (for filling)
- 1 tsp salt
- 0.5 tsp black pepper
- 0.5 tsp garlic powder
- 3 cups cornflakes, crushed
- 0.25 cup butter, melted (for topping)
Instructions
- Preheat oven to 350°F (175°C). Grease a 9×13 inch baking dish with butter.
- In a large bowl, combine thawed hash browns, shredded cheddar cheese, sour cream, cream of chicken soup, 1/4 cup melted butter, salt, pepper, and garlic powder. Mix well until fully combined.
- Spread the potato mixture evenly in the prepared baking dish. Press down gently but do not compact too much.
- In a small bowl, combine crushed cornflakes with 1/4 cup melted butter. Sprinkle evenly over the casserole to cover the surface.
- Bake uncovered for 45–60 minutes until the topping is golden brown and edges are bubbling.
- Let rest 5 minutes before serving. Scoop and enjoy warm.