Here’s the truth about Halloween party planning – by the time you’ve decorated, carved pumpkins, and figured out what you’re wearing, the last thing you want is a complicated dessert. Most people just buy candy and call it done. But then you show up with Ghost S’mores Dip and suddenly you’re the hero of the party despite doing maybe 15 minutes of actual work.
I discovered this recipe last year when I volunteered to bring dessert to a Halloween potluck and completely forgot until three hours before. Panic mode activated. I threw this together with stuff I already had, showed up late, and people legitimately thought I’d been cooking all day. My friend’s mom asked for the recipe and seemed disappointed when I told her it was basically “melt chocolate, add marshmallows, broil.” Sometimes simple wins.
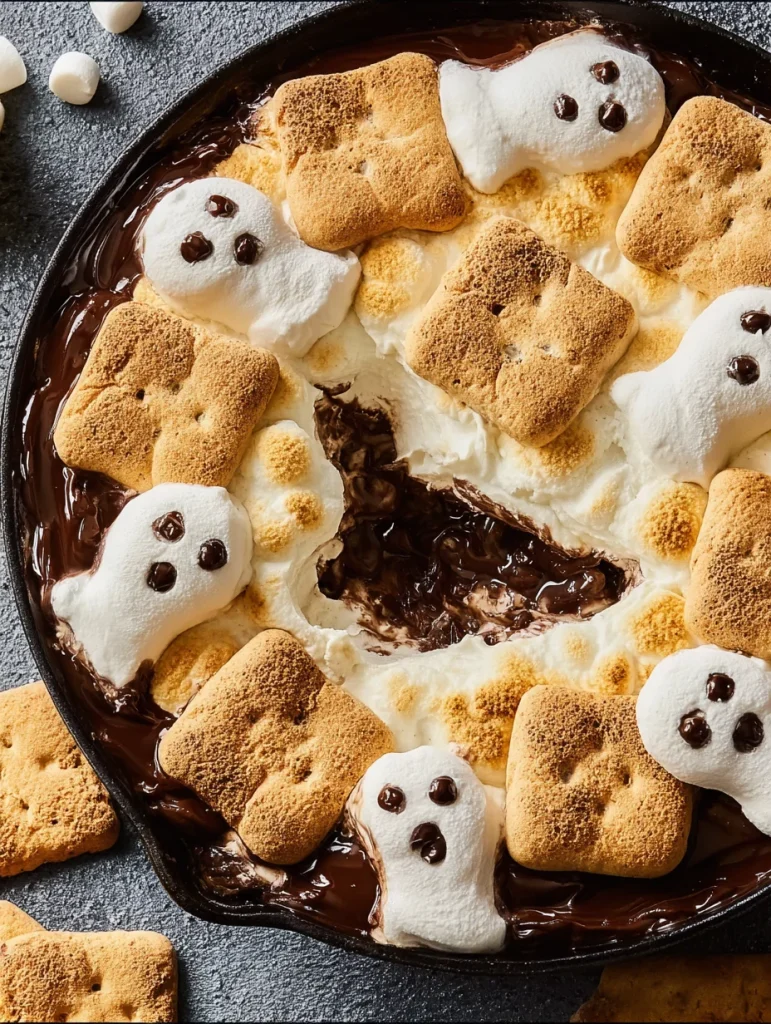
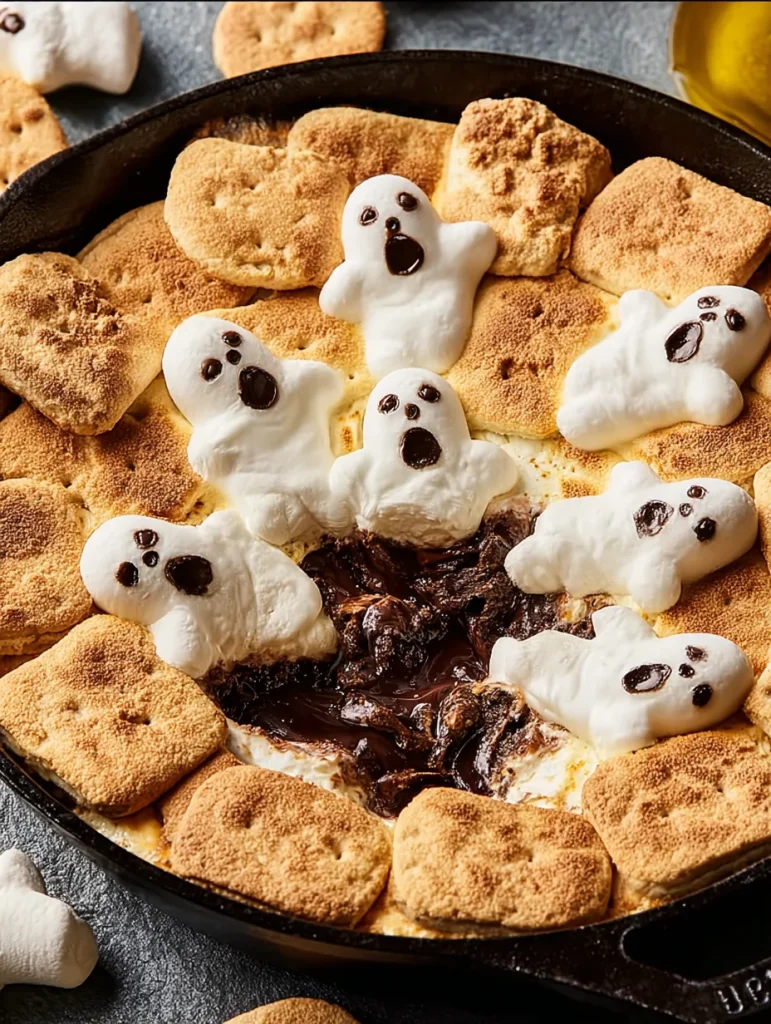
The genius here is that melted chocolate and toasted marshmallows shaped like ghosts automatically look impressive. Add some graham crackers for dipping and you’ve got an interactive dessert that people actually enjoy eating. No dry cookies, no overly sweet frosting, just gooey s’mores goodness in a shareable format.
Why This Dip Beats Every Other Last-Minute Dessert
Ever been stuck bringing dessert somewhere and realized too late that you have no time? That’s where s’mores dip saves your life. It’s one of those rare recipes that looks way more complicated than it actually is.
I made this for my neighbor’s Halloween block party last October. She’s one of those overachiever types who makes everything from scratch and has a perfectly decorated house. I walked in with this dip still warm from the oven, and she literally asked what bakery I’d ordered it from. When I told her I made it in under 20 minutes, she didn’t believe me until I walked her through the steps. Three ingredients plus decorating. That’s it.
Here’s why you need this dip in your life:
- Takes 15-20 minutes total including baking time
- Only needs like 5 ingredients max
- Everyone loves s’mores – this is proven science
- The interactive dipping aspect makes parties more fun
- Serves a crowd without requiring individual plating
- Looks Instagram-worthy without actual effort
Plus this works for people who claim they don’t like “fussy” desserts. It’s literally chocolate, marshmallows, and graham crackers – the most universally loved combo. My uncle who only eats dessert twice a year tried this and went back for seconds. That’s the power of melted chocolate and nostalgia working together.
What You Need for Ghost S’mores Dip
For the Chocolate Base
Don’t overthink this part. Simple ingredients, maximum impact.
Chocolate Layer:
- Semi-sweet chocolate chips (2 cups – about 12 oz)
- Milk chocolate chips (1 cup – makes it sweeter and creamier)
- Heavy cream (¼ cup – helps it stay smooth and dippable)
- Vanilla extract (½ teaspoon)
Why these ingredients work: The combination of semi-sweet and milk chocolate gives you depth without being too bitter. Heavy cream prevents the chocolate from seizing and keeps it silky even as it cools. And that vanilla? Brings out the chocolate flavor without being obvious.
Substitutions that work:
- All semi-sweet chocolate is fine if that’s what you have
- Dark chocolate works but it’s less kid-friendly
- Dairy-free? Use coconut cream instead of heavy cream and dairy-free chocolate chips
For the Ghost Marshmallows
This is where the Halloween magic happens.
- Large marshmallows (1 bag – about 40 marshmallows)
- Mini chocolate chips or black decorating gel (for eyes and mouths)
- Toothpicks (for applying the chocolate chip eyes)
Critical info: Use large marshmallows, not mini ones. Mini marshmallows melt too fast under the broiler and turn into a sticky mess before you can get that toasted effect. Large marshmallows give you time to get them golden brown without completely liquifying.
For Dipping
- Graham crackers (2 boxes – people eat more than you think)
- Pretzel rods (optional but good for variety)
- Apple slices (if you want to pretend this is healthy)
- Strawberries (actually pretty good with chocolate marshmallow)
Pro tip: Break graham crackers into quarters before serving. Whole sheets are awkward to dip and people end up breaking them over the bowl and making a mess. Pre-break them and save yourself the cleanup.
Equipment You Actually Need
- 9-inch cast iron skillet or oven-safe dish
- Microwave-safe bowl
- Broiler (or kitchen torch if you’re fancy)
- Serving platter for crackers
- Aluminum foil (optional, makes cleanup easier)
The cast iron skillet is ideal because it holds heat and keeps the chocolate melty longer. Regular oven-safe dishes work fine though – just expect the chocolate to firm up faster.
How to Make This Ghost S’mores Dip
Step 1: Melt That Chocolate
Combine both chocolate chips and heavy cream in a microwave-safe bowl. Microwave for 30 seconds, stir, repeat. Usually takes 2-3 cycles total – don’t rush it or you’ll burn the chocolate.
Once smooth and melted, stir in vanilla extract. The chocolate should be silky and pourable, not thick and clumpy. If it’s too thick, add another tablespoon of heavy cream.
Pour the melted chocolate into your cast iron skillet or oven-safe dish, spreading it evenly across the bottom. You want a layer about ½ inch thick – enough to hold marshmallows but not so much that it’s overwhelming.
Step 2: Create Your Ghost Army
This is the fun part where you can get kids involved if they’re around.
Arrange large marshmallows on top of the chocolate layer, standing them upright. Pack them in pretty tight – they’ll puff up and toast together which looks cool. I usually fit about 25-30 marshmallows in a 9-inch skillet depending on how precisely I arrange them.
Design tip: You can arrange them in rows, spirals, or just randomly. They all look good once toasted. I prefer slight chaos because perfectly arranged things stress me out, but you do you.
Step 3: Toast Those Marshmallows
Turn your broiler to high and let it preheat for a few minutes. Place your skillet on the top rack – usually 4-6 inches from the heating element.
Watch it like a hawk. Seriously, don’t walk away. Marshmallows go from pale to perfect to burnt in about 30 seconds. You want golden brown tops, maybe some darker spots for character.
This usually takes 1-3 minutes depending on your broiler. Rotate the pan halfway through if your broiler heats unevenly. When the marshmallows are toasted to your liking, pull it out immediately.
Alternative method: If you have a kitchen torch, you can skip the broiler entirely. Torch each marshmallow individually for more control over the browning. Takes longer but gives you better results and is honestly more fun :/
Step 4: Make Them Look Like Ghosts
Let the dip cool for about 5 minutes – you need the marshmallows to firm up slightly or the chocolate chips you’re about to add will just sink in.
Use mini chocolate chips to create faces on each marshmallow. Press two chips in for eyes, pointing down so they look spooky. Add a third chip or use black decorating gel to make an “O” shaped mouth like they’re saying “ooooh.”
You can also use a toothpick dipped in melted chocolate to draw faces if you’re feeling artistic. Or use black edible marker – works surprisingly well on marshmallows.
Creative options: Make some ghosts with different expressions. Happy ghosts, surprised ghosts, silly ghosts. Variety makes it more interesting and kids especially love the goofy ones.
Step 5: Serve While It’s Warm
Put the skillet on a trivet or heat-safe surface in the center of your serving area. Arrange graham crackers, pretzels, and any other dippers around it.
The ghost s’mores dip is best served warm when the chocolate is still melty. As it cools, the chocolate firms up but you can always stick it back in the oven for a few minutes to reheat.
Give people small plates or napkins because this gets messy. That’s part of the charm – messy food is fun food.
Creative Variations That Actually Work
Peanut Butter Ghost Dip
Add ½ cup peanut butter to the chocolate layer before pouring into the skillet. The peanut butter-chocolate-marshmallow combo is dangerous. Like, people will fight over the last graham cracker dangerous.
Dark Chocolate Monster Dip
Use all dark chocolate and add a pinch of sea salt. Make the marshmallows look like monsters instead of ghosts using different colored candies for eyes. More sophisticated flavor for adult parties.
White Chocolate Ghost Dip
Use white chocolate chips instead of regular chocolate. The white-on-white ghost effect is subtle and classy. Add orange food coloring to the marshmallows before toasting for jack-o-lantern vibes instead of ghosts.
Caramel Apple S’mores Dip
Layer caramel sauce under the chocolate. Serve with apple slices for dipping. This variation leans more fall than Halloween but still works for October parties. The caramel-chocolate-marshmallow-apple thing is legitimately amazing.
Cookies and Cream Ghost Dip
Mix crushed Oreos into the chocolate layer before pouring. Use chocolate graham crackers for dipping. Everything tastes better with Oreos, this is just facts.
Mint Chocolate Ghost Dip
Add ½ teaspoon mint extract to the chocolate. Use Andes mints as decoration around the edges. Toast the marshmallows and make ghost faces as usual. Tastes like a fancy after-dinner mint but in s’mores form.
Frequently Asked Questions
My chocolate seized and got grainy – what did I do wrong?
Water got into your chocolate, or you overheated it. Even a drop of water can cause chocolate to seize. Make sure your bowl is completely dry before melting. If it happens, stir in heavy cream one tablespoon at a time until it smooths out again.
Can I make this ghost s’mores dip ahead of time?
Sort of. You can melt the chocolate and pour it in the skillet earlier in the day, then add marshmallows and toast right before serving. Don’t toast the marshmallows ahead – they deflate and get weird. The whole point is serving it warm and fresh.
The marshmallows caught on fire under the broiler – help?
Your broiler is too hot or they were too close to the heating element. Lower the rack one position and watch more carefully. If a marshmallow catches fire, blow it out immediately – a little char is fine, fully flaming is not the vibe.
How do I reheat leftover s’mores dip?
Stick it in a 300°F oven for about 10 minutes until the chocolate melts again. The marshmallows won’t look as pretty but it still tastes good. Honestly though, this doesn’t usually have leftovers – people demolish it.
Can I use a different type of dish besides cast iron?
Yes. Any oven-safe dish works – ceramic, glass baking dish, whatever. Cast iron just holds heat better and keeps the dip melty longer. If using glass or ceramic, expect the chocolate to firm up faster as it cools.
My marshmallows melted into a blob instead of staying puffy – why?
You probably left them under the broiler too long, or your broiler is really hot. Marshmallows should toast on top but stay mostly intact. Watch them constantly and pull the skillet at the first sign of serious melting. Better slightly under-toasted than melted into oblivion.
What if I don’t have a broiler?
Use a kitchen torch to toast the marshmallows individually. Or bake at 450°F for about 5-7 minutes, watching carefully. The broiler gives the best results but these alternatives work in a pinch.

Ghost S’mores Dip
Equipment
- Microwave-safe bowl
- 9-inch cast iron skillet or oven-safe dish
- Broiler or kitchen torch
- Toothpicks For applying chocolate chip eyes
- serving platter For crackers and dippers
Ingredients
- 2 cups semi-sweet chocolate chips
- 1 cup milk chocolate chips
- 0.25 cup heavy cream
- 0.5 tsp vanilla extract
- 1 bag large marshmallows (about 40)
- mini chocolate chips or black decorating gel (for eyes/mouths)
- graham crackers, for dipping
- pretzel rods (optional)
- apple slices (optional)
- strawberries (optional)
Instructions
- In a microwave-safe bowl, combine both chocolate chips and heavy cream. Microwave in 30-second intervals, stirring between each, until smooth. Stir in vanilla extract.
- Pour the melted chocolate into a 9-inch cast iron skillet or oven-safe dish, spreading it evenly about ½ inch thick.
- Arrange large marshmallows upright on top of the chocolate layer, packing them closely together.
- Broil on high for 1–3 minutes until marshmallows are golden and puffed. Watch carefully to prevent burning.
- Let cool for 5 minutes. Use mini chocolate chips or gel to make ghost faces on each marshmallow.
- Serve warm with graham crackers, pretzels, and fruit on the side for dipping.
Notes
My Final Take on This Dip
I’ve brought a lot of desserts to parties over the years. Complicated cakes that took all day. Cookies that required perfect timing. Cheesecakes that cracked and made me question my life choices. Most of them tasted good but caused way more stress than any dessert should.
This ghost s’mores dip is the opposite of stressful. It’s the dessert equivalent of showing up to a party in a really good outfit that you threw on in five minutes. Looks like effort, actually required almost none. That’s the sweet spot.
Last Halloween I made this for three different events because it’s so easy to throw together. One of those events was my cousin’s fancy dinner party where everyone else brought elaborate plated desserts. I showed up with a skillet of melted chocolate and toasted marshmallows and people went crazy for it. Sometimes nostalgic comfort food beats fancy pastry, IMO.
What I love most is that it’s genuinely fun to eat. People gather around the skillet, dipping graham crackers and chatting. It creates this interactive moment that individual plated desserts just don’t provide. Plus watching people try to get the perfect marshmallow-to-chocolate ratio on their cracker is weirdly entertaining.
Make this for your Halloween party when you’re short on time. Make it for yourself on a random Tuesday because s’mores don’t require a special occasion. Make it to impress people with minimal effort – it absolutely works.
Just make it, because showing up to Halloween with store-bought cookies when you could bring a skillet of gooey chocolate marshmallow magic is honestly a missed opportunity. Your party reputation is about to get way better with like 15 minutes of work.
Now go melt some chocolate and toast some marshmallows. Your Halloween dessert situation just got infinitely easier and approximately 1000% more delicious 🙂