
Picture this: you’re craving that tangy, creamy goodness of key lime pie, but you don’t want to mess with pie crusts or worry about perfect slices. Enter Key Lime Pie Lush – the dessert that gives you all the flavors you love without the fuss. I stumbled upon this gem during a particularly lazy summer afternoon when I wanted something spectacular but couldn’t be bothered with complicated baking. Spoiler alert: it became my go-to crowd-pleaser, and honestly, people ask for the recipe more than they ask about my actual pies.
This layered beauty combines the best of both worlds – the convenience of a no-bake dessert with the sophisticated taste that’ll have your guests thinking you spent hours in the kitchen. Trust me, your secret’s safe with me 😉
What Exactly Is Key Lime Pie Lush?
Let’s get one thing straight – Key Lime Pie Lush isn’t your grandma’s traditional pie. It’s a modern twist that layers all those beloved flavors into a show-stopping dessert that’s actually easier to make than the original.
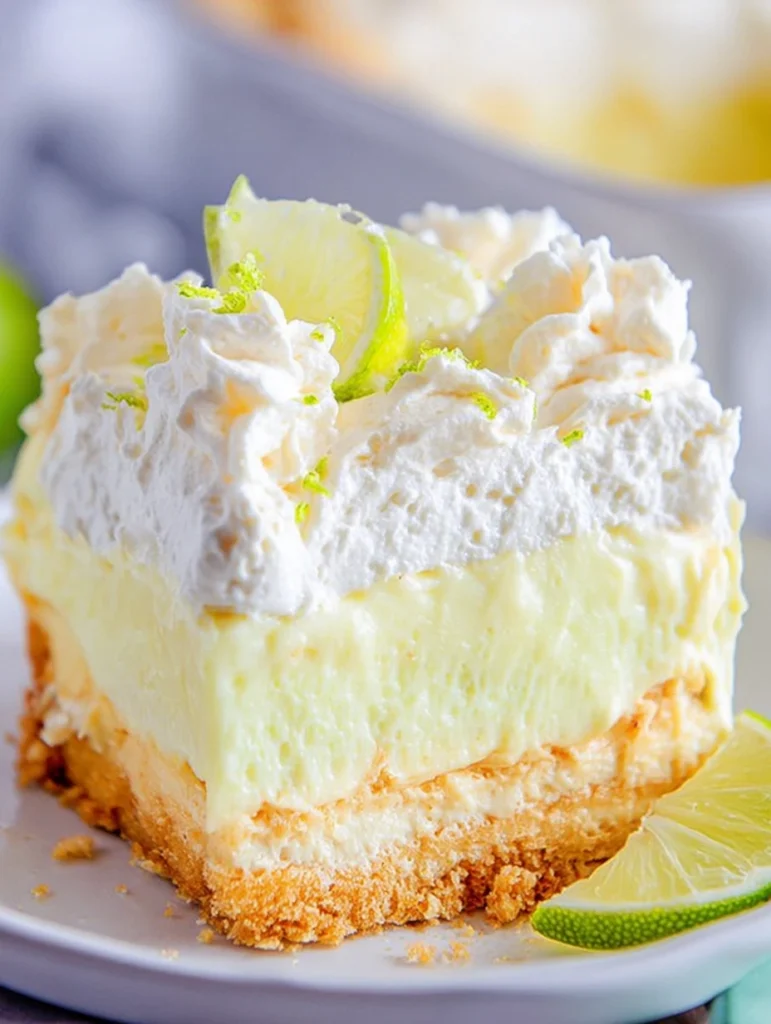
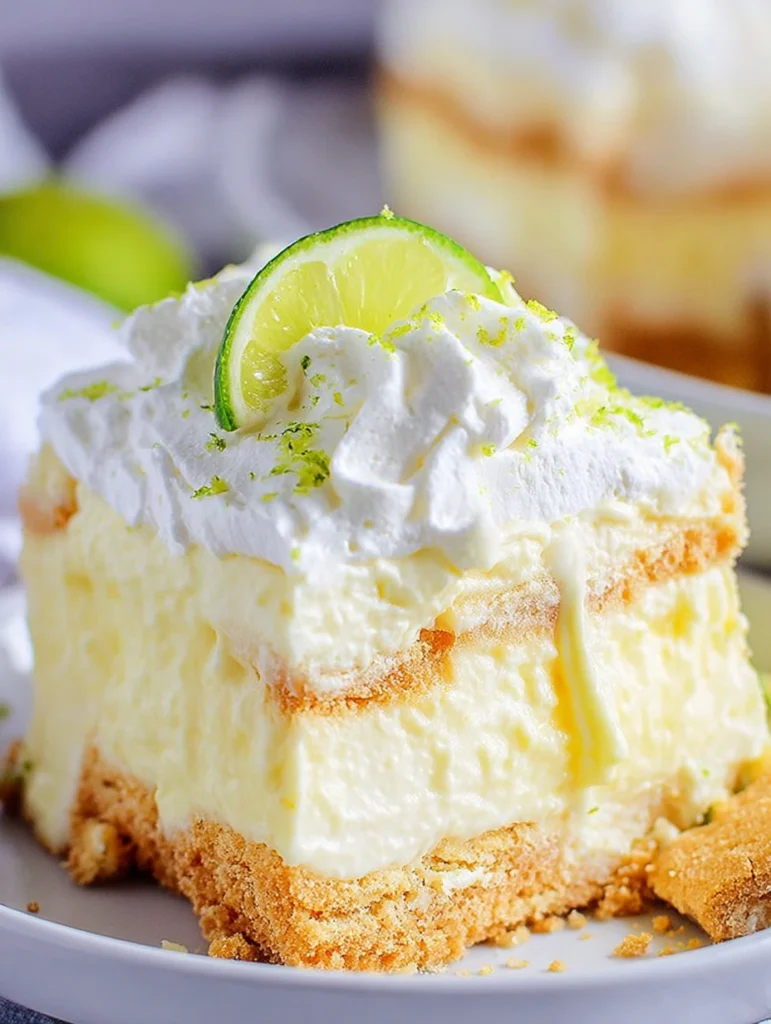
Think of it as pie’s cooler, more relaxed cousin. You’ve got your buttery crust layer on the bottom, followed by a creamy cheesecake-like middle, and topped with that signature tangy lime goodness that makes your taste buds do a happy dance. The beauty lies in the layers – each bite gives you a perfect combination of textures and flavors.
I first tried this at a friend’s barbecue, and I’ll admit, I was skeptical. How could something so simple compete with a proper key lime pie? One bite later, I was converted. The layers create this incredible contrast – you get the crunch, the cream, and that zesty lime punch all in one spoonful.
The Magic Behind the Layers
Bottom Layer: The Foundation That Matters
The bottom layer typically consists of crushed graham crackers mixed with melted butter and sometimes a touch of sugar. But here’s where I like to get a little creative – why stick to just graham crackers when you can experiment?
I’ve tried this with: • Vanilla wafers for extra sweetness • Gingersnap cookies for a spicy kick • Shortbread cookies for buttery richness • Pretzels for a salty-sweet contrast (don’t knock it till you try it!)
The key is getting the right butter-to-crumb ratio. Too little butter and your crust falls apart; too much and it becomes soggy. I learned this the hard way during my first attempt – let’s just say it wasn’t pretty.
Middle Layer: Where the Magic Happens
This is where Key Lime Pie Lush really shines. The middle layer usually combines cream cheese, powdered sugar, and whipped topping to create this incredibly smooth, rich base that’s like a cloud of dessert heaven.
Here’s my personal twist: I always add a splash of vanilla extract and a pinch of salt. The vanilla enhances the overall flavor profile, while the salt – and this might sound weird – actually makes the lime flavor pop more. It’s basic food science, people!
The texture should be light and airy, not dense like traditional cheesecake. You want it to practically melt in your mouth while still providing that creamy satisfaction.
Top Layer: The Star of the Show
The top layer is where your key lime dreams come true. Traditional recipes call for lime juice, sweetened condensed milk, and more whipped topping. But let’s talk about the elephant in the room – key limes versus regular limes.
Can you use regular limes? Absolutely. Will purists judge you? Maybe. Do I care? Not really. Key limes have a more intense, slightly more bitter flavor, but regular limes work just fine if that’s what you’ve got. IMO, the difference isn’t dramatic enough to stress over if you can’t find key limes at your local store.
The secret to this layer is achieving the perfect sweet-tart balance. Too much lime juice and it’s mouth-puckeringly sour; too little and you lose that signature tang that makes this dessert special.
Tips for Key Lime Pie Lush Success
Getting the Consistency Right
Ever wondered why some lush desserts turn out perfectly layered while others become a mushy mess? It’s all about timing and temperature.
Each layer needs time to set before you add the next one. I usually give the bottom layer about 15 minutes in the fridge, the middle layer at least 30 minutes, and then the final layer needs a good 2-4 hours to really set up properly.
Pro tip: Don’t rush this process. I know it’s tempting to dig in early (trust me, I’ve been there), but patience pays off with clean, distinct layers that look as good as they taste.
Flavor Enhancement Tricks
Here are some game-changing additions I’ve discovered: • Lime zest mixed into any layer adds incredible freshness • A drop of green food coloring makes it Instagram-worthy (optional, but fun) • Toasted coconut on top gives amazing texture contrast • White chocolate shavings add elegance for special occasions
Storage and Serving Wisdom
This dessert actually improves with time. The flavors meld together beautifully, and the texture becomes even more luxurious after sitting overnight. I always make mine a day ahead when possible.
Serve it chilled – room temperature lush is sad lush. Cut with a sharp knife wiped clean between slices for those picture-perfect servings that’ll make your Instagram followers jealous.
Why Key Lime Pie Lush Beats Traditional Pie
Look, I love a good traditional key lime pie, but let’s be real about the advantages here:
No baking required – your oven stays off, your kitchen stays cool, and you don’t risk a soggy bottom or cracked filling.
Easier portioning – no wrestling with pie slices that fall apart or trying to get that perfect wedge.
Make-ahead friendly – actually tastes better after sitting, unlike some desserts that are best served immediately.
Customizable layers – want more lime? Add more lime. Prefer extra crust? Go for it. It’s your dessert world, and we’re just living in it.
Feeds a crowd – make it in a 9×13 pan and you’ve got dessert for a party without breaking a sweat.
Common Mistakes to Avoid
I’ve made my fair share of lush disasters, so learn from my mistakes:
Don’t skip the setting time – I cannot stress this enough. Rushing leads to layer mixing, and nobody wants lime-flavored crust soup.
Watch your whipped topping – use it straight from the container or make fresh. Don’t let it sit out and deflate, or your layers will be flat and sad.
Balance is everything – taste as you go. Too sweet? Add more lime. Too tart? A bit more sweetened condensed milk fixes that right up.
Use room temperature cream cheese – cold cream cheese creates lumps, and nobody has time for lumpy lush.
Making It Your Own
The beauty of Key Lime Pie Lush lies in its adaptability. I’ve seen people add everything from mascarpone cheese for extra richness to Greek yogurt for a slightly tangy twist.
Want to make it boozy? A splash of rum or tequila in the lime layer adds an adult twist that’s perfect for summer entertaining. Just don’t go overboard – we want enhanced flavor, not a dessert that requires an ID check 🙂
For the health-conscious crowd, this recipe adapts surprisingly well to lighter ingredients. Sugar-free pudding mix, light cream cheese, and reduced-fat whipped topping still create a delicious result that won’t completely derail your summer fitness goals.
The Verdict
Key Lime Pie Lush earns its place as the ultimate summer dessert. It delivers all the flavors you crave from traditional key lime pie while being infinitely more practical and customizable. Whether you’re hosting a backyard barbecue, bringing dessert to a potluck, or just want something refreshing after a heavy meal, this layered wonder delivers every single time.
The best part? Even if you mess up the first attempt (and let’s be honest, we all have those moments), it’s still going to taste pretty amazing. The flavors are so good that even a slightly imperfect version will have people asking for seconds.
So next time you’re torn between wanting something impressive and wanting something manageable, remember that Key Lime Pie Lush gives you both. Your taste buds will thank you, your guests will be impressed, and you’ll have a new go-to dessert that’s practically foolproof. Now that’s what I call a win-win situation!

Key Lime Pie Lush
Equipment
- 9×13-inch baking dish
- Mixing bowls
- Hand mixer or stand mixer
- Silicone spatula
- Zester (optional)
- Measuring cups and spoons
- Sharp Knife
Ingredients
Bottom Layer:
- 2 cups crushed graham crackers or vanilla wafers/gingersnaps/shortbread/pretzels
- ½ cup unsalted butter melted
- 2 tablespoons sugar optional
Middle Layer:
- 8 oz cream cheese room temperature
- 1 cup powdered sugar
- 1 teaspoon vanilla extract
- Pinch of salt
- 2 cups whipped topping like Cool Whip
Top Layer:
- ¾ cup key lime juice or regular lime juice
- 1 can 14 oz sweetened condensed milk
- 2 cups whipped topping
Optional Garnishes:
- Lime zest
- Green food coloring
- Toasted coconut
- White chocolate shavings
Instructions
Prepare the Crust:
- Mix crushed graham crackers (or substitute) with melted butter and optional sugar. Press into the bottom of a 9×13 dish. Chill in the fridge for 15 minutes.
Make the Middle Layer:
- Beat cream cheese until smooth. Add powdered sugar, vanilla, and salt. Fold in whipped topping until fully combined. Spread evenly over the chilled crust. Refrigerate for 30 minutes.
Prepare the Top Layer:
- In a bowl, combine lime juice and sweetened condensed milk. Fold in whipped topping. Add food coloring if desired. Spread over the middle layer gently.
Chill:
- Refrigerate the entire dessert for at least 2–4 hours, or overnight for best results.
Serve:
- Garnish with lime zest, toasted coconut, or white chocolate if using. Slice and serve chilled.

One Comment