Let me ask you something real quick—have you ever wanted to make a stunning, crowd-pleasing dessert without turning your kitchen into a war zone (or, you know, actually baking anything)?
Yeah, me too.
That’s exactly why I swear by this No-Bake Berry Icebox Cake. It’s the dessert equivalent of wearing sweatpants to a wedding and somehow still getting compliments. It’s ridiculously easy, tastes like summer wrapped in a cloud, and best of all—you don’t need an oven. That’s right, zero baking. Your AC just sighed in relief.
I’ve made this more times than I care to admit, and every time someone’s like, “You made this?!” I just smile and pretend I slaved over it. But now you’re in on the secret. So let’s break it all down.
What Is a No-Bake Berry Icebox Cake?
You know those old-school refrigerator cakes your grandma used to make? This is the glow-up version.
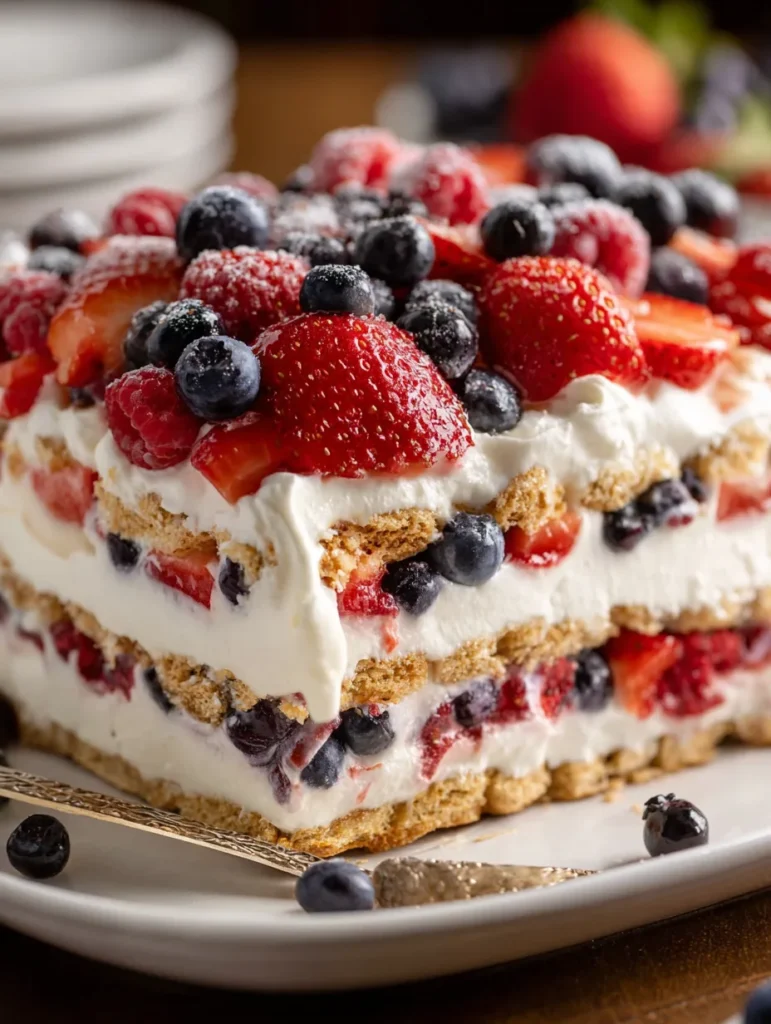
A no-bake berry icebox cake is basically layers of whipped cream, fresh berries, and graham crackers or cookies, all stacked up and chilled until it turns into this dreamy, cake-like dessert. The layers soften into a creamy, sliceable treat that’s so much more than the sum of its parts.
Think:
- Strawberries, blueberries, raspberries—all the berries
- Pillowy whipped cream
- Buttery graham crackers or ladyfingers
- A little chill time (you AND the cake)
No oven. No stress. No regrets.
Why You’ll Fall in Love With It (And Maybe Brag a Little)
Let me count the ways this cake makes life better:
- No baking required – If it’s 90°F outside, your oven’s staying off. Period.
- Super customizable – Use whatever berries you’ve got. Go rogue with chocolate chips or lemon zest. I won’t stop you.
- Make-ahead magic – It actually gets better the longer it chills.
- Looks fancy, tastes fancier – And yet it’s basically just layering and chilling. Total smoke and mirrors.
- Crowd-approved – I brought this to a potluck once and it disappeared in 12 minutes flat. That’s gotta be some kind of record.
Still wondering if it’s worth the hype? Try it once. Just once. And then try explaining to your family why you’re eating it for breakfast the next day. (Spoiler: I don’t regret it.)
Ingredients You’ll Need (Nothing Weird, Promise)
You probably have most of this stuff already. If not, it’s all easy to find. No mystery ingredients, no twenty-dollar extracts you’ll use once and forget in the back of the cabinet.
The Basics:
- 2 cups heavy whipping cream
- 1/3 cup powdered sugar (adjust to taste)
- 1 tsp vanilla extract
- 1 box of graham crackers (or ladyfingers if you’re feeling bougie)
- 3–4 cups mixed berries (fresh strawberries, raspberries, blueberries, blackberries—go wild)
- Optional: lemon zest, mint leaves, or a drizzle of berry jam
Pro Tip: Wanna save even more time? Use store-bought whipped topping (like Cool Whip). I won’t judge. Okay, maybe a little—but only in the “ugh, why didn’t I think of that?” way.
How to Make the Magic Happen (Step-by-Step Guide)
This isn’t one of those “simple” recipes that turns into a culinary nightmare halfway through. This one actually keeps things easy.
Step 1: Make the Whipped Cream
Whip the heavy cream with the powdered sugar and vanilla until stiff peaks form. (Yes, you can use an electric mixer. Unless you want an arm workout, which… lol, no.)
Step 2: Slice the Berries
Chop strawberries if they’re big. Leave the small ones whole. Mix them up in a bowl and maybe toss in a little sugar if you want them extra juicy.
Step 3: Layer Like a Pro
In a 9×13 dish (or whatever you’ve got):
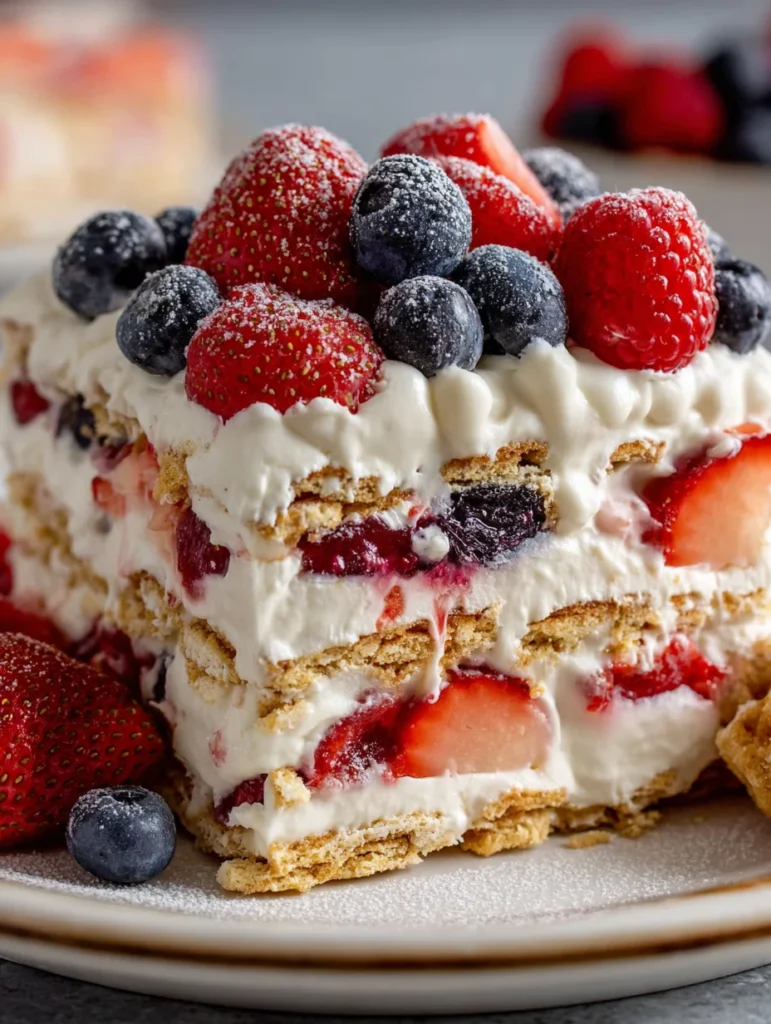
- Spread a thin layer of whipped cream
- Add a layer of graham crackers
- Dollop more whipped cream
- Scatter berries all over
- Repeat until you run out of ingredients or willpower
Top it off with a final blanket of whipped cream and extra berries. Maybe a little lemon zest if you’re feeling artsy.
Step 4: Chill, Baby, Chill
Cover and refrigerate for at least 4 hours, but overnight is even better. The crackers absorb the cream and soften into this magical, cake-like texture. It’s chef’s kiss.
Variations That Slap (In a Good Way)
Why stick to one version when you can remix it like a playlist?
Berry Lemonade Vibe
Add a little lemon juice and zest to the whipped cream. Instant zing. Pairs beautifully with raspberries and blueberries.
Chocolate-Covered Strawberry Version
Add cocoa powder to the whipped cream and drizzle chocolate sauce between layers. Yes, it’s as good as it sounds.
Vegan Twist
Use coconut whipped cream and vegan cookies. Tons of dairy-free folks swear by it—and IMO, the coconut gives it a tropical upgrade. 🌴
Tips to Keep You Winning
Let’s avoid the “Pinterest fail” scenario, shall we? Here’s what I’ve learned from ahem personal experience:
- Use cold cream for whipping—room temp cream = sad, soupy mess
- Don’t skimp on chill time – The longer it rests, the better the texture
- Slice gently with a sharp knife for neat layers
- Go big on berries – You can never have too many, trust me
Also, pro move: stash some extra whipped cream for serving. People love it. You love it. Let’s not pretend we’re above it.
Serving Ideas That’ll Make You Look Extra
You could plop this down in a baking dish and call it a day. But if you’re going for that ooh-la-la vibe, here’s how to fake fancy:
- Garnish with mint sprigs – Easy, pretty, smells good
- Dust with powdered sugar – Instagrammable in 0.3 seconds
- Serve in mason jars – Individual servings = cute and practical
- Top with toasted almonds or coconut flakes – Textuuuure!
Hosting a brunch? This cake is basically your new best friend. Just prep the night before and let it chill (literally and figuratively).
FAQs Because You Know Someone Will Ask
Can I freeze it?
Technically, yes—but the texture changes a bit. It becomes more like an ice cream cake. Not a bad thing, just different.
Can I use frozen berries?
You can, but thaw and drain them first. Otherwise, they’ll water everything down and make your layers sad and soggy. No one wants that.
How long does it last?
About 3–4 days in the fridge. After that, the berries start to go rogue.
Can I add booze?
Ohhh yes. A splash of Grand Marnier or berry liqueur in the whipped cream? Game changer. Just keep it kid-free if you go that route. (Or don’t. I won’t call the dessert police.)
Final Thoughts: The Lazy Legend of No-Bake Berry Icebox Cake
If you’re still on the fence about making this—why?! It’s literally:
- No oven
- No stress
- All delicious
Honestly, this dessert is my secret weapon. It looks fancy, tastes incredible, and somehow makes people think I’m a domestic goddess when all I really did was stack some stuff in a dish and chill.
So next time you need a last-minute summer dessert (or a treat-yourself Tuesday situation), give this No-Bake Berry Icebox Cake a whirl. You won’t regret it. Your tastebuds will throw a party, and your oven? It’ll enjoy the day off.
FYI: If you do make it, post a pic and tag me. Just don’t out me when people ask if it took hours.
No-Bake Berry Icebox Cake
Equipment
- Mixing bowl
- Electric mixer or whisk
- 9×13-inch baking dish
- Spatula
- Knife & cutting board
- Measuring cups/spoons
- Plastic wrap or foil (for chilling)
Ingredients
- 2 cups heavy whipping cream
- 1/3 cup powdered sugar adjust to taste
- 1 tsp vanilla extract
- 1 box graham crackers approx. 14–16 full sheets
- 3 –4 cups mixed fresh berries strawberries, blueberries, raspberries, blackberries
- Optional: 1 tsp lemon zest
- Optional: Mint leaves or extra berries for garnish
- Optional: 1 tbsp berry jam for drizzle
Instructions
- In a mixing bowl, whip the heavy cream, powdered sugar, and vanilla extract until stiff peaks form.
- Wash and slice the berries. If using strawberries, slice them thinly. Leave smaller berries whole.
- In a 9×13-inch baking dish, spread a thin layer of whipped cream to coat the bottom.
- Add a layer of graham crackers on top of the whipped cream.
- Spread more whipped cream over the crackers, then scatter a layer of mixed berries on top.
- Repeat the layers: graham crackers, whipped cream, and berries, until all ingredients are used.
- Finish with a final layer of whipped cream and top with extra berries, lemon zest, or mint if desired.
- Cover the dish with plastic wrap or foil and refrigerate for at least 4 hours, preferably overnight.
- Slice and serve chilled. Enjoy!






One Comment