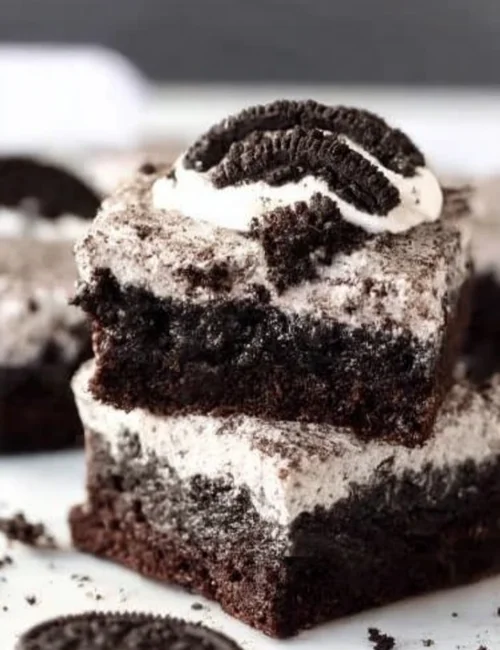
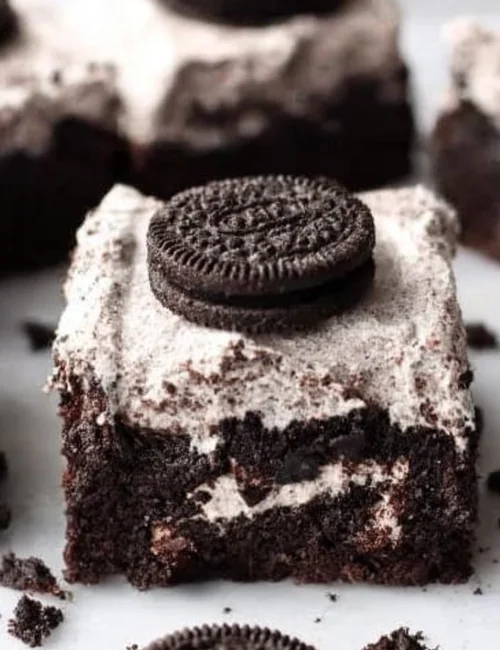
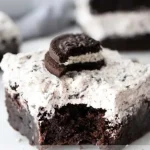
There’s nothing like the blissful combination of rich, fudgy brownies and delightful Oreo cookies. These Oreo Brownies are an easy treat that everyone will love. They make the perfect dessert for family gatherings, potlucks, or a cozy night in. Imagine biting into a warm brownie with creamy frosting and crunchy Oreo bits simply irresistible!
Why You Will Love This Recipe
These Oreo Brownies are perfect for any occasion. They are quick to make and use simple ingredients you probably have at home. The combination of chocolate and Oreos is a guaranteed hit with kids and adults alike. Plus, they are super fun to make! You can easily involve the kids in mixing and decorating, making it a family activity.
How to Make Oreo Brownies
Making these brownies is straightforward and forgiving. Start by mixing your wet ingredients, then gradually add the dry ones. Finally, you’ll whip up a simple Oreo frosting to spread on top. There’s no need for complicated techniques or fancy equipment—just your mixing bowls and a baking pan.
What You Need
Ingredients for Oreo Brownies
- 1 c unsalted butter (or two sticks)
- 2 c granulated sugar
- 1/2 c semisweet chocolate chips (or your favorite chopped chocolate)
- 3 eggs
- 2 tsp vanilla extract
- 1/3 c unsweetened cocoa powder + 2 Tbsp
- 2 Tbsp black cocoa powder (if you don’t have black cocoa powder, you can use dark cocoa or more regular, unsweetened cocoa powder instead)
- 1 c all purpose flour
- 1/2 tsp salt
- ½ c unsalted butter (or 1 stick)
- ⅓ c vegetable shortening
- 1 tsp vanilla extract
- 2 c powdered sugar
- 1-2 Tbsp milk (more as needed to create fluffy, light frosting)
- 12 Oreos (crushed into coarse crumbs; leave some larger pieces)
Step-by-Step
For the Brownies: Start by preheating your oven to 350°F (175°C). Melt the butter with chocolate chips until smooth. Mix in sugar, followed by eggs and vanilla. Combine the dry ingredients in a separate bowl. Then, gradually fold the dry into the wet mixture until just combined. Pour the brownie mix into a greased baking pan and bake for about 25-30 minutes.
To Make the Oreo Frosting: In a bowl, beat together the softened butter and shortening. Gradually add powdered sugar, vanilla, and milk until creamy. Stir in the crushed Oreos.
Once the brownies cool, spread the Oreo frosting evenly on top. Enjoy every bit of this delicious treat!
How to Serve Oreo Brownies
These decadent brownies are perfect on their own but can be served warm with a scoop of vanilla ice cream or drizzled with chocolate sauce. They also pair wonderfully with a glass of cold milk or a cup of coffee. Consider serving these at birthday parties, holiday celebrations, or just as a special weekend treat.
How to Store Oreo Brownies
To keep your Oreo Brownies fresh, store them in an airtight container at room temperature for up to 3 days. For longer storage, you can freeze the brownies. Just wrap them tightly in plastic wrap and place them in a freezer bag. To reheat, simply microwave individual pieces for about 10-15 seconds or until warm.
Recipe Tips
- Use Room Temperature Ingredients: This will help everything mix together smoothly.
- Do Not Overmix: Stir until just combined to keep the brownies fudgy.
- Check for Doneness: A toothpick should come out with a few moist crumbs, not clean.
- Adjust Sweetness: Taste your frosting and add more sugar or milk as needed for your desired consistency.
- Add Extra Oreos: For more crunch, mix additional chopped Oreos into the brownie batter.
Variations & Swaps
- Nutty Brownies: Add chopped nuts like walnuts or pecans for extra texture.
- Minty Delight: Use mint Oreos for a refreshing twist.
- Gluten-Free Option: Substitute all-purpose flour with a gluten-free flour blend.
- Dairy-Free: Use coconut oil or dairy-free butter and non-dairy milk for the frosting.
- Cookie Dough: Stir in chunks of cookie dough for an extra indulgent treat!
FAQs
Can I make these brownies ahead of time?
Yes! You can prepare the batter a day in advance and bake them when you’re ready. They also store well, so you can make them one day and frost them the next.
Can I freeze the brownies?
Absolutely! Wrap them tightly in plastic wrap and store in the freezer. They’ll keep well for about 2-3 months. Just thaw them overnight in the fridge before enjoying!
What if I don’t have black cocoa powder?
No problem! You can use more regular unsweetened cocoa powder or substitute with dark cocoa powder for a richer flavor.
What can I serve with these brownies?
They go great with a scoop of ice cream, fresh berries, or even a drizzle of caramel sauce. You can also pair them with coffee or milk for a comforting treat.
How can I avoid dry brownies?
Make sure not to overbake them. Check for doneness a few minutes before the recommended baking time is up, as ovens can vary. Stick to the toothpick test to find the perfect soft center.
Oreo Brownies
Ingredients
For the Brownies
- 1 c unsalted butter (or two sticks) Melted
- 2 c granulated sugar
- 1/2 c semisweet chocolate chips (or your favorite chopped chocolate)
- 3 eggs Room temperature
- 2 tsp vanilla extract Divided
- 1/3 c unsweetened cocoa powder
- 2 Tbsp black cocoa powder Or substitute with dark cocoa or unsweetened cocoa powder if unavailable
- 1 c all purpose flour
- 1/2 tsp salt
For the Oreo Frosting
- 1/2 c unsalted butter (or 1 stick) Softened
- 1/3 c vegetable shortening
- 2 c powdered sugar
- 1-2 Tbsp milk Or more as needed for creamy frosting
- 12 pieces Oreos Crushed into coarse crumbs; leave some larger pieces
Instructions
Preparation
- Preheat your oven to 350°F (175°C).
- Melt the butter with chocolate chips until smooth.
- Mix in sugar, followed by eggs and 2 tsp vanilla.
- Combine the dry ingredients in a separate bowl.
- Gradually fold the dry mixture into the wet ingredients until just combined.
- Pour the brownie mix into a greased baking pan and bake for about 25-30 minutes.
Making the Oreo Frosting
- In a bowl, beat together the softened butter and shortening.
- Gradually add powdered sugar, vanilla, and milk until creamy.
- Stir in the crushed Oreos.
Finishing Touch
- Once the brownies cool, spread the Oreo frosting evenly on top.
- Enjoy every bite of this delicious treat!